4-117
VRF SYSTEMS Indoor Unit Specifications
1
2
3
4
5
6
7
8
9
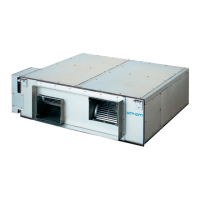
7. High Static Pressure Ducted Type (Type E2)
4-116
1
2
3
4
5
6
7
8
9
7-7-1. Indoor Fan Performance
VRF SYSTEMS Indoor Unit Specifications
7. High Static Pressure Ducted Type (Type E2)
1. Turn off the power breaker to halt the supply of electricity to the PC board.
2. Open the lid of the electrical component box and confirm the location where the Select switch on the indoor unit
control PCB is placed. (Fig. 4-5)
3. Set the On/Off switches in the Off position which are now set in the On position.
Select the positions of the Select SW001 switches respectively to make the desired external static pressure
settings referring to the Table 4-5.
Table 4-5 External static pressure SW setting
Externalstaticpressure
at thetimeofrated
airflow volume
SW001
Type 180TP6 TP3TP1
ON
1 2 3
1
ON
2 3
270Pa
140Pa
60Pa
Type 224
270Pa
140Pa
60Pa
Type 280
270Pa
140Pa
72Pa
1 2
ON
3
Table 4-6 Setting the external static pressure
Indoor unit Item code
External static pressure
of the rated airflow volume
Type 180
270 Pa
140 Pa
60 Pa
Type 224
270 Pa
140 Pa
60 Pa
Type 280
270 Pa
140 Pa
72 Pa
6
2
1 5
1
4
3
NOTE:
Failure to set this parameter may result in decreased airflow
and condensation.
7-7-2. Operating the Timer Remote Controller
(CZ-RTC2)
How to set the external static pressure
1. Press and hold down the
, and buttons
simultaneously for 4 or more seconds.
(
, the Unit No., Item Code and Detailed
will blink on the LCD display.)
2. The indoor unit numbers in the group control will
be sequentially displayed whenever the Unit Select
button is pressed
.
Only the fan motor for the selected indoor unit will
operate during this time.
3. Specify the “
” item code by pressing the
/ buttons for the temperature
setting buttons and confirm the values.
(“ ” set at shipment )
4. Press the
/ buttons for the time to amend
the values for the set data.
Refer to Table 4-6 and Fig. 4-3 and select a value
“
”, “ ”or“ ”.
5. Press the
button.
The display will stop blinking and remain
illuminated.
6. Press the
button. The fan motor will stop
operating and the LCD display will return to the
normal stop mode.
1
ON
TP6
TP3
TP1
2
SW001
3
1
TP6
TP3
TP1
2
SW001
3
ON
Indoor Unit controlPC board
ON
Fig. 4-5
CZ-RTC2
4-117
VRF SYSTEMS Indoor Unit Specifications
1
2
3
4
5
6
7
8
9
7. High Static Pressure Ducted Type (Type E2)
7-7-3. Operating the High-spec Wired Remote
Controller (CZ-RTC3)
START[]
20:30 (THU)
How to set the external static pressure
1. Keep pressing the
, and
buttons simultaneously for 4 or more seconds.
The “Maintenance func” screen appears on the
LCD display.
Maintenance func
1. Outdoor unit error data
2. Service contact
3. RC setting mode
4.Test run
Sel. Page [] Confirm
20:30 (THU)
2. Press the or button to see each
menu. If you wish to see the next screen instantly,
press the or button.
Select “8. Detailed settings” on the LCD display
and press the
button.
Maintenance func
5. Sensor info.
6. Servicing check
7. Simple settings
8. Detailed settings
Sel. Page [] Confirm
20:30 (THU)
The “Detailed settings” screen appears on the LCD
display.
Select the “Unit no.” by pressing the
or
button for changes.
Detailed settings
Unit no. Code no.Set data
10
3-1 0006
Sel. Next
20:30 (THU)
3. Select the “Code no.” by pressing the or
button.
Change the “Code no.” to “5D” by pressing the
or button (or keeping it pressed).
Detailed settings
Unit no. Code no. Set data
10001-3
Sel. Next
20:30 (THU)
5D
4. Select the “Set data” by pressing the or
button.
Select one of the “Set data” among “0006”, “0003”
or “0001” according to the desired external static
pressure setting by pressing the
or
button.
Then press the button.
(See Table 4-7 and Fig. 4-5.)
Then press the button.
Table 4-7Setting the external static pressure
Item code
External static pressure
of the rated air flow volume
Type 180
270 Pa
140 Pa
60 Pa
Indoor unit
Type 224
270 Pa
140 Pa
60 Pa
Type 280
270 Pa
140 Pa
72 Pa
5D
0006
0003
0001
5. Select the “Unit no.” by pressing the
or
button and press the button.
The “Exit detailed settings and restart?” (Detailed
setting-end) screen appears on the LCD display.
Select “YES” and press the
button.
Detailed settings
Unit no. Code no.Set data
10
1-1 0001
Sel. Next
20:30 (THU)
Exit detailed settings
and restart?
NOYES
TD831172-03 VRF SYS INDOOR.indb 117 2015/06/04 12:06:56
 Loading...