1 Standby/on switch [Í], [Í/I]
Press to switch the unit from on to standby mode or vice
versa. In standby mode, the unit is still consuming a
small amount of power.
2 Select the audio source
On the unit:
To start Bluetooth
®
pairing, press and hold [ -PAIRING]
when you are in Bluetooth
®
(See “Connecting via Bluetooth
®
menu”)
3 Basic playback control buttons
4 Enter setup menu
5 Change the displayed information
6 Selection/OK
7 Set the sleep timer
8 Dim the display panel
Press again to cancel.
9 Adjust the volume (0 (min) to 50 (max))
10 Mute the sound
Press again to cancel. “MUTE” is also cancelled when
the volume is adjusted or the unit is turned off.
11 Set the play menu item
12 Enter sound menu
13 Remote control signal sensor
For both horizontal and vertical layouts:
Distance: Within approx. 7 m directly in front
Angle: Approximately 20° up and down, 30° left and right
14 Switch the sound to stereo or monaural
15 Display panel
16 USB terminal
*
These switches work just by touching the marks.
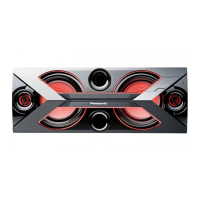
1
Control reference guide
14*
16
15
1*
9*
13
3*
2*
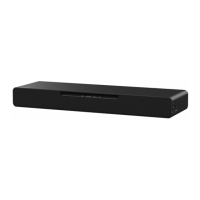
This unit can be installed either vertically or horizontally. Select the installation style based on your preferences.
Install this unit with the speaker feet side down as shown below.
≥ It is recommended to select the “MONO” sound effect when this unit is installed vertically.
(See “Sound effects”)
∫ Carrying this unit
This unit can be carried by either one or two people. To lift this unit, hold the side handles.
≥ Put this unit on a flat safe surface.
≥ Use caution when lifting this unit.
j Carry this unit with two people if necessary.
2
Installation
Speaker feet
Display panel
Horizontal Layout
Speaker feet
Display panel
Vertical Layout
Turn off all equipment before connection and read the appropriate operating instructions.
Connect the AC mains lead.
≥ Conserving power
This unit consumes a small amount of power (See “Specifications”) even in
standby mode. In the interest of power conservation, if you will not be using
this unit for a long time, unplug it from the household mains socket. Since
some settings will be lost when this unit is unplugged, you will need to apply
them again next time you use it.
Preparation
Before you connect a USB device to this unit, make sure you do a backup of the data.
Decrease the volume and connect the USB device to the
USB terminal.
Hold this unit when connecting or disconnecting the USB device.
≥ Do not use a USB extension cable.
This unit cannot recognise USB device connected through a cable.
Charging starts when a device (rated value: 5 V/1 A) is connected to the USB terminal of this unit.
≥
Although some devices can be charged when this unit is in USB mode, it is recommend to charge such devices
when this unit is in Bluetooth
®
mode or AUX mode.
≥ When charging a device for more than approximately 20 minutes, set the Auto off function to "OFF".
(See “Auto off function”)
Preparation
Turn the unit on.
Connect a device.
Confirm from the screen of the connected device, etc. to
make sure charging has started.
≥ A cable compatible with your device is required. Use the cable
that comes with your device.
≥ Even if you connect a cable compatible with the USB terminal of this unit, your device may not be charged. In that case, use
the charger that comes with the device.
≥ Depending on your device, using other chargers may not work. Check the operating instructions of your device before use.
≥
If your device cannot be charged when this unit is in USB mode, charge the device when this unit is in Bluetooth
®
mode or AUX mode.
≥ Do not connect a device with a rated value higher than 5 V/1 A to this unit.
≥ To check if charging is complete, look at the screen of the connected device, etc.
≥ Once fully charged, remove the USB cable from the USB terminal.
3
Connecting the AC mains lead
4
Connecting a USB device
Charging a device
Rear view
To a
household
mains socket
AC mains lead
USB device (not supplied)
Front view
To the compatible
device
USB cable
(not supplied)
Front view
You can listen to the sound from the Bluetooth
®
audio device from this unit wirelessly.
≥ Refer to the operating instructions of the Bluetooth
®
device for details.
Preparation
≥ Turn on the Bluetooth
®
feature of the device and place the device near this unit.
∫ Pairing with Bluetooth
®
devices
1 Press [ ] to select “BLUETOOTH”.
≥ If “PAIRING” is indicated on the display, go to step 4.
To enter pairing mode*
2 Press [PLAY MENU] to select “PAIRING”.
3 Press [3, 4] to select “OK? YES” and then press [OK].
* You can also enter pairing mode by pressing and holding [ -PAIRING] on the unit.
To pair with a device
4 Select “SC-BMAX3” from the Bluetooth
®
device’s Bluetooth
®
menu.
5 Start playback on the Bluetooth
®
device.
∫ Connecting a paired Bluetooth
®
device
1 Press [ ] to select “BLUETOOTH”.
≥ “READY” is indicated on the display.
≥ When “BLUETOOTH” is selected as the source, this unit will automatically try and connect to the last connected
Bluetooth
®
device.
2 Select “SC-BMAX3” from the Bluetooth
®
device’s Bluetooth
®
menu.
3 Start playback on the Bluetooth
®
device.
≥ If prompted for the passkey, input “0000”.
≥ You can register up to 8 devices with this unit. If a 9th device is paired, the device that has not been used the longest will be
replaced.
≥ This unit can only be connected to one device at a time.
1 While a Bluetooth
®
device is connected:
Press [PLAY MENU] repeatedly to select “DISCONNECT?”.
2 Press [3, 4] to select “OK? YES” and then press [OK].
≥ You can also disconnect the Bluetooth
®
device by pressing and holding [ -PAIRING] on the unit.
≥ The Bluetooth
®
device will be disconnected if a different audio source (e.g., “USB”) is selected.
5
Bluetooth
®
connection
Connecting via Bluetooth
®
menu
Disconnecting a Bluetooth
®
device
Preparation
Turn the unit on.
1 Connect an external device using an audio cable (not
supplied).
≥ Plug type: ‰ 3.5 mm stereo
2 Press [AUX] to select “AUX” and start playback on the
connected device.
∫ To select the sound input level of the external
device
1 While in AUX mode, press [PLAY MENU] repeatedly to select “INPUT LEVEL”.
2 Press [3, 4] to select “NORMAL” or “HIGH” and then press [OK].
≥ The factory default is “NORMAL”.
≥ To improve sound distortion when “HIGH” is selected, select “NORMAL”.
≥ Switch the equalizer off or turn the volume of the external device down to reduce the input signal. High level of input signal
will distort the sound.
≥ For details, refer to the operating instructions of the device.
You can connect to play sound from this unit to the additional SC-BMAX3 units.
≥ It is recommended to install all SC-BMAX3 units vertically.
Preparation
1 Set the sound input level of additional SC-BMAX3 units to “NORMAL”.
(See “To select the sound input level of the external device”)
2 Turn all the SC-BMAX3 units off.
1 Connect this unit and all the additional
SC-BMAX3 units with audio cables (not
supplied).
≥ Plug type: ‰ 3.5 mm stereo
2 Turn all the SC-BMAX3 units on.
3 On the additional SC-BMAX3 units:
Press [AUX] to select “AUX”.
≥ For all the SC-BMAX3 units:
It is recommended to select the “MONO”
sound effect. (See “Sound effects”)
4 On this unit:
Start your desired playback.
≥
You can connect this unit and up to two SC-BMAX3 units.
≥ The sound effect will be controlled separately by
each unit. Make the same sound settings on the
additional units if necessary.
≥ The illumination lights of the SC-BMAX3 units may flash at slightly different times.
6
Connecting an external device
Connecting additional SC-BMAX3 units
Audio cable
(not supplied)
Rear view
Additional
SC-BMAX3
(rear)
Audio cable
(not supplied)
Rear view
Audio cable
(not supplied)
Additional
SC-BMAX3
(rear)
The following marks indicate the availability of the feature.
Preparation
≥ Turn the unit on.
≥
Insert the USB device or connect the Bluetooth
®
device.
≥ Press [USB] or [ ] to select the audio source.
∫ To display information
Press [DISPLAY] repeatedly.
≥ To use this unit’s remote control with a Bluetooth
®
device,
the Bluetooth
®
device must support AVRCP (Audio Video
Remote Control Profile).
Depending on the status of the device, some controls may
not work.
≥ Maximum number of displayable characters: approx. 32
≥ This unit supports ver. 1 and 2 ID3 tags but priority is more
to ver. 2. Text data that is not supported will not be
displayed or will be shown differently.
≥ The displayed remaining time of a track with a variable bit
rate (VBR) may differ from its actual remaining time.
≥ Album and track indication for MP3 files.
≥ This unit skips MP3 files (tracks) that are not supported.
Select the playback mode.
1 Press [PLAY MENU] to select “PLAYMODE” or
“REPEAT”.
2 Press [3, 4] to select the setting and then
press [OK].
≥ During random play, you cannot skip to the previous track.
≥
In “RANDOM” or “1-ALBUM RANDOM” mode, tracks are played
endlessly even when “REPEAT” is set to “OFF REPEAT”.
≥ “`” is displayed depending on the REPEAT mode
setting.
≥ In “RANDOM” or “1-ALBUM RANDOM” mode, tracks may
be played more than once.
7
Media playback controls
[USB]: USB devices containing MP3 files
(See “Compatible USB devices”)
[Bluetooth]: Connected Bluetooth
®
device
Basic controls ([USB], [Bluetooth])
Play Press [1/;].
Stop Press [∫].
≥ [USB]: The position is memorised and
“RESUME” is displayed.
j Press [1/;] to resume.
j Press [∫] again to clear the position.
Pause Press [1/;].
Press again to restart play.
Skip
Press [
:
/
6
] or [
5
/
9
] to skip track.
[USB]
:
Press [
3
] or [
4
] to skip the MP3 album.
Search During play or pause, press and hold
[:/6] or [5/9].
“ ”: This indication is also used to refer to an album.
“ ”: This indication is also used to refer to a track.
* Those numbers are displayed as “A _ _ _” (album
number) or “T _ _ _” (track number) when the number of
albums or tracks stored in the connected USB device
exceeds the maximum number of albums or tracks that
can be read by this unit.
Track number*
e.g.
Album number*
Playback modes ([USB])
PLAYMODE
OFF
PLAYMODE
Cancels the play mode setting.
1-TRACK Only plays the selected track.
≥ “1”, “ ” is displayed.
(Skip to the desired track.)
1-ALBUM Only plays the selected MP3 album.
≥ “1”, “ ” is displayed.
RANDOM Plays the contents randomly.
≥ “RND” is displayed.
1-ALBUM
RANDOM
Plays the tracks in the selected MP3
album randomly.
≥
Press [
3
] or [
4
] to select the MP3 album.
≥ “1”, “ ”, “RND” is displayed.
REPEAT
OFF REPEAT Turns off repeat mode.
ON REPEAT Turns on repeat mode.
≥ “`” is displayed.
This is a 24-hour clock.
1 Press [SETUP] repeatedly to select “CLOCK”.
2 Press [3, 4] to set the time and then press
[OK].
≥ To display the clock, press [SETUP] repeatedly to select
“CLOCK” and then press [OK] once.
(During standby, press [DISPLAY] once.)
≥ The clock is reset when there is a power failure or when
the AC mains lead is removed.
≥ Reset the clock regularly to maintain accuracy.
The sleep timer can turn the unit off after a set time.
Press [SLEEP] to set the time (in minutes).
“SLEEP 30” -. “SLEEP 60” -. “SLEEP 90” -. “SLEEP 120”
^------------------- “OFF” (Cancel) (------------------b
≥ The remaining time is indicated on the unit’s display except
when other operations are performed.
≥ The play timer and sleep timer can be used together. The
sleep timer is always the main timer on the unit.
You can set the timer so this unit turns on at a certain
time every day.
Preparation
Set the clock. (See “Setting the clock”)
1 Press [SETUP] repeatedly to select “TIMER
ADJ”.
2 Press [3, 4] to set the starting time
(“ON TIME”) and then press [OK].
3 Press [3, 4] to set the finishing time
(“OFF TIME”) and then press [OK].
Turning the timer on
1 Select a music source* and set the desired
volume.
2 Press [SETUP] repeatedly to select “TIMER
SET”.
3 Press [3, 4] to select “SET” and then press
[OK].
≥ “F” is displayed.
≥ To turn the timer off, select “OFF”.
4 Press [Í] to turn the unit to standby mode.
≥ To display the timer settings, press [SETUP] repeatedly to
select “TIMER ADJ” and then press [OK] once.
The music source and volume will also be displayed if the
timer is turned on.
≥ During standby, if the timer is turned on, press [DISPLAY]
twice to display the settings.
≥ To change the music source, select “OFF” in step 3 of
“Turning the timer on” and then perform steps 1 to 4 of the
procedure.
≥ This unit can be used as normal after the timer is set,
however:
j Turn the unit to standby mode before the timer start time.
j Even if the music source or the volume is changed, the
timer will still use the music source and volume that was
set when the timer was turned on.
* “USB” and “AUX” can be set as the music source.
8
Clock and timers
Setting the clock
Sleep timer
Play timer
The following sound effects can be added to the
audio output.
1 Press [SOUND] repeatedly to select the effect.
2 Press [3, 4] to select the setting and then
press [OK].
≥ You may experience a reduction in sound quality when
these effects are used with some sources. If this occurs,
turn the sound effects off.
≥ When “AUX” is selected as the source, you can select
“INPUT LEVEL” to adjust the sound input level of the
external device.
(See “To select the sound input level of the external
device”)
You can change the illumination setting.
1 Press [SETUP] repeatedly to select
“ILLUMINATION”.
2 Press [3, 4] to select a setting and then
press [OK].
“SPECTRUM” ,--------. “NEON” ,--------. “SWING”
^----. “OFF ILLUMINATION” (Cancel) (----J
To cancel, select “OFF ILLUMINATION”.
≥ The factory default is “SPECTRUM”.
≥ Depending on the track, the flashing pattern of the
set illumination light differs, and it may flash with
one state (on or off) lasting longer than the other.
As a factory default, this unit will turn to standby
mode automatically if there is no sound and it is not
being used for approximately 20 minutes.
To cancel this function
1
Press [SETUP] repeatedly to select “AUTO OFF”.
2
Press [
3
,
4
] to select “OFF” and then press [OK].
≥ To turn the function on, select “ON” in step 2.
≥ This function does not work in the following cases:
j When this unit is in USB mode and the connected device
is playing or paused.
j When this unit is connected to a Bluetooth
®
device
When “SC-BMAX3” is selected from a paired
Bluetooth
®
device’s Bluetooth
®
menu, this unit will
turn on automatically from power standby mode and
establish a Bluetooth
®
connection.
1 Press [PLAY MENU] repeatedly to select
“STANDBY MODE”.
2 Press [3, 4] to select “ON STANDBY MODE”
and then press [OK].
≥ The factory default is “OFF STANDBY MODE”.
≥
To turn the function off, select “OFF STANDBY MODE” in step 2.
When other Panasonic equipment responds to the
supplied remote control, change the remote control code.
1 Press [USB/AUX] on the unit to select “USB”.
2
While pressing and holding [ST/MONO] on the
unit, press and hold [USB] on the remote control
until the unit’s display shows “REMOTE 2”.
3 Press and hold [OK] and [USB] on the remote
control for at least 4 seconds.
≥
To change the mode back to “REMOTE 1”, press [USB/AUX]
on the unit to select “USB” and then repeat the step 2 and 3
but replace [USB] with [ ].
The version of the installed software is displayed.
Press [SETUP] repeatedly to select “SW VER.”
and then press [OK].
≥ Press [OK] to exit.
9
Sound and illumination
effects
Sound effects
“PRESET EQ”
(Preset
Equalizer)
“HEAVY” (heavy), “SOFT” (soft),
“CLEAR” (clear), “VOCAL” (vocal) or
“FLAT” (flat/off).
≥ The factory default is “HEAVY”.
“D.BASS”
(Dynamic Bass)
“ON D.BASS” or “OFF D.BASS”.
≥ The factory default is “ON D.BASS”.
“ST/MONO”
(STEREO/
MONO)
“STEREO” or “MONO”.
≥ The factory default is “STEREO”.
≥
“ ” is displayed when “MONO” is selected .
Illumination setting
10
Advanced operations
Auto off function
Bluetooth
®
standby
Changing the unit and remote
control code
Checking the software version
SC-BMAX3GN.fm 2 ページ 2014年9月12日 金曜日 午後10時48分
 Loading...