Using Timer
The TV can automatically turn On/Off at the designated date and time.
The Clock must be set before On time/Off time settings. (p. 18)
The “Sleep” timer and “On / Off timer” will not work if the “Auto power on” (p. 36) is set.
■
Press to exit from
a menu screen
■
Press to return
to the previous
screen
Note
The TV automatically
turns Off after 90
minutes when turned
On by the Timer.
This operation will be
cancelled if the Off
time is selected or if a
key is pressed.
Display menu
Select “Timer”
select
next
Turns Off automatically
Sleep
Turns On/Off automatically
(5 timers can be set.)
Timer 1
Timer 5
~
Set the timer
■
To set “Sleep” (Off Timer)
Set to shut the unit off after a pre-selected amount of time.
select
set
or
SUN/MON/TUE/WED/THU/FRI/SAT
(displays the nearest future date)
MON-FRI/SAT-SUN/DAILY/Every SUN/Every MON/
Every TUE/Every WED/Every THU/Every FRI/ Every SAT
Select the channel
Channel
Select the day
Day
The time to turn On
On time
The time to turn Off
Off time
Select the inputs
Inputs
AM / PM
Timer setting (On/Off)
Timer set
Clear
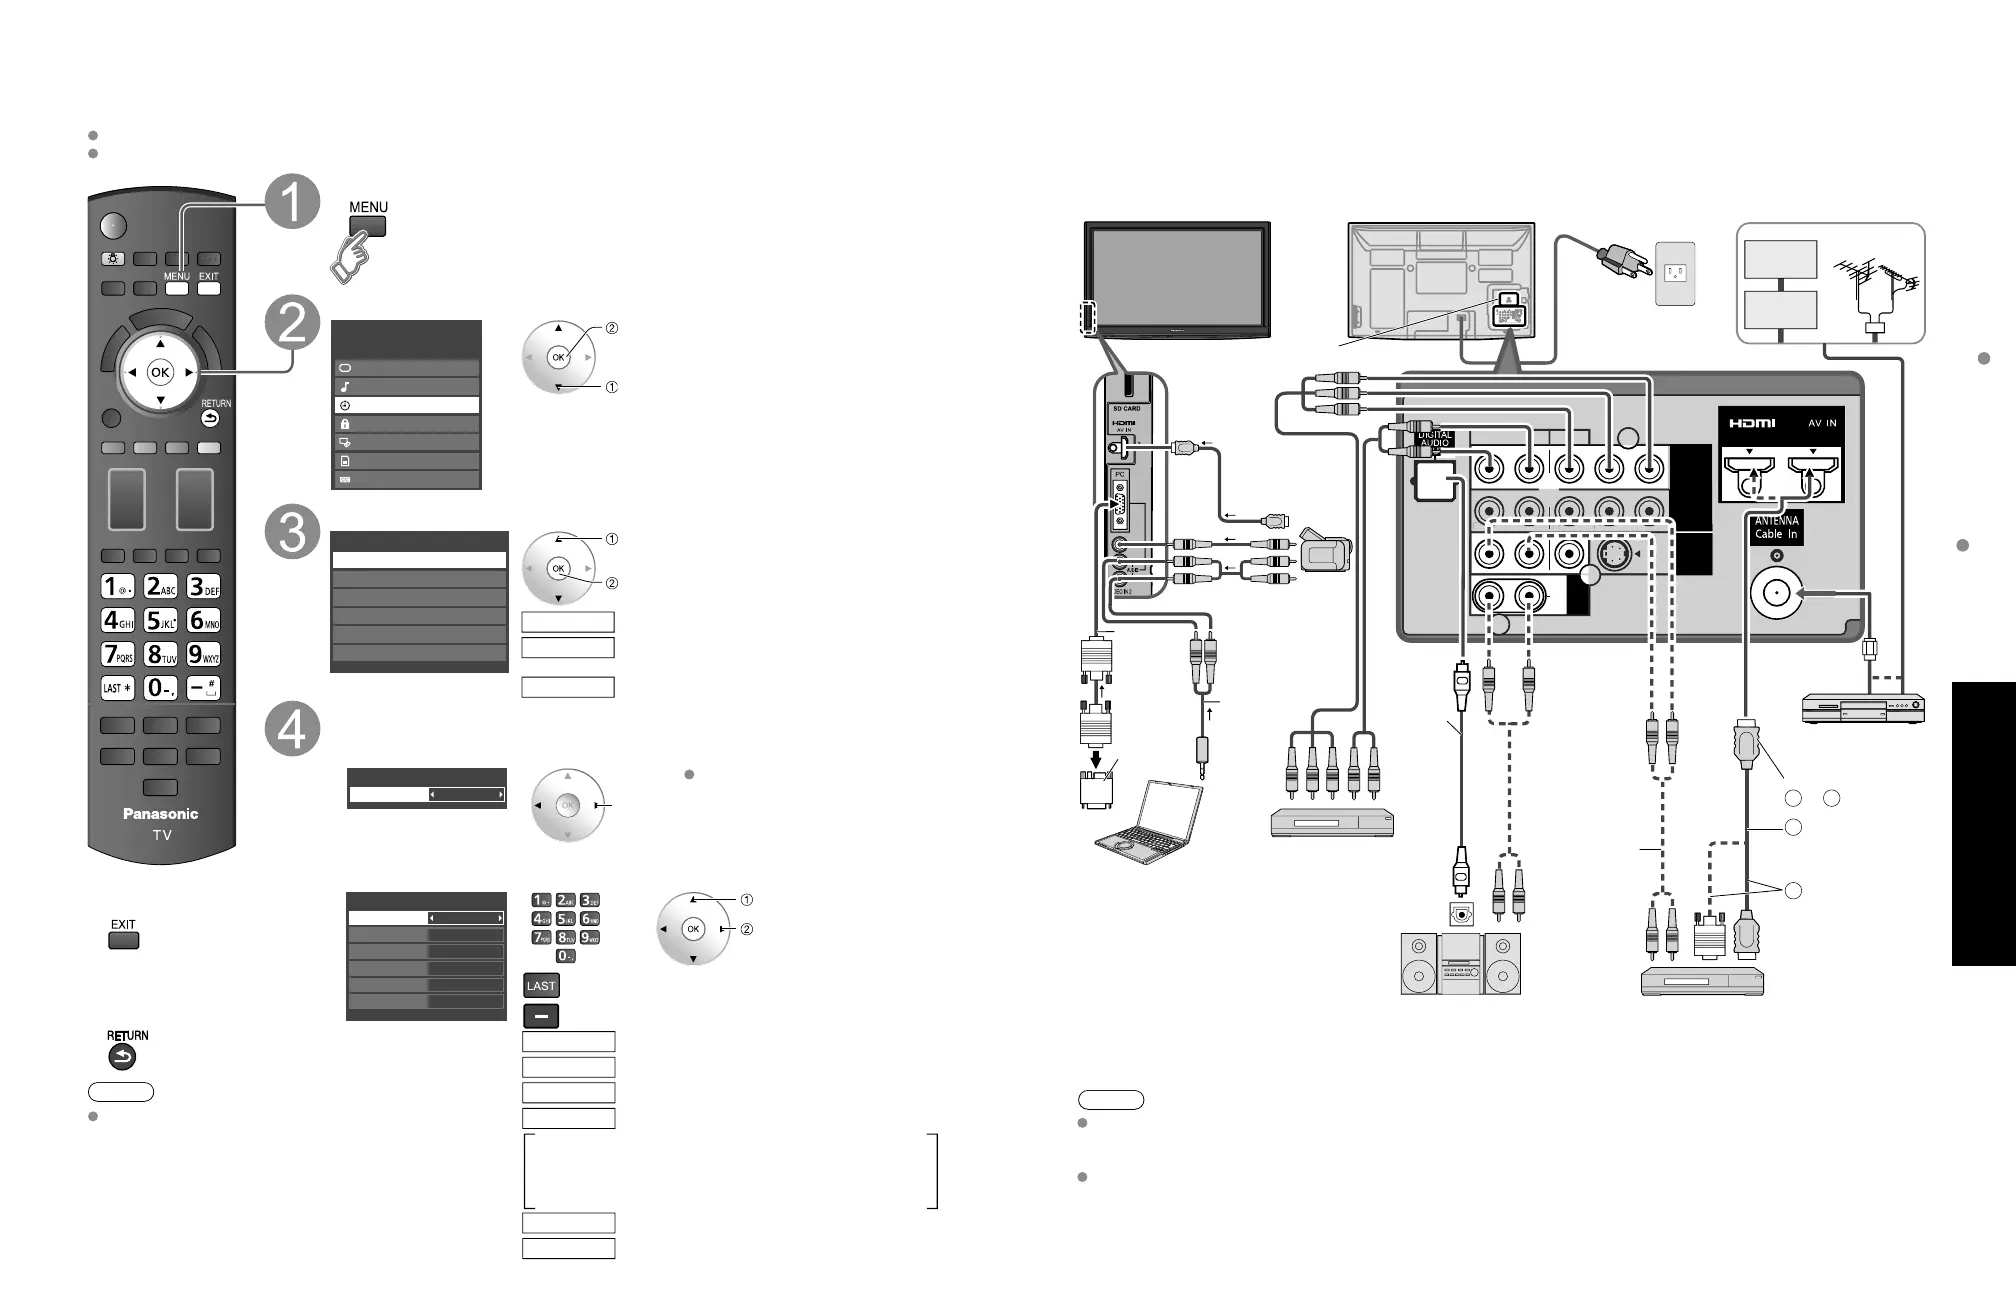
Recommended AV Connections
These diagrams show our recommendations or how to connect the TV unit to your various equipment.
For other connections, consult the instructions for each piece of equipment and its specifications.
For additional assistance, please visit our website at: www.panasonic.com
www.panasonic.ca
AC 120 V
60 Hz
Back of the TV
Cable Box
Cable TV
or
■
To watch DVDs
Optical
digital
audio
cable
■
DVD Recorder /
VCR
■
To listen to the TV
through speakers
or
■
To watch camcorder images
Camcorder
VCR
DVD Player
(For HDMI connection,
HDMI compatible equipment only.
For connection using HDMI-DVI
Conversion cable, see HDMI 1 or
HDMI 2 connection on this page.)
Audio
cable
or
■
To watch digital video image
DVD Player/Set
Top Box
DVD Player or Set Top Box
(HDMI compatible machines
only)
Connect with
HDMI-DVI
Conversion
cable +
Audio cable*
or
Amplifier
OPTICAL
IN
or
Front of the TV
* Please see p. 34-35 for setup when using an external analog audio cable with an HDMI to DVI cable.
AC Cord
(Connect after all the
other connections are
complete.)
Conversion
adapter (if
necessary)
Computer
RGB
PC cable
AUDIO cable
■
PC
Note
The audio input signals connected to a terminal disabled in “Audio out” (p. 53) cannot be output from “AUDIO OUT”
terminals.
However, audio output can be obtained from “DIGITAL AUDIO OUT” terminal.
To prevent howling, set the “Audio out” setting when connecting the VCR with loop-connection. (p. 36, 53)
LAN connection (p. 29)
 Loading...