10. TWIN, TRIPLE AND DOUBLE TWIN TYPE CONNECTIONS
●
Two, three or four indoor units can be operated simultaneously with a single remote controller.
Note that individual operation is not possible.
●
Master unit and slave unit can be set automatically in twin and triple system.
No address setting is necessary.
●
Applicable “TWIN” and “TRIPLE” combination table.
Outdoor unit Type 200 Type 250
TWIN
combination
S-100
S-100
S-1014 S-1014
S-125
S-125
S-1014 S-1014
TRIPLE
combination
DOUBLE
TWIN
combination
U-200
S-50 S-50S-50S-50
U-200
S-3650 S-3650S-3650S-3650
U-250
S-60 S-60S-60S-60
U-250
S-6071 S-6071S-6071S-6071
Tubing Connections
●
The following table shows the tube diameter.
(Branch tube kit should be used)
Outdoor unit main tube diameter
(mm)
Branch tube diameter
Indoor unit combination
S-50
S-3650
S-60
S-6071
S-71
S-6071
S-100
S-1014
S-125
S-1014
Liquid tube : ø9.52 (U-200)/
ø12.7 (U-250)
Gas tube : ø25.4
Liquid tube ø6.35 ø9.52 ø9.52 ø9.52 ø9.52
Gas tube ø12.7 ø15.88 ø15.88 ø15.88 ø15.88
Branch tube kit (option)
TWIN CZ-P680BK2
DOUBLE TWIN Branch tube 1:CZ-P680BK2 + Branch tube 2:CZ-P155BK1
TRIPLE CZ-P3HPC2
●
The following table shows the equivalent tube lengths and height differences.
SYMBOLS
SPEC
TWIN TRIPLE DOUBLE TWIN
Total tube length L+La+Lb L+La+Lb+Lc L+La+Lb+Lc+Ld+Le+Lf
100m (U-200)
80m (U-250)
Maximum branch tube length La or Lb La or Lb or Lc La+Lc or La+Ld or Lb+Le or Lb+Lf Less than 20m
Maximum branch tube length difference
La > Lb
La - Lb
La > Lb > Lc
La - Lb
Lb - Lc
La - Lc
Lb+Lf
→
MAX
La+Lc
→
MIN
(Lb + Lf) - (La + Lc)
Less than 10m
Maximum tube length difference of branch tube 1
(DOUBLE TWIN)
_____ _____
Lb > La
Lb - La
Less than 10m
Maximum tube length difference of branch tube 2
(DOUBLE TWIN)
_____ _____
Ld > Lc
Lf > Le
Ld - Lc
Lf - Le
Less than 10m
Height difference
Outdoor located higher installation H1 Less than 30m
Outdoor located lower installation H1 Less than 30m
Height difference between indoor units H2 H2 or H3 or H4 H2 or H3 or H4 or H5 or H6 or H7 Less than 0.5m
H1
H1
H1
H2
H2
H2
H3
H3
H4
H4
H5
H6
La
La
La
Lb
L
Indoor unit
Branch tube
Main tube
(TWIN type)
Outdoor unit
Indoor unit
H1
H2
H3
H4
La
Lb
Lc
L
(TRIPLE type)
Main tube
Branch tube
Outdoor unit
Indoor unit
Indoor unit
Indoor unit
H1
H2
H3
H4
H5
H6
La
Lb
Lc
Ld Le Lf
L
(DOUBLE TWIN type)
Main tube
Branch tube 2
Branch tube 2
Branch tube 1
Outdoor unit
Indoor unit
Indoor unit
Indoor unit
Indoor unit
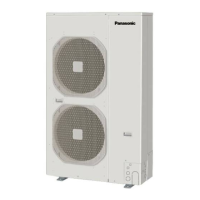
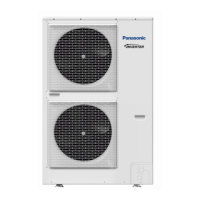
MODEL NAME
TYPE 8 HP 10 HP
PZH2 U-200PZH2E8 U-250PZH2E8
ACXF60-35881
ENGLISH
INSTALLATION INSTRUCTIONS (CONTINUE) OUTDOOR UNIT
• Usethemaintubetogainanyriseorfallrequiredforthetubes.
• Thenumberofbendsshouldbe8orlessinasinglesystem,and15orlessoverall.
• Branchtubesshouldbepositionedhorizontally.
01_320585_Eng_pg 2.indd 1 2020/3/26 12:07:13
Refrigerant charging
Addition amount of refrigerant [
g
/m]
Tube diameter
Main tube Branch tube
L La, Lb La, Lb, Lc Lc, Ld, Le, Lf
U-200PZH2E8
TWIN
Liquid tube : ø 9.52
Gas tube : ø 25.4
60 45 - -
TRIPLE 60 - 45 -
DOUBLE TWIN 60 45 - 20
U-250PZH2E8
TWIN
Liquid tube : ø 12.7
Gas tube : ø 25.4
80 45 - -
DOUBLE TWIN 80 45 - 45
●
Make additional charges by adding up tube length in an order of main tube (L)
→
branch tube (La
→
Lb
→
Lc wide diameter) and then selecting the amount of refrigerant
corresponding to the remaining (after 30m for the twin connection and after 20m for the triple/double-twin connections) liquid tube diameter and tube length from the table above.
Wiring
Power supply
(220-230-240V~)
Indoor unit
Indoor unit
Indoor unit
Indoor unit Outdoor unit
Control
cable
Control
cable
Control
cable
Control
cable
protective
earth
protective
earth
(TRIPLE type)
protective
earth
protective
earth
Circuit breaker
Switch
protective earth
: functional earthing
(for the shielded cable)
(DOUBLE TWIN type)
Power supply
(220-230-240V~)
Power supply
(220-230-240V~)
Power supply
(220-230-240V~)
Power supply
(380-400-415V 3N~)
11. PRECAUTIONS REGARDING TEST RUN
Check Before Test Run
Content check
Outdoor unit
●
Check that the insulation resistant value is more than 1M
Ω
.
Use the 500 V mega-testers to measure the insulation.
Check point : between power supply terminal block (L1, L2, L3, or L, N) to earth.
Do not use the mega-tester for any other circuit except for voltage of 220-230-240V~ or 380-400-415V 3N~.
Power supply cable
Indoor/outdoor connection wire
Earth wire
●
Is the wire set up and connected as described in the instructions? Check for any phase sequence.
●
Are the wire connection’s screws loose?
●
Is the open and close device / leakage breaker installed?
●
Is the power supply cable’s thickness and length appropriately measured as described in the instructions?
●
Is it earthed (grounded)?
●
Are the wire connections for the indoor/outdoor units connected as described in the instructions? Are there any looped wires?
●
Was the “N-phase” surely connected when connecting the power supply wire on the three-phase model?
If N-phase is not connected, only the fan may repeat turning ON/OFF without the compressor operating. In that case, check if there is
any problem with N-phase connection.
Refrigerant tube
●
Is the tubing installed as described in the instructions?
●
Arethetubessizesappropriate?
●
Does the tube’s length adhere to the specifications?
●
Is the branch tube slant being appropriately done as described in the instructions?
●
Was vacuum removal sufficiently carried out?
●
Was the leak tightness test carried out with nitrogen gas? Use the testing pressure of 4.15 MPa.
●
Is the tubing insulation material appropriately installed? (Insulation material is necessary for both gas and liquid tubing.)
●
Is the 3-way valve for the liquid tube and gas tube open?
●
Always be sure to use a properly insulated tool to operate the short-circuit pin on the circuit board. (Do not use your finger.)
●
Never switch the power supply ON until the installation has completed.
●
Supply electrical current through all indoor units and check the voltage.
●
Supply electrical current through all the outdoor units and check each inter-phase voltage.
●
Before the test run, ensure to check that the 3-way valve is open. Operating while the valve is closed causes the compressor to fail.
01_320585_Eng_pg 2.indd 2 2020/3/26 12:07:13
Test Run Procedure
●
If there are duplicated system addresses, or if the settings for the Nos. of the indoor units are not consistent,
an alarm will occur and the system will not start.
●
Switch the power supply ON both indoor and outdoor unit.
●
Short-circuit CHK pin on the outdoor main PCB.
Do not remove CHK pin until test run is completed.
Removing CHK pin stops test run.
●
Short-circuit RUN pin on the outdoor main PCB for one second or longer.
Factory setting is cooling operation mode and cooling operation test run starts.
If heating operation starts, short-circuit both right side and centre of the MODE pin (centre and COOL)
continuously.
●
Ensure to conduct a test run. In addition, be sure to run the cooling operation test run for at least 20 minutes
before starting the heating operation test run.
●
To conduct heating operation test run, short-circuit left side and centre of the MODE pin (centre and HEAT)
continuously.
●
Removing CHK pin’s and MODE pin’s short-circuit stops test run.
●
For the test run using remote controller, please see installation instructions included with the remote controller.
Caution for Pump Down
Pump down means refrigerant gas in the system is returned to the outdoor unit. Pump down is used when the unit is
to be moved, or before servicing the refrigerant circuit.
How to perform Pump-Down (Refrigerant recovery) properly
(1) Stop operation of the unit (cooling, heating etc.).
(2) Connect the pressure gauge to the service port of the gas tubing valve.
(3) Short-circuit the “PUMPDOWN” pin on an outdoor unit control PCB (CR) for more than 1 second to release.
●
Pump-Down begins and the unit starts operating.
●
During Pump-Down, LED1 blinks and LED2 is lit on an outdoor unit control PCB (CR).
●
“CHK” blinks on the remote controller.
(4) Fully close the liquid tubing valve 2-3 minutes later.
The Pump-Down will begin.
(5) When the pressure gauge drops to 0.1-0.2MPa, close the gas tubing valve tightly and short-circuit the
“PUMPDOWN” pin for more than 1 second to release. That is the end of Pump-Down.
●
When running for more than 10 minutes, it stops even if the Pump-Down is not completed. Check the blocked
state of the liquid tubing valve.
●
lt also stops when the “PUMPDOWN” pin is short-circuited during the operation.
* For compressor protection, do not operate to the point where the unit wiring side reaches negative pressure.
Note : In the case that inter-unit wiring is 30m or longer, you cannot pump-down. (lt may trigger the operation of the overload protection device.)
In this case, perform pump-down with pump-down device.
Outdoor main PCB
LED1
CHK pin
PUMPDOWN
RUN pin
MODE pin
*MODE pin: factory setting is cooling operation
mode.
LED2
12. CHECKS AFTER INSTALLATION HAVE COMPLETED
●
Check the following items after completing installation.
Is there a short circuit with the intake air flow?
Is the insulation secure? (Refrigerant tubing)
Are there any errors with the wiring?
Aretheterminalscrewsloose?Tighteningtorque(Unit:N•m{k
g
f•cm})
M4...1.57~1.96{16~20},M5...1.96~2.45{20~25}
Is the drain water flowing smoothly?
Is the insulation material properly installed?
Is the earth wire securely connected?
Is the front panel and the indoor unit air conditioner firmly fixed and was the installation completed without any leakage from the refrigerant?
Are the indoor and outdoor units secured firmly installed with bolts at secured locations?
13. REGARDING DELIVERY TO THE CUSTOMER
●
Request the customer to review the operating instructions and explain the operating method for the product.
●
In addition, it is also recommended that regular inspection checks are agreed upon for maintenance.
User inspection places
Serviceman inspection
places
•Grillcleaning
•Exteriorcleaning
•Checktheoperatingstatus
•Cleanthedrainpanorthingsrelatedtothewaterdischarge
•Heatexchangercleaning
Please turn over
01_320585_Eng_pg 2.indd 3 2020/3/26 12:07:13
Page 1
01_320585_Eng_pg 2.indd 4 2020/3/26 12:07:13
00_320585_A2.indb 1 2020/4/8 10:37:58