31
© Copyright 2008 Panoramic Corporation
PC-1000/Laser 1000 Installation
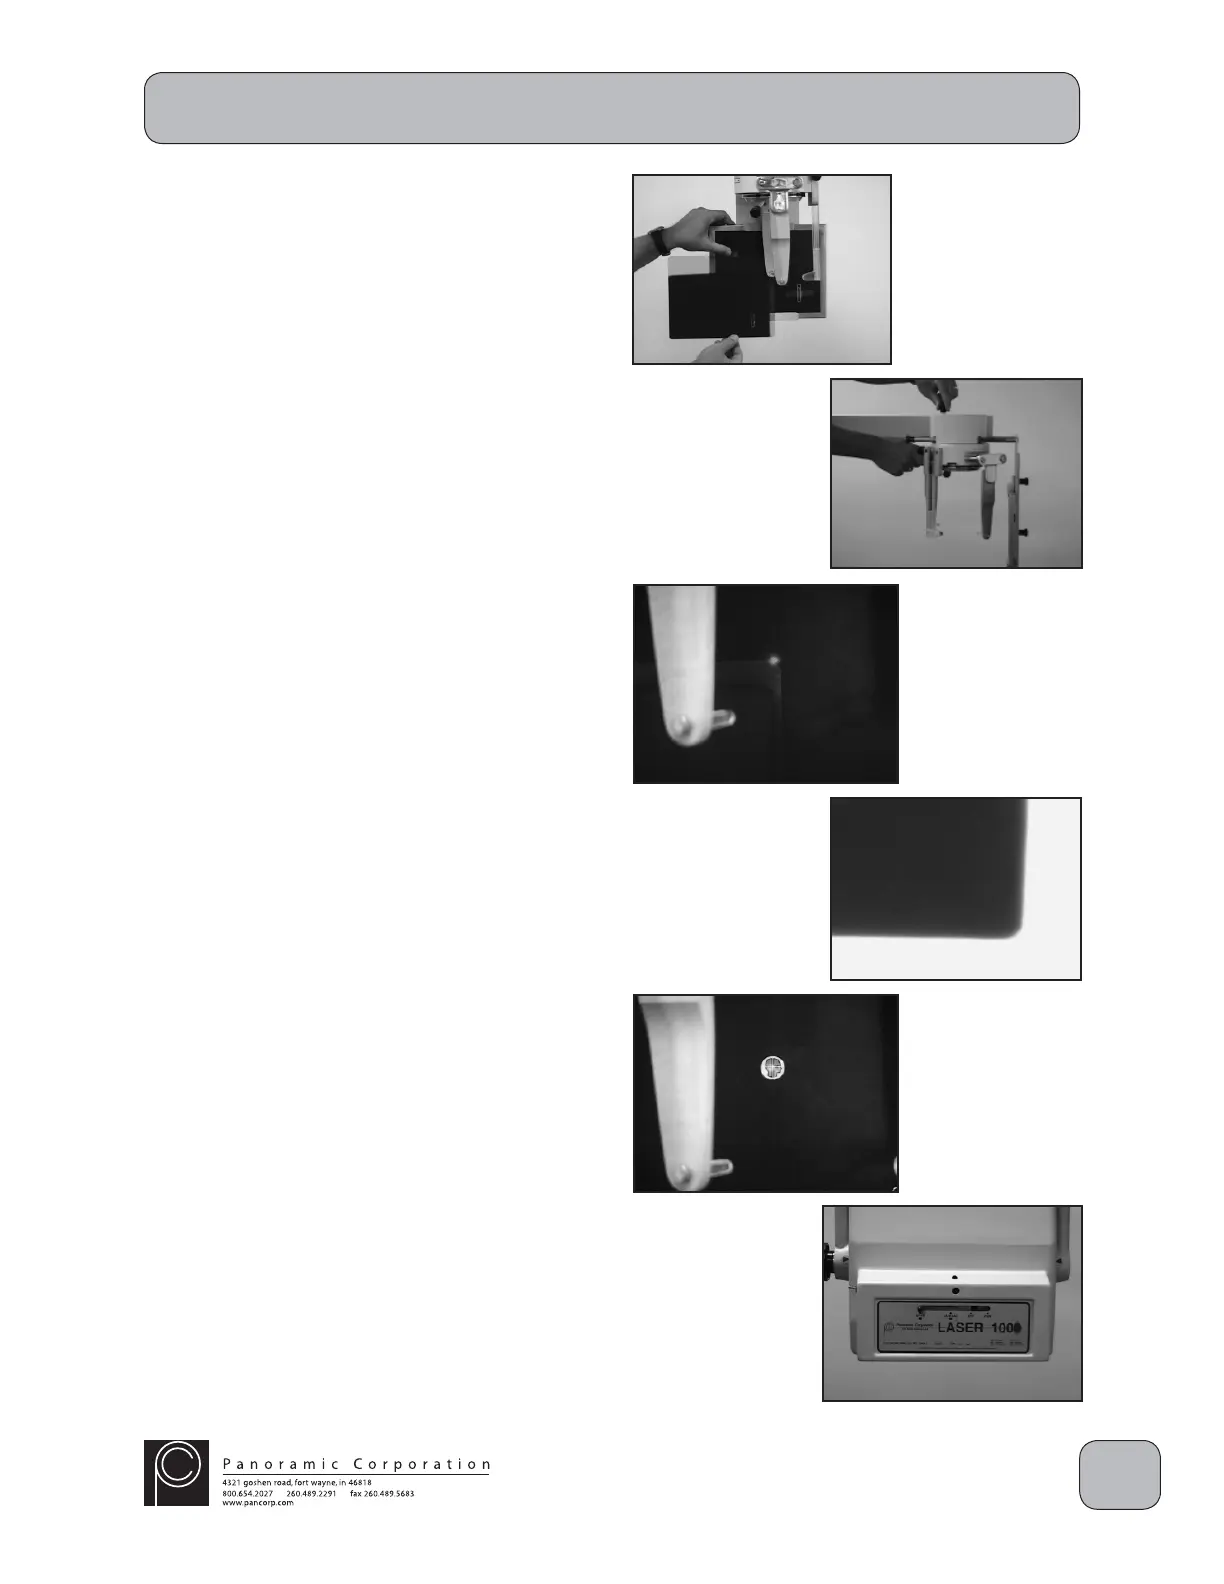
14. Temporarily tape the processed cephalometric
fi lm on the front of the cassette, in the same
orientation, so that the top corner of the
exposed area is aligned to the intersection of
the inscribed lines on the cassette.
15. Rotate the ear rods to approximately 45° to
allow the laser alignment beam to strike the
cassette.
16. Depress the laser switch on the right side of
the tubehead to activate the laser. Adjust the
tubehead so that the laser beam strikes the
closest physical corner of the processed fi lm.
17. Rotate the head positioner back into the
LATERAL position and install the locking pin.
CAUTION: X-rays will be emitted when the
exposure switch is depressed.
18. Depress the exposure switch.
19. Remove the cephalometric cassette from the
cassette holder and process the fi lm. Load
the cassette again with cephalometric fi lm for
another test exposure.
20. Continue to position the cassette and
tubehead until the exposure is centered within
the cephalometric fi lm (steps 14-18).
21. When the exposure is properly centered within
the cephalometric fi lm, place a permanent
head decal upright where the laser beam now
strikes the cassette.
22. Slide the lever in the collimator assembly
on the front of the tubehead to the AP-PA
position.
NOTE: If the collimator is NOT fi rmly seated in its
locking notch:
a. the alignment laser will not fi re
b. when the exposure switch is depressed,
the machine will beep rapidly, but no
radiation will be emitted
 Loading...