36
© Copyright 2008 Panoramic Corporation
PC-1000/Laser 1000 Installation
Horizontal Alignment
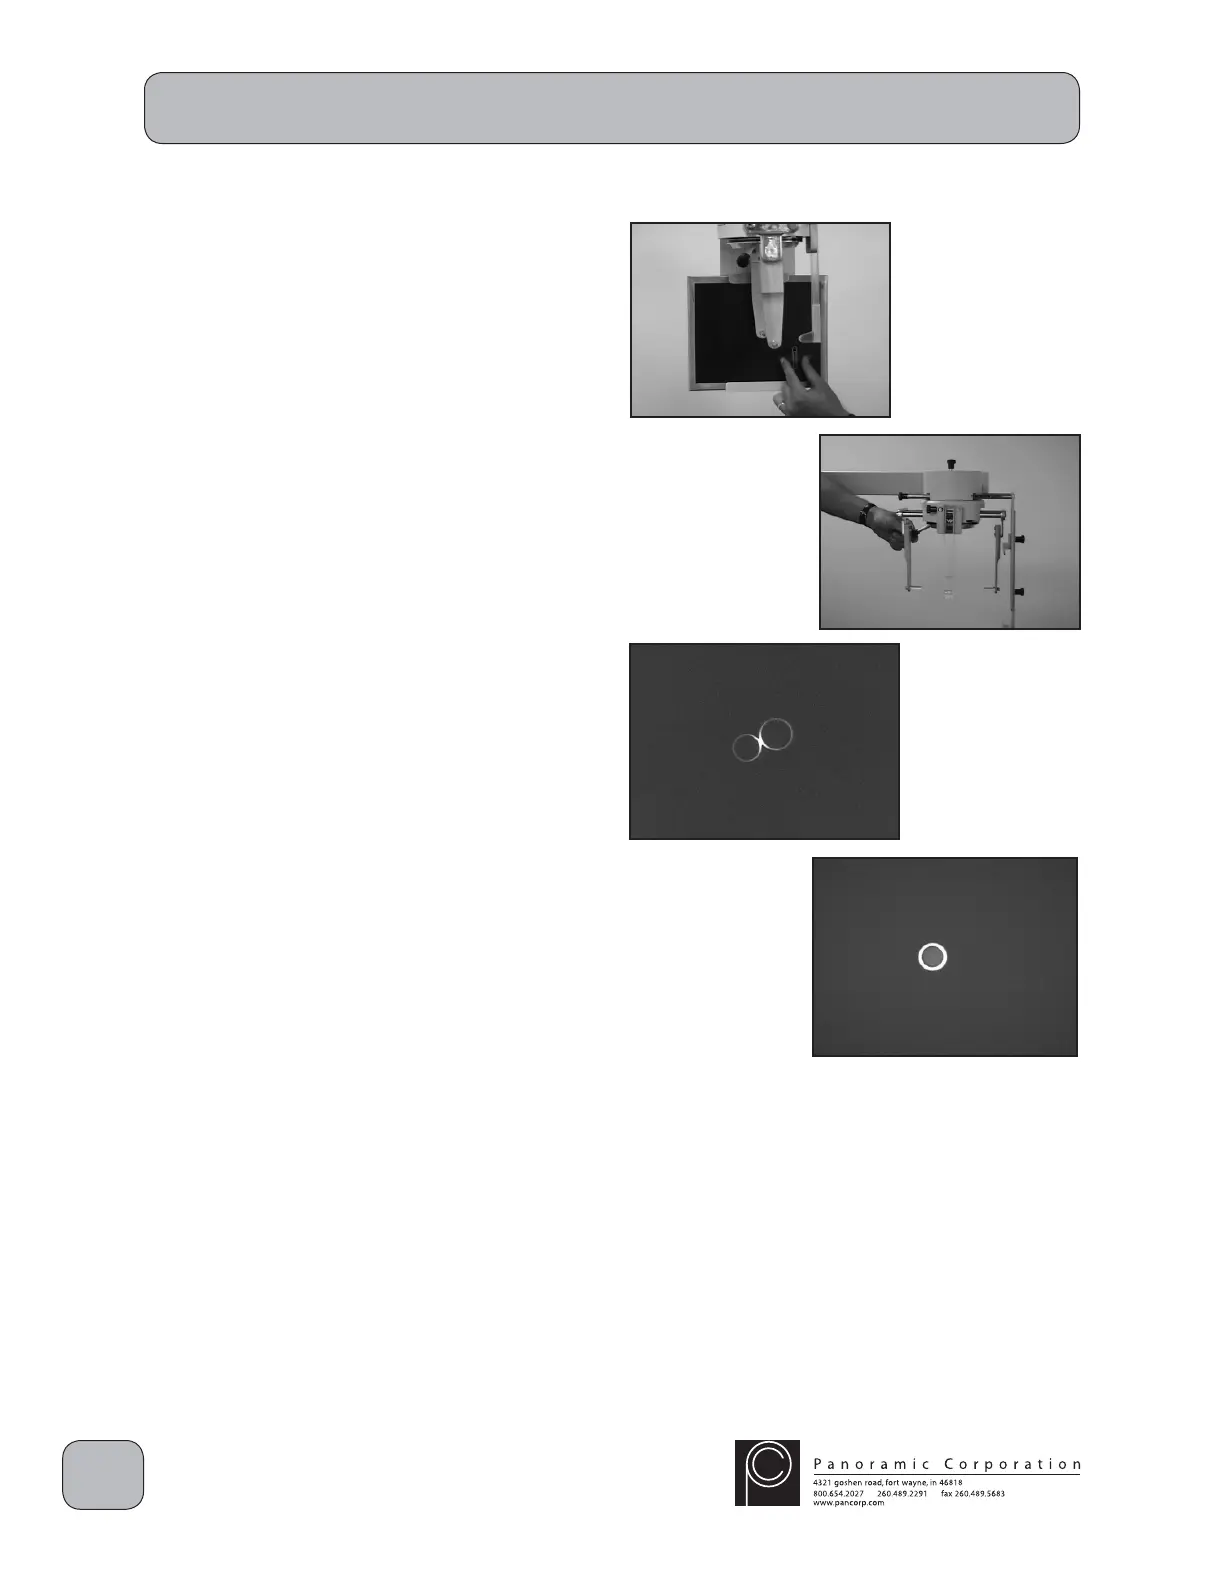
17. Place a loaded cephalometric fi lm cassette in
the cassette holder centered HORIZONTALLY
at the end of the cephalometric arm. Align the
top edge of the sliding portion on the rear of
the cassette holder to the LATERAL position.
It may be helpful to temporarily tape a coin
or paperclip, to be used as a reference after
exposing a test fi lm, in either of the lower
quadrants of the cassette.
18. Open the ear posts as far as possible using
the lever on the rear of the head positioner.
CAUTION: X-rays will be emitted when the
exposure switch is depressed.
19. Depress the exposure switch.
20. Remove the cephalometric cassette from the
cassette holder and process the fi lm. Load
the cassette again with cephalometric fi lm for
another test exposure.
21. The smaller ear ring should appear centered
horizontally inside the larger ear ring on the
processed fi lm. If it does not, loosen the
4 allen bolts on top of the cephalostat and
slightly rotate the ear posts. If the larger ear
ring is too far to the right, slightly rotate the ear
posts counter clockwise (CCW). If the larger
ear ring is too far to the left, slightly rotate the
ear posts clockwise (CW). Tighten the 4 allen
bolts.
22. Continue to adjust the cephalostat head
positioner until the smaller ear ring is centered
horizontally inside the larger ear ring (steps
18-21).
Note: Contact Panoramic Corporation if the ear
 Loading...