12072021 8
PANTHER / PREDATOR / APPLICATOR ASSEMBLY PREVENTATIVE MAINTENANCE
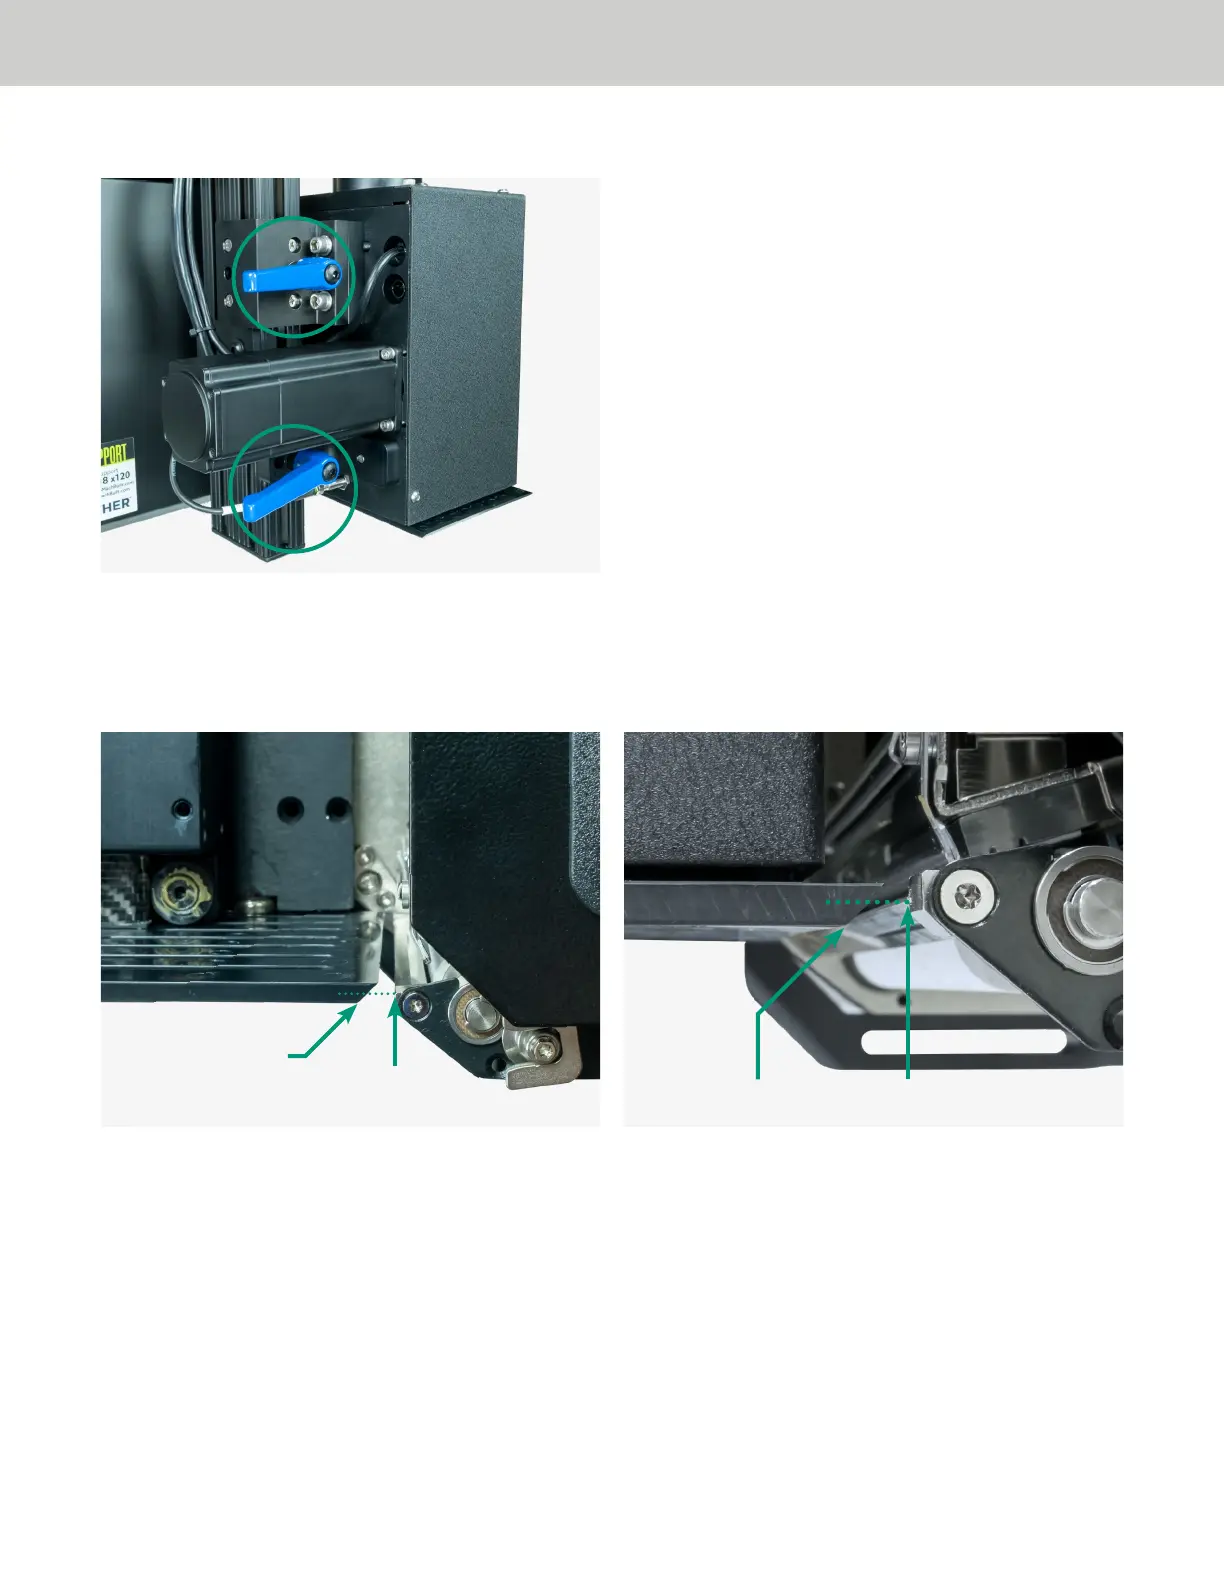
12. Loosen the vertical adjustment lock handles, located on the back of the Predator main plate.
13. Adjust the vertical position of the tamp head so that the print engine peel bar splits the bevel on the tamp
head. Note: This well require adjusting the fixed mounting bolt that the slide assembly rests on. You
should position the surface of the tamp head approximately 1/16” below the position where the labels
feed out.
14. Slide the applicator assembly unit until it comes in contact with the home location bolt.
15. Re-tighten the vertical adjustment lock handle.
16. Re-connect the power wires to fan.
Note: Before reconnecting the fan, it is recommended that you clean the fan and fan base of any buildup
of dust or debris. This can be done with isopropyl alcohol wipes or with compressed air, using the proper
safety precautions.
17. Remount the fan shroud.
18. On the Predator HMI display, press the [RESET] button, then press the [APPLY] button. Ensure the
applicator cycles smoothly.
Peel Bar
Peel Bar
Tamp Head Bevel
Tamp Head Bevel
 Loading...