This document serves as a User Guide for the Pantum CM9106-CM9706 Series Color Multifunction Printer. It provides comprehensive information on the printer's functions, technical specifications, usage, and maintenance.
Function Description
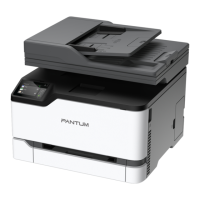
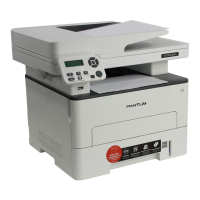
The Pantum CM9106-CM9706 Series are color multifunction printers designed for various office tasks including printing, copying, and scanning. These models support both wired network printing and USB connections. The control panel features a color touch screen for easy navigation and operation.
Important Technical Specifications
- Product Series: CM9106DN, CM9706DN
- Interface Type: USB, NET
- Print Language: PCL6
- Control Panel: Touch screen
- Print Speed (One-sided, A4):
- CM9106DN: 45ppm
- CM9706DN: 65ppm
- Print Speed (Duplex, A4):
- CM9106DN: Black: 45spm; Color: 41spm
- CM9706DN: Black: 65spm; Color: 61spm
- Max. Monthly Print Volume: 275,000 pages/month
- Recommended Monthly Print Volume: 8,000 – 50,000 pages
- Duplex Printing: Supported
- Print Time of First Page: Black & White: 5.2s; Color: 6.3s
- Copy Speed (One-sided, A4):
- CM9106DN: Black/Color: 45ppm
- CM9706DN: Black/Color: 65ppm
- Copy Speed (Duplex, A4):
- CM9106DN: Black/Color: 45spm
- CM9706DN: Black/Color: 65spm
- Zoom Ratio (Copy): 25-400%
- Scan Type: Flatbed + ADF (Automatic Document Feeder)
- Scan Speed (A4): Single-sided: 80ppm; Duplex: 160spm
- Scanning Technique: CCD
- Type of Document Feeder: DADF
- Max. ADF Capacity: 150 pages
- Scan Area: Max A3
- Scan Resolution: Max 1200x1200dpi
- Product Size (WDH): 921mm615mm697mm
- Product Weight (including enclosed consumables): About 108.5kg
- Product Weight (including enclosed consumables and package): About 135kg
- Touch Screen: 10 inch color touch screen
- Print Environment:
- Temperature: 10 - 30°C
- Humidity: 15 - 85% relative humidity
- Altitude: 0 - 3000m
- Power Voltage: 220-240V~50/60Hz, 10A
- Noise: Print: 55dBA; Copying: 57dBA; Scan: 53dBA
- Operating System Support: Astra Linux Special Edition 1.7, Alt Linux 10.1, RedOS 7.3, Debian 11, Redhat 9, Ubuntu 22.04, CentOS 9
- Communication Interface: USB 2.0 (High-speed), IEEE802.3 10/100/1000Base-Tx
Usage Features
The printer offers a variety of features to enhance user experience and productivity:
- Control Panel: The 10-inch color touch screen provides intuitive access to printer status, messages, and settings. Dedicated buttons for Home, Power, Numeric Keyboard, Consumables Information, Start, Volume, Indicator, Cancel, Information Report, and Backspace simplify operations.
- Home Screen Icons: Quick access to functions like Copy, Time/Date, Scan, ID Copy, Switch Language, Secure Print, Error Status Indication, Tips/Warnings, Wired Network Status Icon, Security Management, Shortcut Center, Settings, Network Settings, Consumable Information, and Information Report.
- Paper Handling: Supports various paper types (plain paper, thick paper 1-4) and sizes (A4-Short/Long Side, A3, A5-Short/Long Side, JIS B5-Short/Long Side, Legal, Letter-Short/Long Side, Executive) across multiple trays (Tray 1/3/4, Tray 2, Multi-purpose paper feeder, External large-capacity tray, Built-in large-capacity tray). Maximum capacities range from 150 pages (multi-purpose feeder) to 3000 pages (external large-capacity tray).
- Driver Installation: Detailed instructions for installing printer drivers on Linux operating systems (RedOS, Astra, Debian, Ubuntu) using .rpm and .deb formats.
- Printer Setup: Guides for installing USB and network printers, including manual and automatic IP address settings.
- Web Server Management: Allows remote management of printer settings via an embedded Web server, including IP address setup, machine setup (email notification, sleep time), and factory reset.
- Printing Options:
- Automatic Two-Sided Printing: Supports duplex printing for various paper types and sizes.
- Print with Page Break: Allows inserting blank pages between printed texts, jobs, or copies.
- Skip Blank Pages: Automatically skips blank pages in documents.
- Binding Function: For printers with an optional stapler, allows setting "Folded," "Offset," "Staple," "Output Support," and "Punch" for binding.
- Booklet Printing: Typesets and prints originals into a book format, supporting various paper sizes and types.
- Secure Print: Enables saving print jobs in printer memory, requiring a password for release, enhancing document security.
- Cancel Printing: A dedicated "Cancel" button on the home screen to stop current print jobs.
- Copying Options:
- Color for Copying: Output in primary color or black-and-white.
- Copy Source/Destination: Set paper size of originals and target paper size/tray.
- Duplex Copying: Supports manual duplex copying for originals.
- Image Quality: Adjust definition mode for improved copying effect.
- Collated Copy: Collates copies of an original (ADF only).
- Resizing: Automatic or manual adjustment of copied image size (25%-400% zoom range for manual).
- Multipage: Copies 2- or 4-page documents onto a single sheet.
- Advanced Portrait: Adjusts color balance, brightness, saturation, contrast, background elimination, hue, and sharpness for improved copying.
- Booklet Copy: Typesets and prints originals into a book format, supporting various paper sizes and types, with options for cover page settings (inside front, outside front, inside & outside front, inside back).
- Watermark Copy: Adds preset or custom watermarks to copies.
- Copy with Page Break: Inserts blank pages between jobs or copies (ADF only).
- ID Copy: Specifically designed for copying ID cards, with optimal placement guidance and color mode selection.
- Scanning Options:
- Pull Scan: Scans documents via a PC-based scanning application (e.g., Simple Scan), supporting USB or wired connections. Allows setting scan parameters like scan sides, page size, delay, quality, text resolution, image resolution, brightness, contrast, and more. Supported file types for saving include PNG, JPEG, PDF, and WebP.
- Push Scan: Scans documents to SMB, E-mail, and FTP directly from the printer control panel. Requires proper SMTP client and address book configuration for email, and server address/login for FTP.
- Cancel Scan Job: A dedicated "Cancel" button on the home screen to stop current scan jobs.
- General Settings:
- System Settings: Adjust sleep time, time/date, screen brightness, restore factory settings, and sound/volume.
- Print Settings: Configure print color, paper size/type for each tray, advanced portrait settings, page break options, and error processing.
- Network Settings: View and configure wired network settings and information.
- Information Report: Print various reports including Print Demo, Print Information, Print Network Configuration, and Print System Components.
- Consumable Information: Check batch numbers and remaining toner levels for consumables.
- Data Clearing Function: Automatically or manually clears residual latent images and printer memory data for security.
- Security Management (ScrtyMgmnt): Features include Lock Screen Password (to prevent unauthorized printer operation), Job Control (to restrict copy and scan functions), and Port Restriction.
Maintenance Features
The manual provides detailed instructions for routine maintenance to ensure optimal printer performance and longevity:
- Cleaning the Printer:
- General Cleaning: Advises cutting off power, removing paper, dusting, and wiping the exterior with a damp, soft, lint-free cloth. Emphasizes using mild detergents and avoiding organic solvents.
- Cleaning the Scanner: Instructions for cleaning the ADF glass, ADF glass mat, scanner glass, scanner glass mat, and sensor area with a soft, lint-free wet cloth.
- Cleaning Print Head Lenses: Steps to open door A, remove waste toner bottles, and clean print head lenses with a brush.
- Emptying the Punching Box: Guides on opening door H, removing, emptying, and reinserting the punching box.
- Replacing Parts and Consumables:
- Replace the Toner Cartridge: Steps to open door A, remove the old cartridge, unpack and shake the new cartridge, insert it, remove waste toner bottles, clean print head lenses, reinsert the brush blade, and close the door.
- Replace Photosensitive Drum: Instructions to open door A, remove waste toner bottles, remove the old drum, unpack the new drum (with warnings against direct sunlight and touching the drum surface), insert it, clean print head lenses, reinsert the brush blade, and close the door.
- Replace Waste Toner Bottles: Steps to open door A, remove old bottles, clean print head lenses, reinsert the brush blade, unpack and insert new bottles, and close the door.
- Replace Paper Pickup, Paper Feed, and Separation Rollers: Requires powering off the printer, removing all trays, opening doors C and D, locating and removing old rollers, inserting new rollers, closing doors, and powering on.
- Replace the Transfer Belt: Involves powering off, opening door C, removing the door stop, loosening screws, removing the paper guide and old transfer belt, unpacking and inserting the new belt, cleaning print head lenses, reinserting the paper guide, fixing the transfer belt, reinstalling the door stop, closing the door, and powering on.
- Replace the Transfer Roller: Steps to open door C, remove the old roller, unpack and insert the new roller, and close the cover.
- Replace the ADF Separation Roller: Requires powering off, removing the ADF separation pad and old roller, unpacking and inserting the new roller, and inserting the separation pad.
- Replace the ADF Paper Pick-up and Feed Rollers: Involves powering off, opening door B, removing old rollers, unpacking and inserting new rollers, closing the door, and powering on.
- Replace the Staple Box (Hole Punch and Stapler Finisher): Steps to open door H, remove the old staple box, unpack and insert the new staple box, and close the cover.
- Replace the Staple Box (Booklet Finisher): Instructions to open door H, pull out the booklet maker, remove the old staple box, unpack and insert the new staple box, push the booklet maker back, and close the door.
- Installing Optional Trays: Detailed steps for installing 2 x 500-sheet trays (tray 3, tray 4) and a 3000-sheet large-capacity tray, including power off, unplugging, unpacking, installing stabilizers, aligning with the printer, connecting cables, and securing.
- Installing Stapler, Hole Punch, or Booklet Finisher: Guides on powering off, unplugging, removing publication support, unpacking the finisher, removing standard output support and paper clamp, removing the paper guide, inserting paper transport components, connecting the stapler, inserting the staple box, removing/reinstalling filter cover, securing cables, inserting output support, installing publication support, and powering on.
- Troubleshooting: Provides solutions for common problems such as paper jams (in ADF, multi-purpose feeder, doors C and D, 3000-sheet tray, stapler, booklet finisher), software failures (printer icon not appearing, printer not printing, driver installation issues, IP address changes), and error messages (no cartridge, toner low/expired, scanner busy/failed, no paper in ADF, paper jam in ADF). Also addresses image defects like blank/white pages, dark print, ghost images, incorrect margins, jagged characters, light print, missing color, mottles/spots, crooked/skewed print, toner coming off easily, uneven print density, and horizontal/vertical dark/white lines.