ENGLISH
II. INSTRUCTIONS FOR USE
III. GETTING STARTED
These Instructions For Use contain information on the PRONEB Compressor (PRONEB).
Separate Instructions For Use are included with the enclosed PARI Nebulizer.
Before using your PRONEB, you should read and understand the entire Instructions For Use
for both the PRONEB and PARI Nebulizer. Make special note of all danger, warning, and
caution statements. Save this guide for future reference.
1. Check the PRONEB packing box and make sure all components are included.
DESCRIPTION: PART #
PRONEB Compressor
3 Prong Power Cord for North America 41E8224
Air Filter (in compressor) 41F64
PRONEB Instructions For Use DS-37-810
Warranty Card (in nebulizer package) DS-37-9999
Nebulizer Stand (Optional)* 22F1010
PARI Nebulizer Set with Instructions For Use
If you did not receive all of the components, please contact the authorized dealer where you
purchased your PRONEB.
2. Fill out the warranty card completely and mail.
3. It is recommended that the patient keep a back-up nebulizer on hand in case parts are lost
or damaged.
V. MAINTENANCE OF THE PRONEB
To reduce the risk of increased bacterial growth, infection, illness, or injury from
contamination: at the end of each treatment, thoroughly clean and dry all parts of the
nebulizer and thoroughly dry any moisture or condensation in the tubing, following the
instructions below.
8
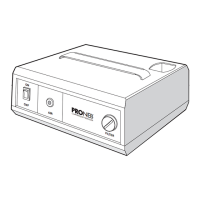
1. Place the PRONEB on a stable, flat surface. Place the unit in an area that is clean and free
of dust (Fig. A).
2. Connect power cord to socket (Fig. B) on the back of the PRONEB and connect power cord
plug to power outlet (wall outlet).
3. Open the nebulizer package and read and follow the nebulizer’s Instructions For Use.
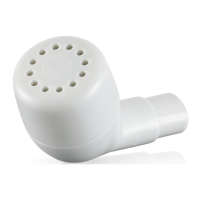
*Note: The 5 year Warranty PRONEB Compressor (see unit Serial Number to verify warranty
coverage) may contain a nebulizer stand for the enclosed nebulizer. The nebulizer stand
attaches to the bottom of the nebulizer (Fig. C). The nebulizer stand allows the nebulizer
to be placed in the nebulizer holder on top of the PRONEB with the tubing attached.
IV. SET-UP
WARNING
!