SWING FRAMES
DATE: 08/29/2014
INSTALLATION GUIDELINES
Page 19 of 20
STEP 8
Install appropriate age level sticker on swing frame. Full bucket seats require a 2-5 label - all other
seats require a 5-12 label. For safety reasons, do not attach swing chains or seats to swing frame until
playground is ready to open. NOTE: Swing seats and chains sold separately.
Detail C
STEP 5
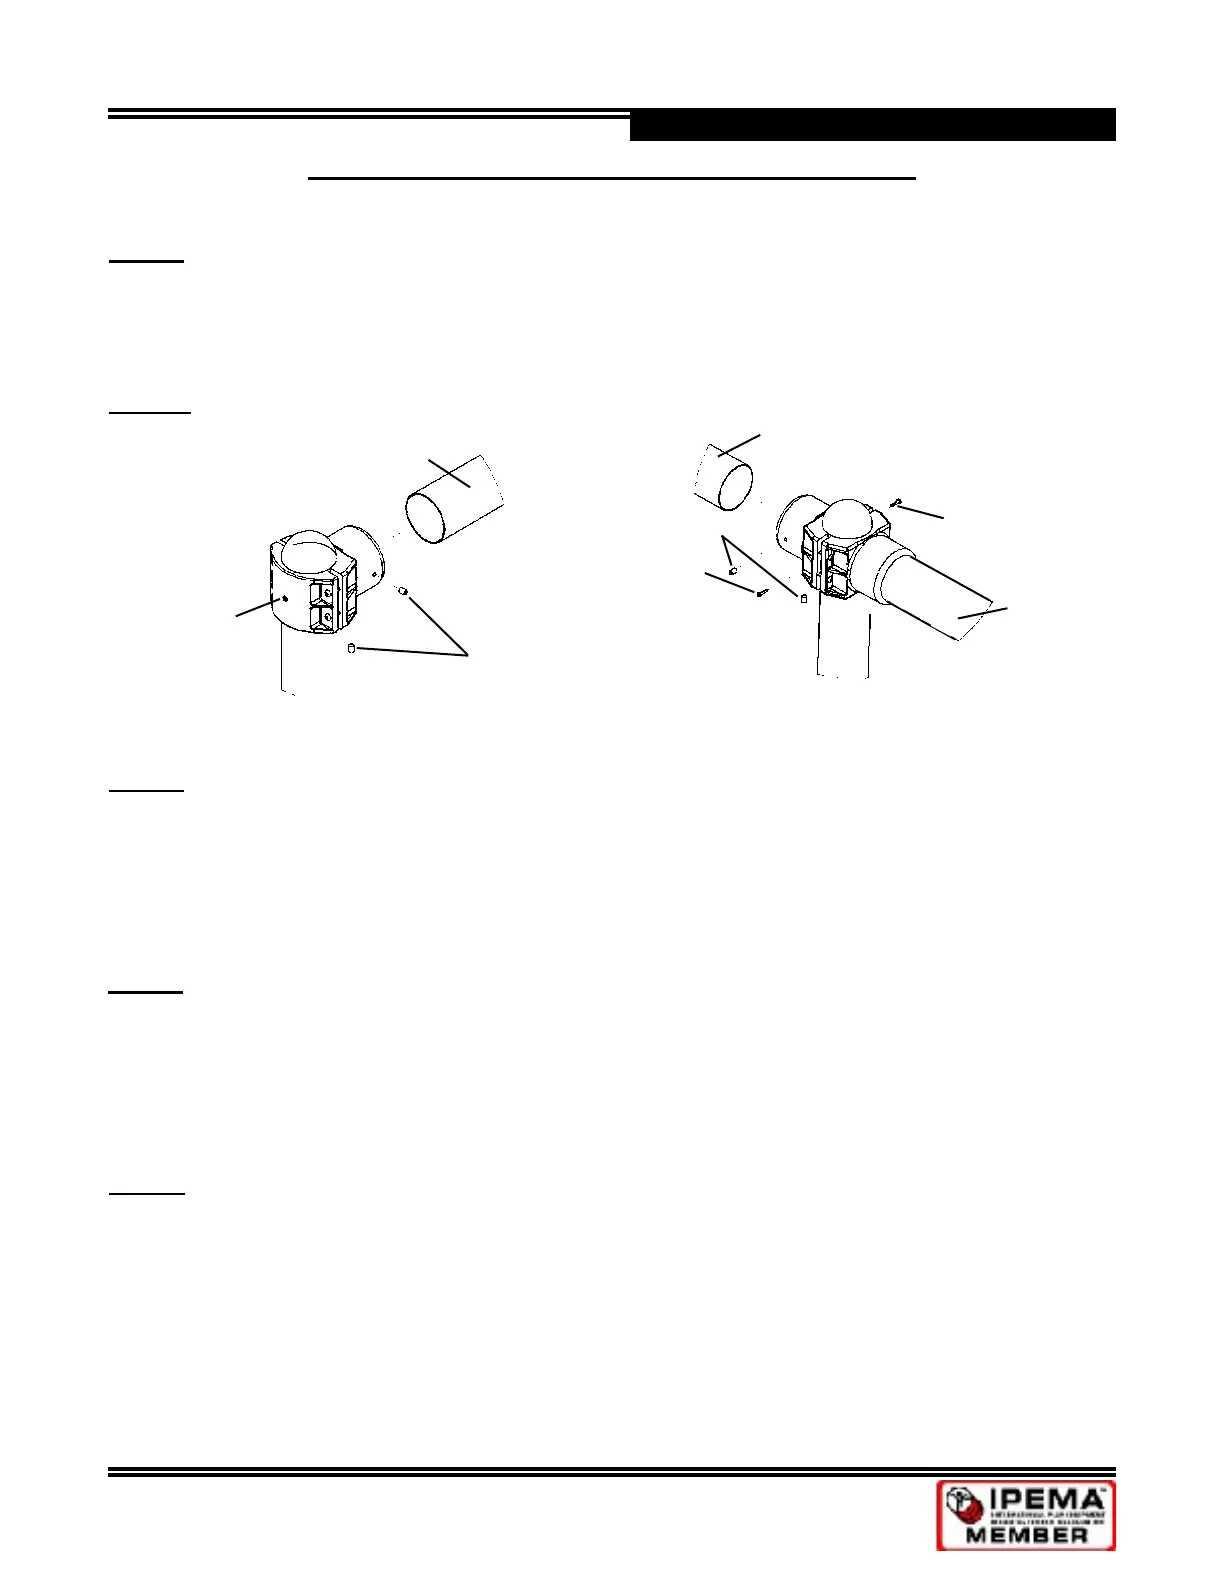
Set post in footing. Select top rail for swing frame. Insert top rail fully into 5”x5” receivers with swing hanger
tabs at 6:00. Install and tighten set screws (see Detail C).
Top Rail
Top Rail
1/2”x3/4”
Set Screw
1/4”x1” Drive Pin
1/4”x1”
Drive Pin
STEP 6
Select ve 1/4”x1” drive pins. Drill one 1/4” hole in each post through back of saddle and two 1/4” diagonal
holes through opposite sides of each receiver in the at area by attachment hardware (see Details A, B
and C). NOTE: Drill hole at top on one side of receiver and at bottom on other side. Place drive pins in
holes and tap into place.
STEP 7
Verify that top bar is at same height as existing swing and that it is level and vertical post is plumb. Pour
concrete into footing to correct level. NOTE: Concrete must have a minimum rating of 2,500 psi and
must be mixed per manufacturer’s recommendations. Fill remainder of hole with dirt. Allow concrete to
harden for at least 48 hours before use.
1/4”x1-1/2”
Drive Pin
Set Screw
Existing Top Rail
SINGLE 5” POST SWING FRAME - ADD-A-BAY - continued
 Loading...