9
Assembly (Continued)
• Save all instructions
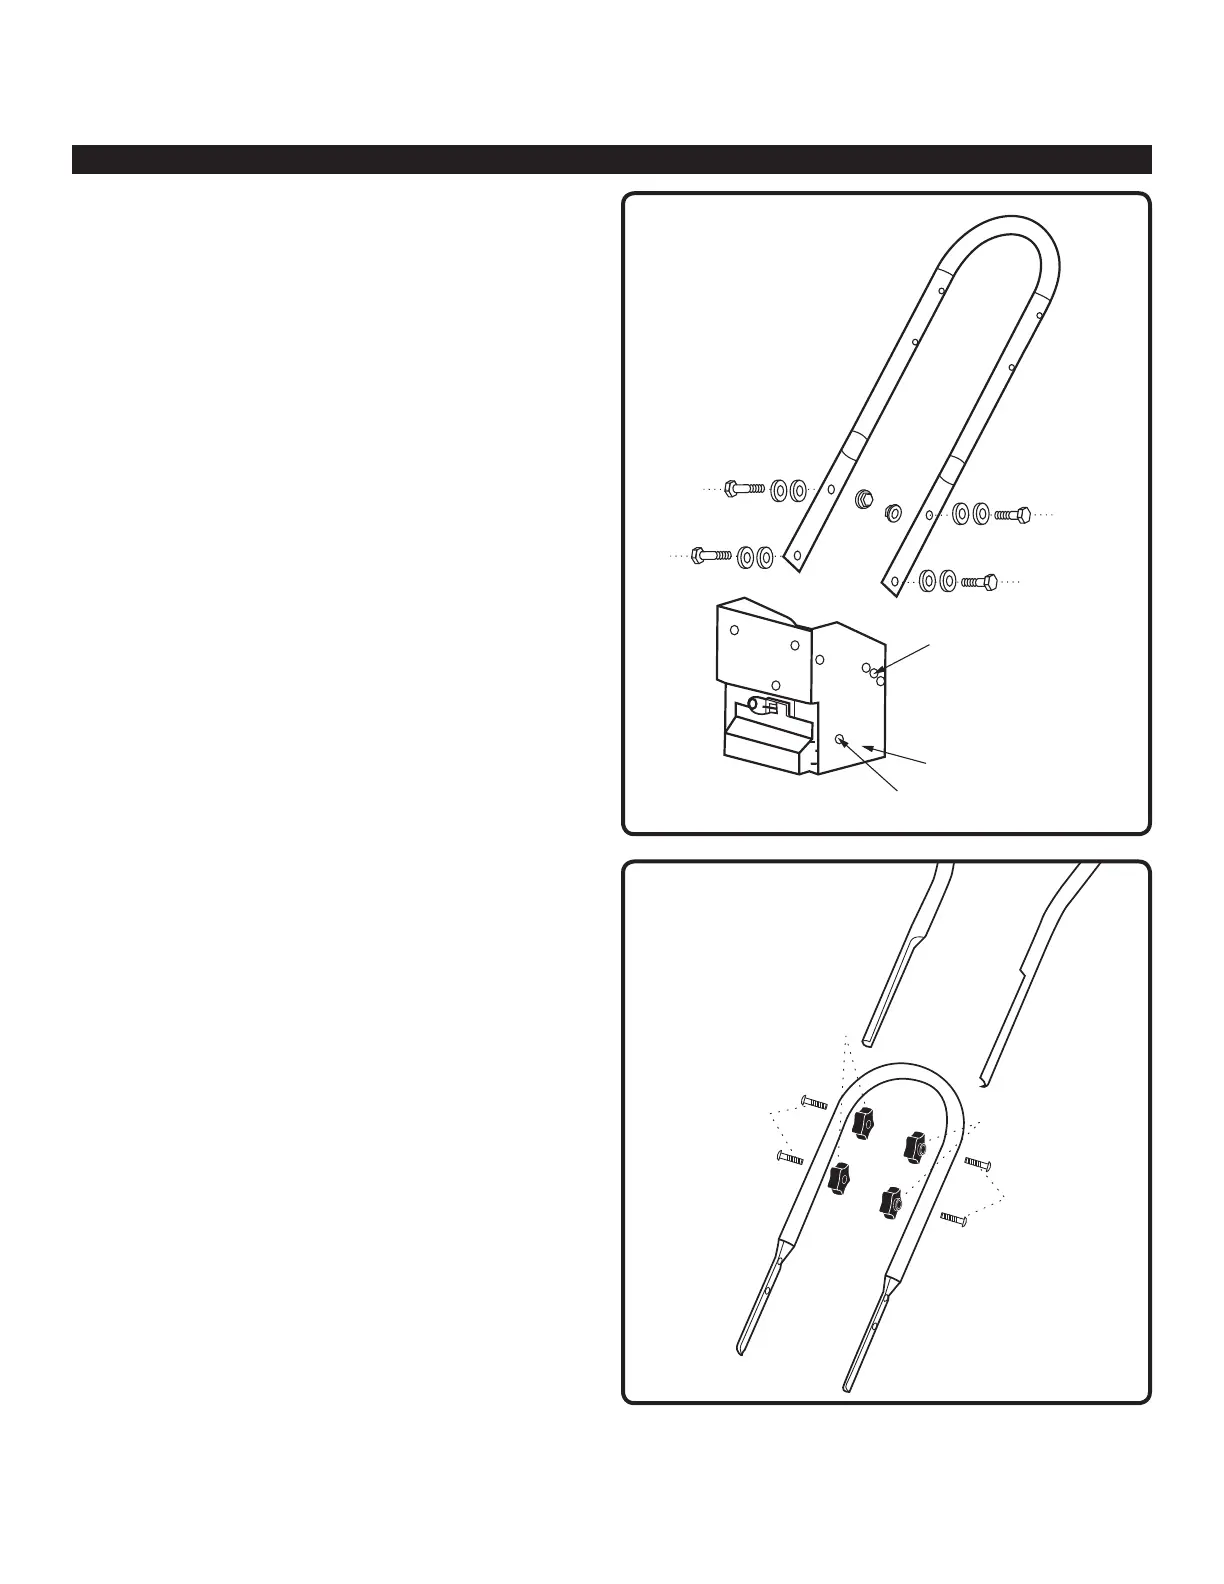
ATTACH LOWER HANDLE
(See Figure 4)
1. Loosen the lower handle bolts.
2. Align the lower handle holes to the middle height
adjustment holes in the transmission cover and install
the M10 x 25mm flange head bolts, lock washers and
nuts. Tighten all four bolts at this time.
ATTACH UPPER HANDLE (See Figure 5)
1. Slide the upper handle down over the lower handle and
align the holes.
2. Insert the saddle bolts into the holes as shown and
securely with the handle knobs.
3. Tighten the handle knobs securely.
ATTACH FRONT HANDLE
(See Figure 1)
1. Slide the front handle onto the outside of the base frame
and align the holes.
2. InstallthefourM8x25mmbolts,atwashersandlocknuts
and tighten securely.
Saddle Bolts
Saddle Bolts
Handle Knobs
Handle Knobs
Figure 5
Transmission Cover
Height
Adjustment
Holes
Lower Holes
Figure 4