7
Fig 1
Start REC - The dvr can be manually switched to start the recording and stop the recording, When the
DVR is recording the icon in the top right of the screen will turn RED REC • when it is
not recording it will turn GREY.
Padlock - The DVR has a built in G-Sensor to lock video #les from the automa-c loop recording , but this
can be manually applied by pressing the padlock bu.on.(Fig 2 )
Recorded video %les - Press this icon to view the recorded video #les.
DVR se' ngs Menu - Press this icon to enter the DVR se/ ngs
Fig 2
Locked - This is the symbol of a video which has been locked, so the automa0c loop recording can not
overwrite this #le
Un-Locked - This is the symbol of a video which has not been locked , and the automa1c loop recording
will overwrite this #le, to play a locked #le you will need to unlock it #rst.
Dustbin - This icon can be pressed to delete a video #le by hand.
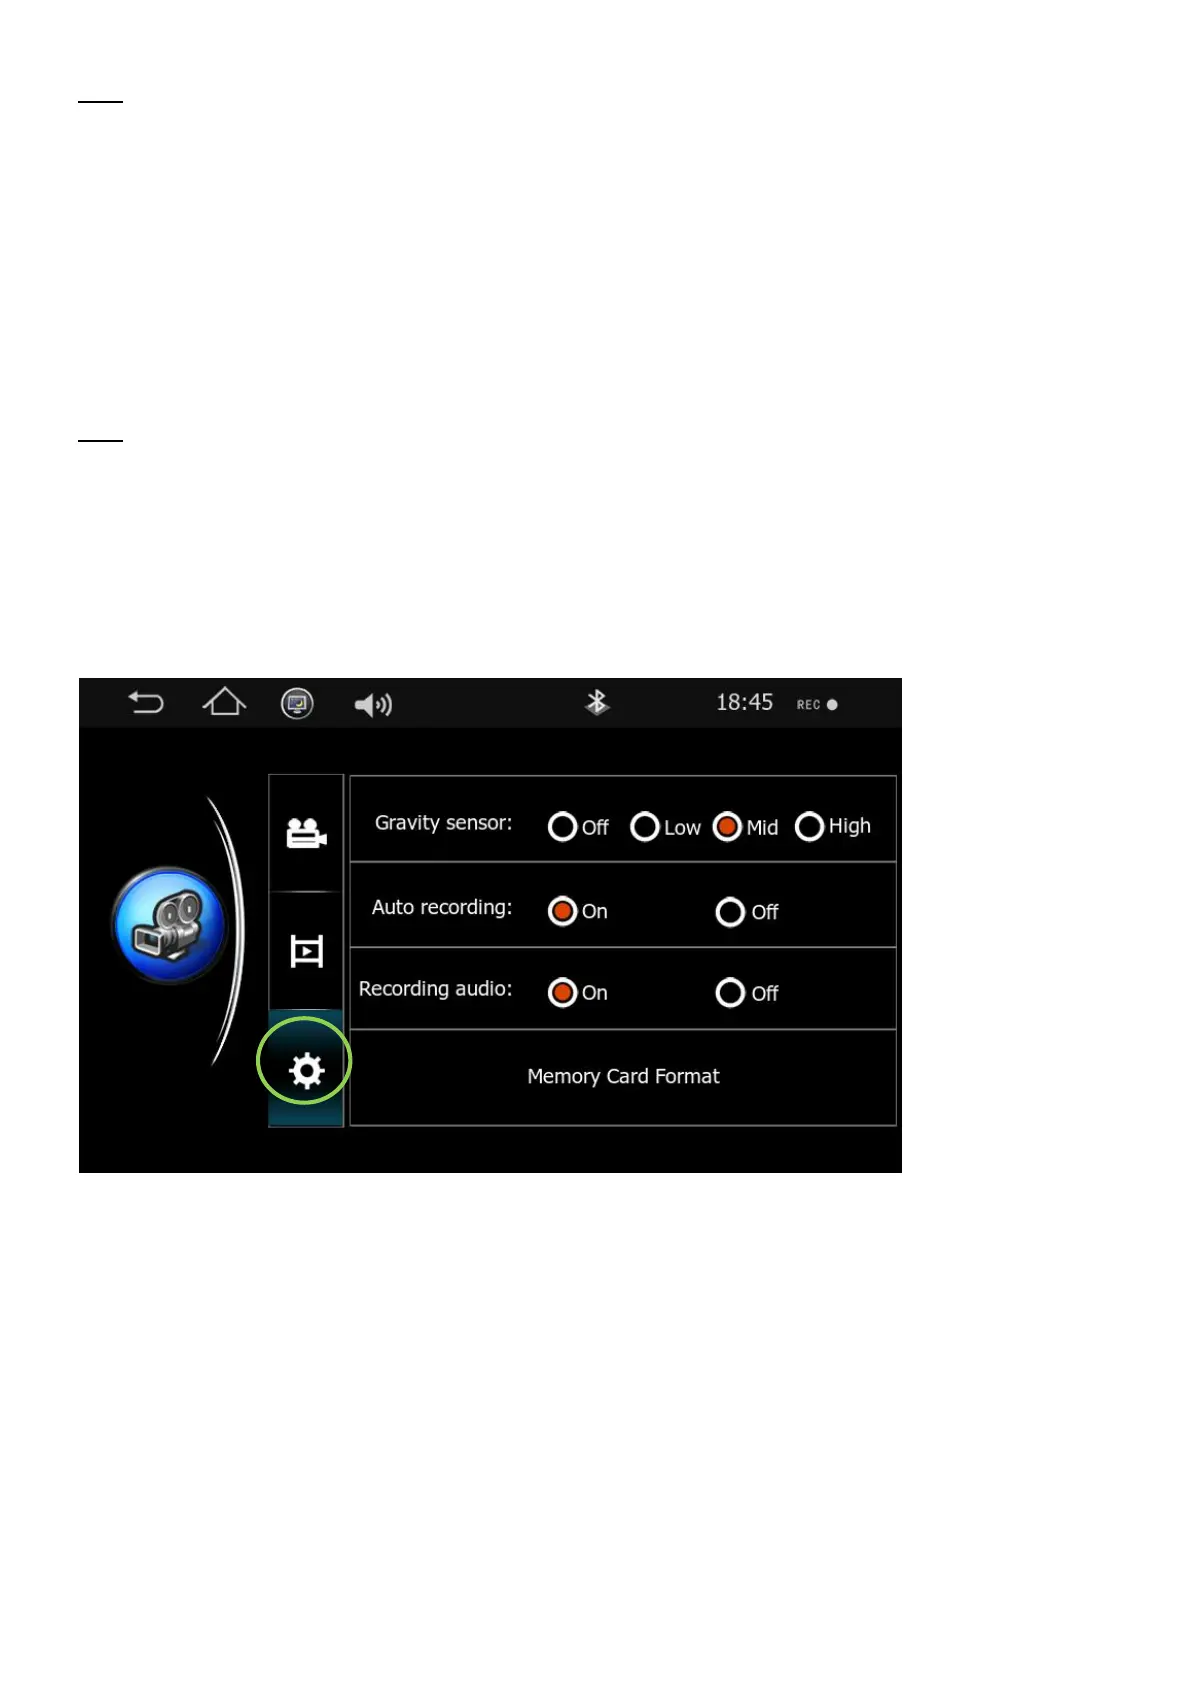
Gravity Sensor (G-Sensor) - Choose the sensi2vity level of the G-Sensor, for more informa3on of how this
works please see page XXX
Auto Recording - This op4on turns auto recording On and O", When in the o" posi5on the recording will
have to be start by hand, when in the On posi6on each 7me the vehicle is switched on
the DVR will start to record.
Recording audio - Switch the microphone On or O".
Memory Card Format - When you press this bu8on, it will delete all the video o" the SD card, before
pressing this bu9on please make sure you have saved all the informa:on from
the card #rst.
To keep the DVR in working order, you must format the SD card every 4-5 weeks.
 Loading...