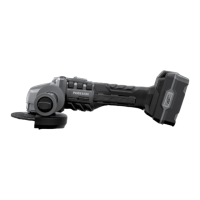
1. Adjust the guard
7
such that any sparks or
detached parts cannot hit either the user or
any bystanders.
2. The guard
7
must also be positioned such
that the sparks cannot ignite combustible
parts, including those in the surroundings.
3. Turn the guard
7
to the required position so
the clamp should match the notches on the
guard
7
.
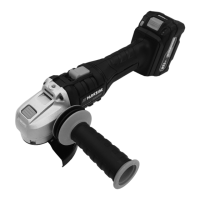
Q Attaching / removing the
accessory
WARNING!
u Always remove the battery pack from the
product before changing the accessory in
order to avoid switching it on accidentally.
u Always use the correct accessories according
to the intended use! Observe the technical
requirements of this product (see section
Technical data) when purchasing and using
accessories!
u Accessories can be sharp and become hot
during use! Handle them carefully! Wear
safety gloves when handling accessories in
order to avoid injuries like burns and cuts!
u Never press the spindle lock whilst the
spindle is rotating!
u The arrow on the accessory must correspond
to the arrow showing the direction of rotation
(running direction shown on the product).
u Ensure that the accessory is suitable for the
rotational speed of the product.
u Do not use any saw blades.
CAUTION! RISK OF INJURY!
u Only use accessory recommended by the
manufacturer. Using other attachment tools
and other accessories can represent a risk of
injury for you.
u Only use accessory, which bear information
about the manufacturer, type of binding,
dimension and permitted number of
revolutions.
u Only use grinding discs where the printed
rotational speed is at least as high as what
has been specified on the product marking.
u Do not use any broken, cracked, or otherwise
damaged accessories.
u Only use flawless grinding discs (ringing
test: when you strike the disc with a plastic
hammer, it results in a clear sound).
u Ensure that the accessory dimensions match
those of the product.
u Never re-drill a locating hole which is too
small to make it larger.
u Never use separate bushings or adapters in
order to make discs with a hole that is too
large fit the product.
u Never operate the product without protective
equipment.
u Support plates or workpieces to reduce the
risk of kickback from a jammed disc. Large
workpieces may bend under their own
weight. The workpiece must be supported on
both sides of the disc, near the disc as well
as at the edge.
u Always reassemble the product completely
after replacing accessories.
1. Press and hold the spindle lock button
10
.
2. Release the locking flange
8
, with the chuck
key
5
.
3. Mount the desired accessory onto the
backing flange
9
. Label should always face
the product.
4. Mount the locking flange
8
on the spindle.
5. Press and hold the spindle lock button
10
and tighten the locking flange
8
tight again
using the chuck key
5
.
15 GB
 Loading...