17GB
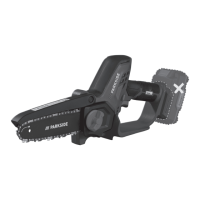
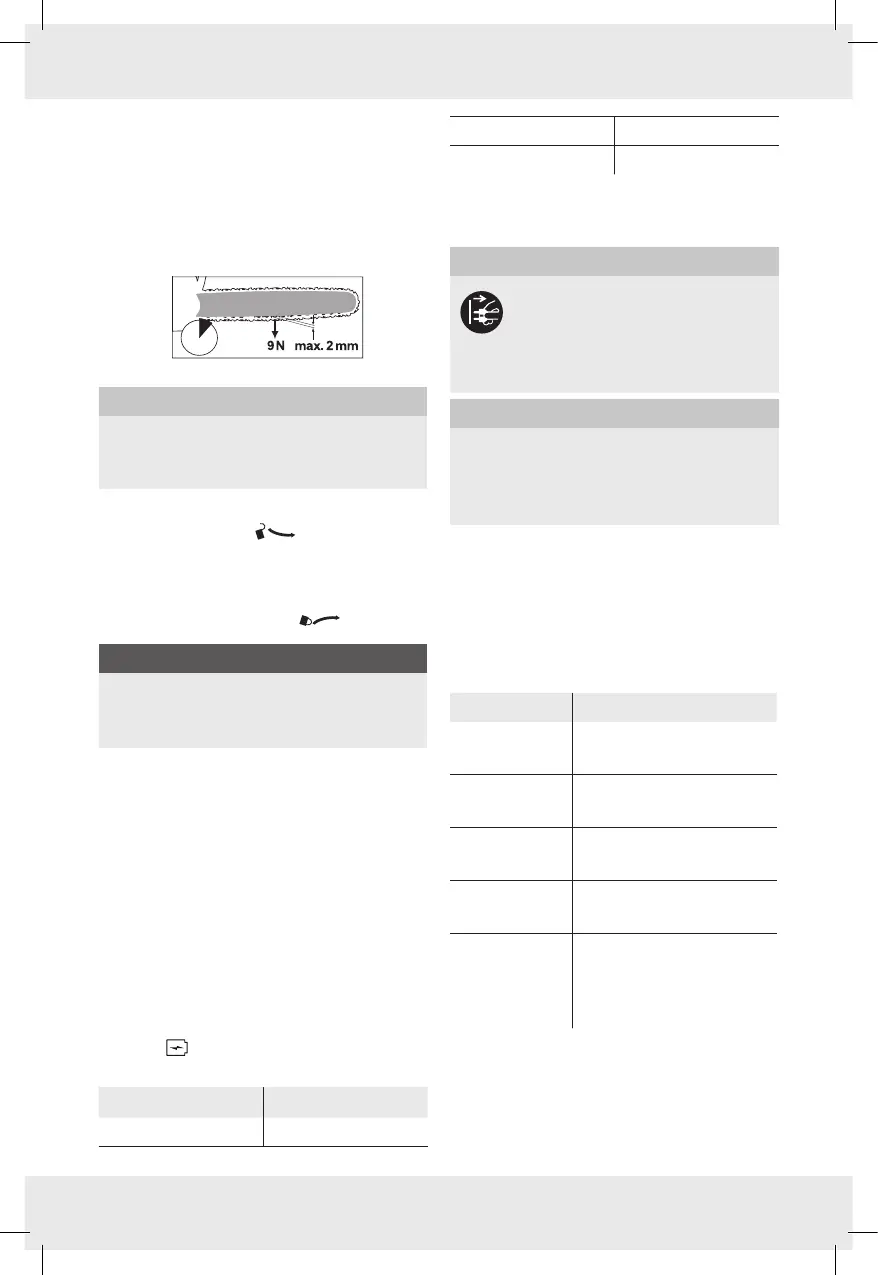
The chain is correctly tensioned if it does not
sag at the rail underside and can be rotated
completely around with the gloved hand.
When the saw chain
[] is tensioned with 9 N
(approx. 1kg), the gap between the saw chain
[] and the guide rail [9] may not be more than
2 mm.
10 min
m
WARNING!
u Switch off the product and remove the
battery pack
[] before carrying out any
maintenance work!
1. Loosen the mounting screw
[8] of the
sprocket cover
[7] .
2. The spring on the chain tension pin
automatically ensures a sufficient tension.
3. Tighten the mounting screw
[8] of the
sprocket cover
[7] again .
NOTE
u The chain tension of a new chain saw
[]
must be readjusted after a maximum of
5 cuts.
Attaching/removing the
battery pack
Attaching the battery pack: Align the
battery pack (B
[]) to the handle and slide
it into it. Ensure it clicks noticeably in place.
Removing the battery pack: Press the
release button (B
[]) on the battery pack.
Pull the battery pack (B
[]) out.
Checking the battery pack
charging level (Fig. B)
Press (B []). The charging level LEDs
(B
[]) light up:
LED (B [])
Charging level
Red/orange/green Maximum
Red/orange Medium
Red Low
Charging the battery pack
(Fig. C)
m
WARNING! RISK OF INJURY!
Always unplug the battery charger
(C
[]) from the mains before
removing the battery pack (B
[])
from the charger or inserting the
battery pack.
NOTE
u The battery pack (B
[]) may be charged
at any time without reducing its life.
u Interrupting the charging process does
not damage the battery pack(B
[]).
Charge the battery pack (B
[]) before
operation when it is at medium or low
charging level.
The charging control LEDs (red (C
[])
and green (C
[]) indicate the status
of the charger (C
[]) and the battery
pack(B
[]):
LED Status
Red LED lights
up
Battery pack (B
[])
charges
Green LED
lights up
Battery pack (B
[]) fully
charged
Green and red
LED flashing
Battery pack (B
[])
defective
Red LED
flashing
Battery pack (B
[]) too
cold or too warm
Green LED
lights up
(without
battery pack)
Charger ready
1. Insert the battery pack (B
[]) into the
charger (C
[]).
2. Connect the power cord with power plug
(C
[]) of the charger to a socket-outlet.
434668_2304_CZ_SK_HU_SI_02.indb 17434668_2304_CZ_SK_HU_SI_02.indb 17 11/3/2023 12:17:24 PM11/3/2023 12:17:24 PM
 Loading...