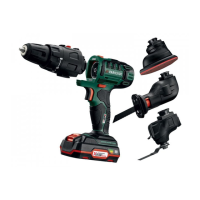
PASSP 20-Li A1
GB
│
IE
│
21 ■
WARNING!
■ To avoid potential risks, if the appliance
power cable is damaged, it must be replaced
by the manufacturer, its customer service or
by a qualified technician.
ATTENTION!
♦ This charger can only charge the following
batteries: PAP 20 A1/PAP 20 A2/PAP 20 A3.
♦ A current list of battery compatibility can be
found at www.Lidl.de/Akku.
Before use
Charging the battery pack (see fig. A)
CAUTION!
► Always unplug the appliance before you
remove the battery pack from or connect the
battery pack to the charger.
NOTE
► Never charge the battery pack at an ambient
temperature of below 10°C or above 40°C.
If a lithium-ion battery is going to be stored
for an extended period, the charge level
should be checked regularly. The optimum
charge level is between 50% and 80%. The
storage climate should be cool and dry and
the ambient temperature should be between
0°C and 50°C.
♦ Connect the battery pack
to the high-speed
battery charger (see fig. A).
♦ Insert the mains plug into the mains power
socket. The control LED
lights up red.
♦ The green control LED
indicates that the
charging process is complete and the battery
pack is ready for use.
ATTENTION!
♦ If the red control LED
flashes, this means
that the battery pack has overheated and
cannot be charged.
♦ If the red and green control LEDs both
flash, this means that the battery pack is
defective.
♦ Push the battery pack
into the appliance.
♦ Switch off the charger for at least 15 minutes
between successive charging sessions. Also
disconnect the power plug from the mains
power socket.
Inserting/removing the battery pack
Attaching the battery pack:
♦ Push the rotation direction switch
into the
middle position (lock). Push the battery pack
into the handle until it clicks into place.
Removing the battery pack:
♦ Press the release button
and remove the
battery pack
.
Checking the battery charge level
♦ Press the battery charge level button to
check the status of the battery (see also main
diagram).
The status/remaining charge will be shown on
the battery display LED
as follows:
♦ RED/ORANGE/GREEN = maximum charge
RED/ORANGE = medium charge
RED = low charge – charge the battery
Switching on/off
Turn on
♦ Press and hold the ON/OFF switch
to start
up the tool.
The LED work light lights up when the ON/
OFF switch is pressed lightly or fully. This
provides illumination of the work area in poor
lighting conditions.
Switching off
♦ Release the ON/OFF switch
to switch off the
appliance.
IB_329707_PASSP20-LiA1_LB8.indb 21 31.08.20 09:39
 Loading...


