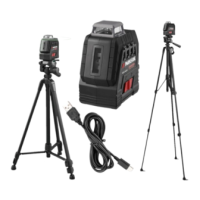
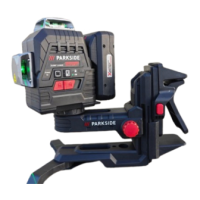
The PARKSIDE PKLL 8 A3 Self-Levelling Cross Line Laser Level is a versatile tool designed for determining and verifying horizontal and vertical lines in enclosed operating sites. It is not intended for commercial use.
Function Description:
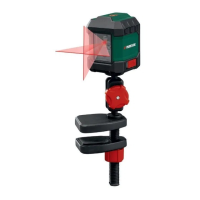
The device projects two laser lines, one horizontal and one vertical, which can be used individually or simultaneously to create a cross-line pattern. It features an automatic levelling system that corrects irregularities of up to ±4° within approximately 4 seconds. When the automatic levelling is active and within range, a green LED indicator (2) illuminates. If the device is outside the ±4° self-levelling range or held freely, the LED indicator (2) turns red, and the laser lines are switched off, indicating that automatic levelling is not possible.
The PKLL 8 A3 also offers a "locked cross lines" mode, allowing the laser lines to be permanently switched on even if the device is outside the ±4° levelling range. In this mode, the LED indicator (2) will be red. This feature is useful for projecting lines at specific angles that are not perfectly horizontal or vertical. The device is switched on and off using a LOCK switch (4), which also locks the pendulum unit during transport to prevent damage from strong movements.
Important Technical Specifications:
- Operating voltage: 3 V === (direct current)
- Batteries: 2 x 1.5 V-Batteries, Type AA
- Working area: At least 8 m (can be reduced by unfavourable environmental conditions like direct sunlight)
- Levelling accuracy: +/- 0.5 mm/m
- Typical self-levelling range: ± 4°
- Typical levelling time: Approx. 4 seconds
- Operating temperature: +5 °C to 35 °C
- Max. relative humidity: ≤ 90%
- Laser class: 2
- Wave length (λ): 635 nm
- Maximum performance P max: 1 mW
- Tripod mount: 1/4"
- Product weight: 310 g (without batteries)
- Tripod weight: 330 g
- Product dimensions: Approx. 70 x 61 x 90 mm
- Tripod dimensions: 65 cm
Usage Features:
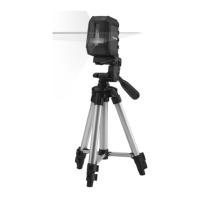
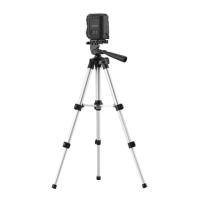
The laser level is designed for ease of use and can be operated either on a stable surface or mounted on the included tripod.
- Inserting/Changing Batteries: Open the battery compartment cover (5a) and insert two AA batteries into the battery compartment (5), ensuring correct polarity. The LED indicator (2) blinks red when the battery is low. Always replace all batteries simultaneously with new ones from the same manufacturer and capacity.
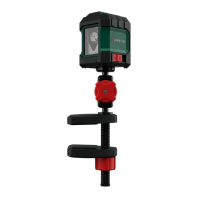
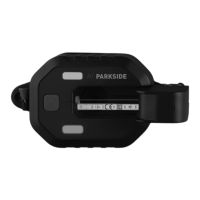
- Switching On/Off: Push the LOCK switch (4) to the "on" position to activate the device and project laser lines from the laser beam opening (7). Push the LOCK switch (4) to the "off" position to switch off the device and lock the pendulum unit.
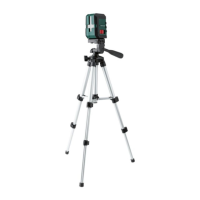
- Automatic Levelling: Place the device on a level, firm surface or fasten it to the tripod using the 1/4"-tripod thread (6). The device will automatically level itself within ±4°.
- Individual and Crossed Lines: When automatic levelling is active (green LED on), press the H-button (1) to toggle the horizontal line on/off, and the V-button (3) to toggle the vertical line on/off.
- Locked Cross Lines Mode (Working without Automatic Levelling): To use the device without automatic levelling (e.g., for inclined lines), push the LOCK switch (4) to the "off" position. Then, press and hold the H-button (1) until the red LED indicator (2) turns on. In this mode, the laser lines are permanently switched on, regardless of the device's angle, and are not levelled.
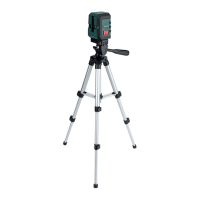
- Working with the Tripod: The included tripod (17) allows for height and angle adjustments.
- Setup: Extend the tripod legs (17) by releasing the blocking levers (16). Adjust the height and secure the levers. Use the bubble level (11) to ensure the tripod is straight.
- Height Adjustment: Loosen the locking screw (14) to extend the centre column for additional height, then tighten it.
- Horizontal Alignment: Loosen the long handle (12) to adjust the tripod flat head (18) horizontally until the air bubble in the spirit level (11) is centred. Tighten the long handle (12).
- Rotation: Loosen the locking screw (13) to rotate the tripod flat head (18) up to 360 degrees horizontally, then tighten it.
- Angle Adjustment: Loosen the locking screw (10) to adjust the angle of the tripod flat head (18) vertically up to 90 degrees, then tighten it.
- Securing the Cross Line Laser to the Tripod: Align the 1/4"-thread (6) of the laser with the 1/4"-screw (8) on the quick shoe (19). Tighten the screw using the metal key (9) located on the underside of the quick shoe (19).
- Removing the Quick Shoe: Pull the lever (11a) on the tripod flat head (18) to the side and remove the quick shoe (19).
Maintenance Features:
The product requires no specific maintenance.
- Cleaning: Never submerge the product in water or other liquids. Keep it clean for optimal performance. Use a dry cloth to clean the exterior. Clean the laser beam opening (7) with a soft air jet; for heavy contamination, use a slightly damp Q-tip without applying strong pressure.
- Storage: If not used for a prolonged period, remove the batteries and store the device in a clean, dry place away from direct sunlight.
- Repairs: For repair purposes, the product should only be opened by a qualified professional using original replacement parts to ensure safety and accuracy.
Safety Notes:
The device includes important safety instructions, such as warnings against direct eye exposure to the laser beam (Class 2 laser), explosion risks with batteries, and the importance of wearing safety gloves during battery handling. It is crucial to keep packaging materials away from children and avoid using the device in explosive environments. The device should not be exposed to moisture, direct sunlight, or extreme temperature fluctuations. Always switch off the device during transport to lock the pendulum unit and prevent damage. Keep the measuring tool away from pacemakers and magnetic data carriers to avoid interference or data loss.