Do you have a question about the Parkside PWBS 180 A1 and is the answer not in the manual?
Proper use includes various sanding, grinding, and removal activities.
Lists numbered components and their functions, such as ON/OFF switch and speed adjustment.
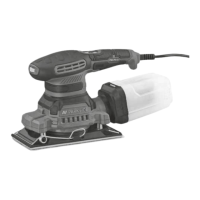
Details items included with the sander, such as tool, hose, dust bag, and accessories.
Provides noise emission values and vibration values for surface sanding.
Ensures a clean, well-lit work area, prevents operation in explosive atmospheres, and keeps bystanders away.
Covers plug matching, avoiding body contact with earthed surfaces, and using outdoor/RCD protected supplies.
Emphasizes alertness, PPE, preventing unintentional starting, proper attire, and using dust extraction.
Instructs on using the correct tool, maintenance, disconnecting power, proper storage, and keeping tools sharp.
Recommends qualified repair persons and identical replacement parts to maintain safety and functionality.
Covers intended use, accessory compatibility, guard usage, and speed requirements for safe operation.
Details accessory dimensions, thread matching, checking for damage, and ensuring secure fitting.
Emphasizes PPE, keeping distance, and hazards from flying fragments or rotating parts.
Covers handling, cord safety, standstill before putting down, avoiding flammable materials, and liquid coolant use.
Instructs to hold firmly, use additional handle, avoid hand near rotating parts, and position body away from blockage.
Advises caution near corners/edges to prevent jamming, bouncing, and loss of control or kickback.
Use approved tools, ensure discs don't protrude, securely mount guards for maximum safety.
Use discs for recommended applications, avoid lateral force on cutting discs, use correct flanges, and avoid worn discs.
Do not use oversized sanding sheets; ensure sheets do not protrude to prevent injury or kickback.
Mandates goggles, dust mask (FFP2), gloves, and avoiding hazardous materials like asbestos or certain wood dusts.
Includes switching off during power interruption, dry sanding only, switching on before contact, and tool standstill.
Use dust extraction, empty dust bag, cool down tools, and avoid processing materials hazardous to health.
Always remove plug before working, wear protective gloves when changing tools, and avoid placing appliance down without accessory.
Details how to attach and remove sanding sheets using the velcro surface on the sanding disc.
Press spindle lock, clean spindle, fit flange, place accessory, screw and tighten nut with spanner.
Connect suction hose to extraction nozzle and dust bag; use PPE and ensure ventilation.
Push the dust extraction adapter onto the extraction nozzle and connect an approved dust extraction system.
Hold firmly, ensure secure footing, connect extraction, and move the sander over the surface with moderate pressure.
Apply even pressure to prolong accessory life; excessive pressure increases wear without improving removal rate.
Remove hood segment for edge access; expect dust development and work surfaces close to edges.
Slide switch forward to turn on; release to turn off, or press rear end if locked.
Adjust speed using +/- buttons for coarse or fine sanding applications.
Clean regularly with a dry cloth, avoid sharp objects or liquids, and do not obstruct ventilation openings.
Empty the dust bag regularly for optimum dust extraction; open zip and shake out dust.
Warranty starts at purchase date; requires proof of purchase. Defects covered by repair, replacement, or refund.
Provides contact details (phone, email) for service in Great Britain, Ireland, and Cyprus.
