CLIO 3
This sheet is designed to help you with the installation of a Parrot product and is purely for information. Any installation performed in
compliance with the instructions appearing in this document is done under the sole responsibility of the installer, who is entirely responsible
for the quality of the installation. All rights reserved © Copyright 2011 PARROT SA RCS PARIS 394 149 496. May not be reproduced without the
authorisation of Parrot SA. Pictures for information only.
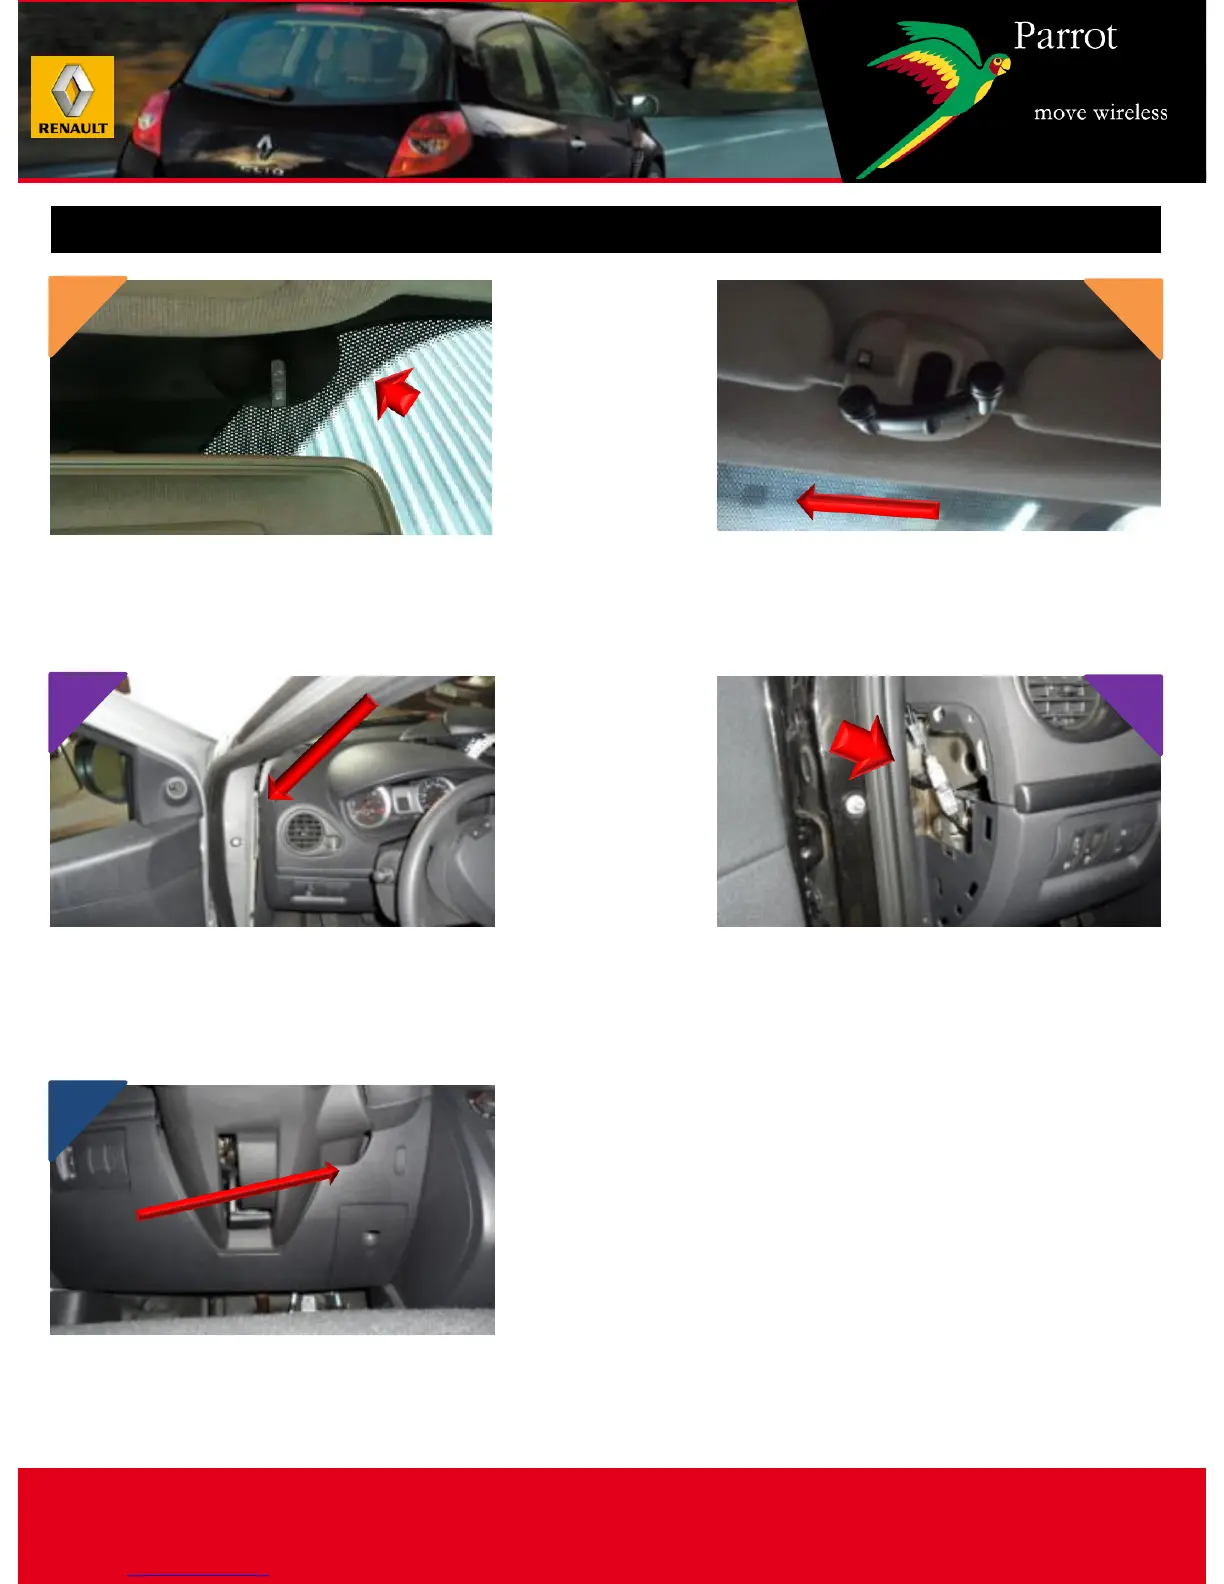
Run the cable under the headliner
towards the driver's side door.
Stick the antenna to the windscreen.
(If necessary use windscreen
adhesive for a better grip.)
Run the cable along the driver's side
windscreen support while replacing
the door seal.
Pass the cable into the dashboard on
the left side. (Connect the USB
extension.)
1
3
2
4
5
Run the cable under the steering
wheel panel towards the radio
housing, attaching with wire ties.
 Loading...