®
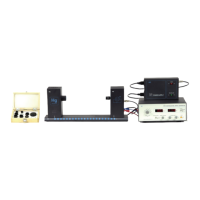
Model No. AP-8209 Photoelectric Effect Apparatus
14
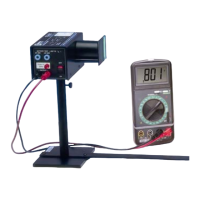
3. Adjust the –2—+30 V VOLTAGE ADJUST knob so that the current display is zero.
Record the voltage and current in Table 4.
4. Increase the voltage by a small amount (for example, 1 V). Record the new voltage and
current in Table 4.
5. Continue to increase the voltage by the same small increment. Record the new voltage
and current each time in Table 4. Stop when you reach the end of the VOLTAGE range.
4 mm Aperture
1. Cover the window of the Mercury Light Source enclosure.
2. On the Photodiode enclosure, replace the 2 mm diameter aperture with the 4 mm diameter
aperture. Put the 436 nm filter back onto the window.
3. Uncover the window of the Mercury Light Source enclosure. A spectral line of 436 nm
will shine on the cathode in the Photodiode enclosure.
4. Adjust the –2—+30 V VOLTAGE ADJUST knob so that the current display is zero.
Record the voltage and current in Table 4.
5. Increase the voltage by a small amount (e.g., 1 V) and record the new voltage and current
in Table 4. Continue to increase the voltage by the same small increment and record the
new voltage and current each time in Table 4. Stop when you reach the end of the
VOLTAGE range
8 mm Aperture
1. Cover the window of the Mercury Light Source enclosure.
2. On the Photodiode enclosure, replace the 4 mm diameter aperture with the 8 mm diameter
aperture. Put the 436 nm filter back onto the window.
3. Uncover the window of the Mercury Light Source enclosure. A spectral line of 436 nm
will shine on the cathode in the Photodiode enclosure.
4. Adjust the –2—+30 V VOLTAGE ADJUST knob so that the current display is zero.
Record the voltage and current in Table 4.
5. Increase the voltage by a small amount (e.g., 1 V) and record the new voltage and current
in Table 4. Continue to increase the voltage by the same small increment and record the
new voltage and current each time in Table 4. Stop when you reach the end of the
VOLTAGE range.