-"~"~~, ,_.c..,..~~ ~--.
1
SERVICE eleclra 3000 A
ANLEITUNG INSTRUCTION INSTRUCTION INSTRUCCION
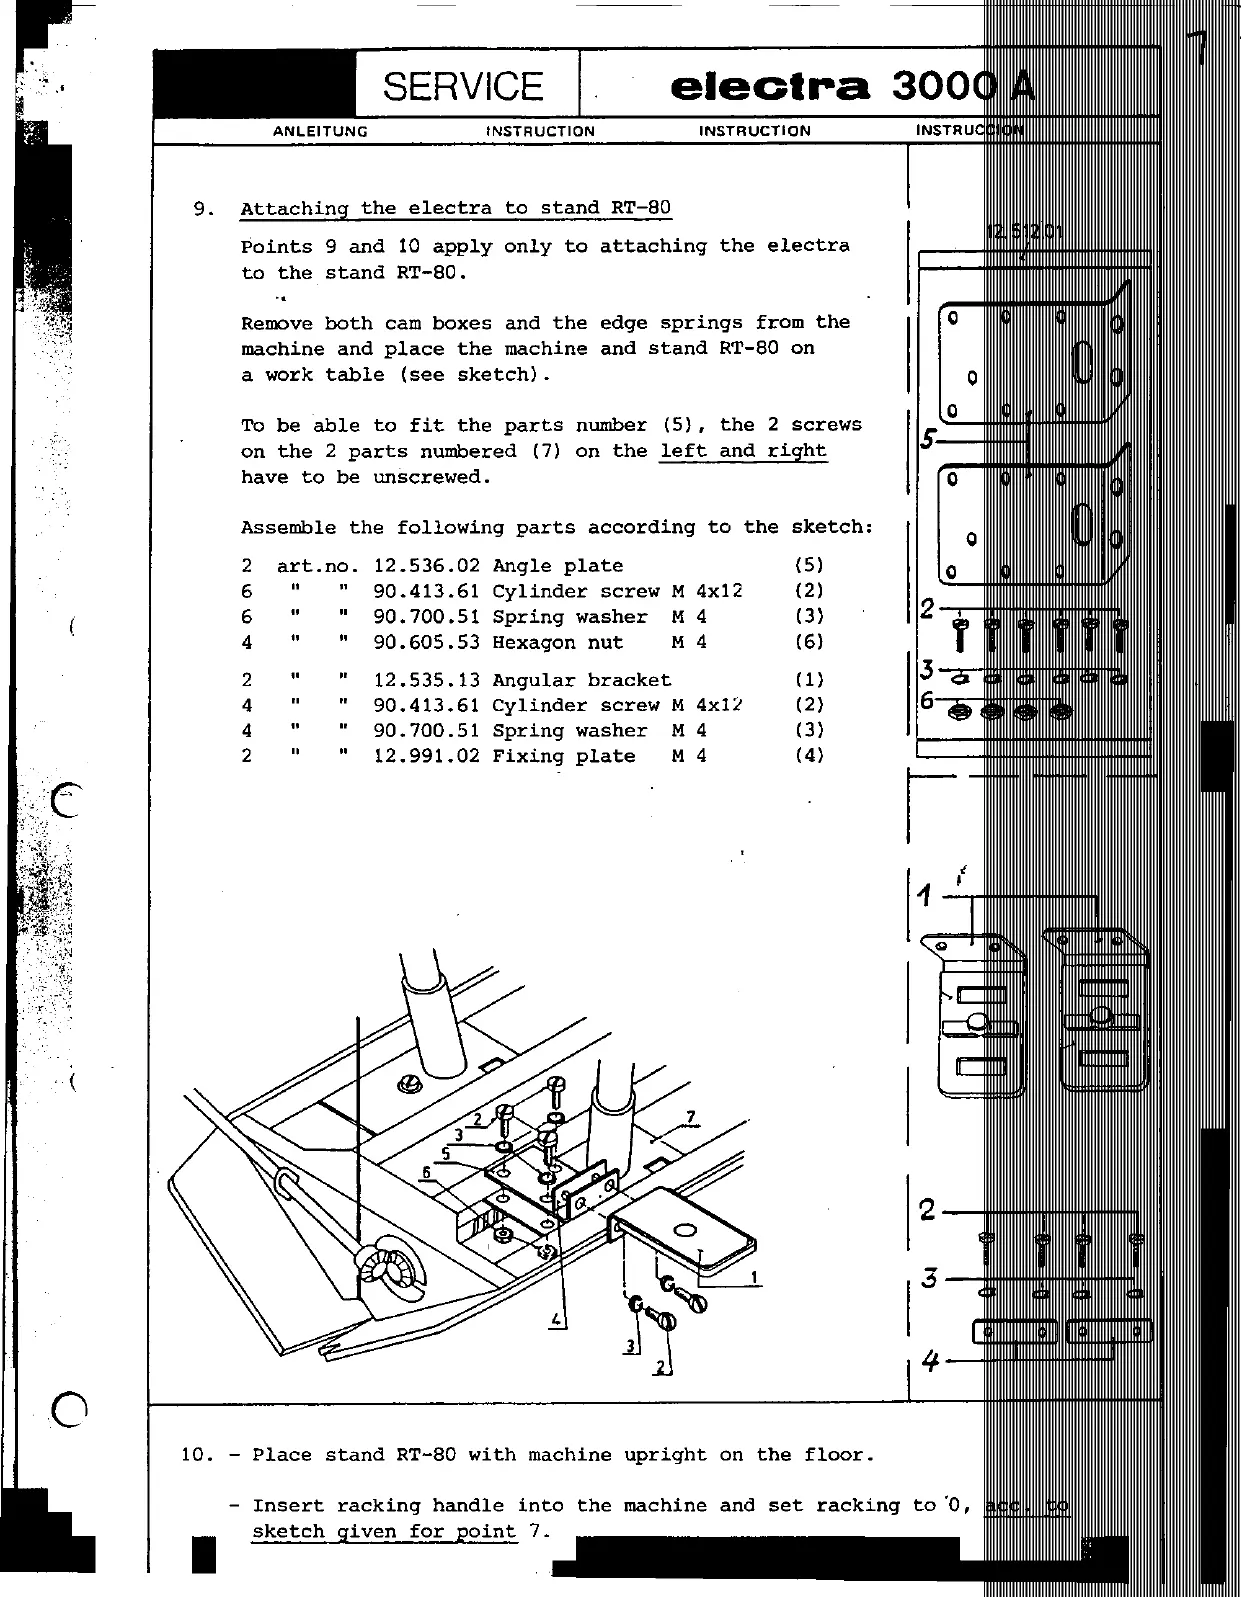
9. Attaching the electra to stand RT-80
.12.512:01
Points 9 and 10 apply only to attach1ng the electra
to the stand RT-80.
..
Remove both cam boxes and the edge springs from the 0 0 0
machine and place the machine and stand RT-80 on
a work table (see sketch). 0
0 0 0
To be able to fit the parts number (5), the 2 screws S
on the 2 parts numbered (7) on the left and right
have to be unscrewed. 0 0 0
Assemble the following parts according to the sketch: 0 [)
2 art.no. 12.536.02 Angle plate (5) 0 0 0
6 " "90.413.61 Cylinder screw M 4x12 (2) I
( 6 " "90.700.51 Spring washer M 4 (3) 2 , , , I .'
r' T T'
T Tr ~
4 " "90.605.53 Hexagon nut M 4 (6) I '"
2 " " 12.535.13 Angular bracket (1) 3 0 a 13 c3 <:3 0 I
4 " " 90.413.61 Cylinder screw M 4x12 (2) 6 t9. ~ t:9 !
4 " " 90.700.51 Spring washer M 4 (3) i
2 " " 12.991.02 Fixing plate M 4 (4) i
r---
I
"
'1 I
c:~
r=J r=:J
2
-t t +-1
1 3 I .I
~ a a a
If -(~:~: :§] ~
10. -Place stand RT-80 with machine upright on the floor.
-Insert racking handle into the machine and set racking to'O, acc. to
sketch given for point 7.
.
 Loading...