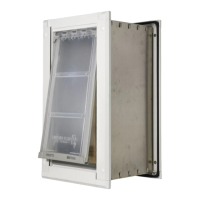
Endura Flap Door Mount
Congratulations on your purchase of one of the finest
pet doors made, featuring the exclusive Endura Flap.
TM
PARTS LIST
For single flap door mounts:
1 flap frame
• 1 trim frame
4x 1-3/4 inch screws
• 4x 2-1/4 inch screws
For double flap door mounts:
2 flap frames
• 4 tunnel pieces • 1 tube of silicone
4x 2-1/4 inch screws
• 4x 2-3/4 inch screws
For both single and double flap door mounts:
1 installation template
• 8 hole plugs
2 weather-strips
• 1 warranty card
1. Tape the provided template to the door.
The top edge of the cut-out line should
be 1-1/4 inch (or more) above the dog’s
withers (shoulders) for the single flap
door mount, and 2 inches for the double
flap door mount. Be careful not to unduly
reduce the strength of the door by cutting
too close to the bottom of the door. Level
the top edge of the cut-out line as shown
in Figure 1.
2. Mark the hole centers for the four holes
and remove the template.
3. Drill the four 3/8 inch holes as shown
in Figure 2. Note: Drill bit needs to be
long enough to go through the interior
and exterior of the door. It should be
both level and straight when making
the holes to ensure the two frames
will align properly.
4. Draw lines to connect the outsides of
the holes using a straight edge as shown
on the template.
5. Cut along the line as shown in Figure 3.
Note: Jigsaw needs to be level and
straight when cutting the lines to ensure
the two frames will align properly.
6. Install the weather-stripping into the
groove on both frames with the start/end
gap at the bottom.
7. If a single flap door mount, place the pet
door trim frame on the outside of the door
and the flap frame on the inside and skip
to Step 14.
8. If a double flap door mount, assemble
the four-piece tunnel by first bending the
screw tabs down as shown in Figure 4 in
the top and bottom tunnel pieces (the two
identical shorter pieces). Note: Only bend
the tabs once, bending more than once
may result in the tabs breaking off.
F
or replacement flaps and parts or
other quality pet door products, visit
petprosupplyco.com
Endura Flap
TM
| U.S. Pat. No. 7,814,956 | Pat. Pending
Installation Instructions For Single and Double Flap Models
These images are representative. Appearance of your pet door may vary slightly depending on model.
TOOLS REQUIRED
Pencil
Drill with
3/8 inch drill bit
Level
Jigsaw or reciprocating saw
Phillips head screwdriver
Please read instructions
thoroughly before
beginning installation.
Figure 4: Bend the top and bottom of screw tabsFigure 3: Cutting along the drawn line
Figure 2: Drilling four 3/8” holes
Figure 1: Leveling the template
Figure 5: Remove the four
flap assembly screws
Instructions