3 4
ASSEMBLY INSTRUCTIONS
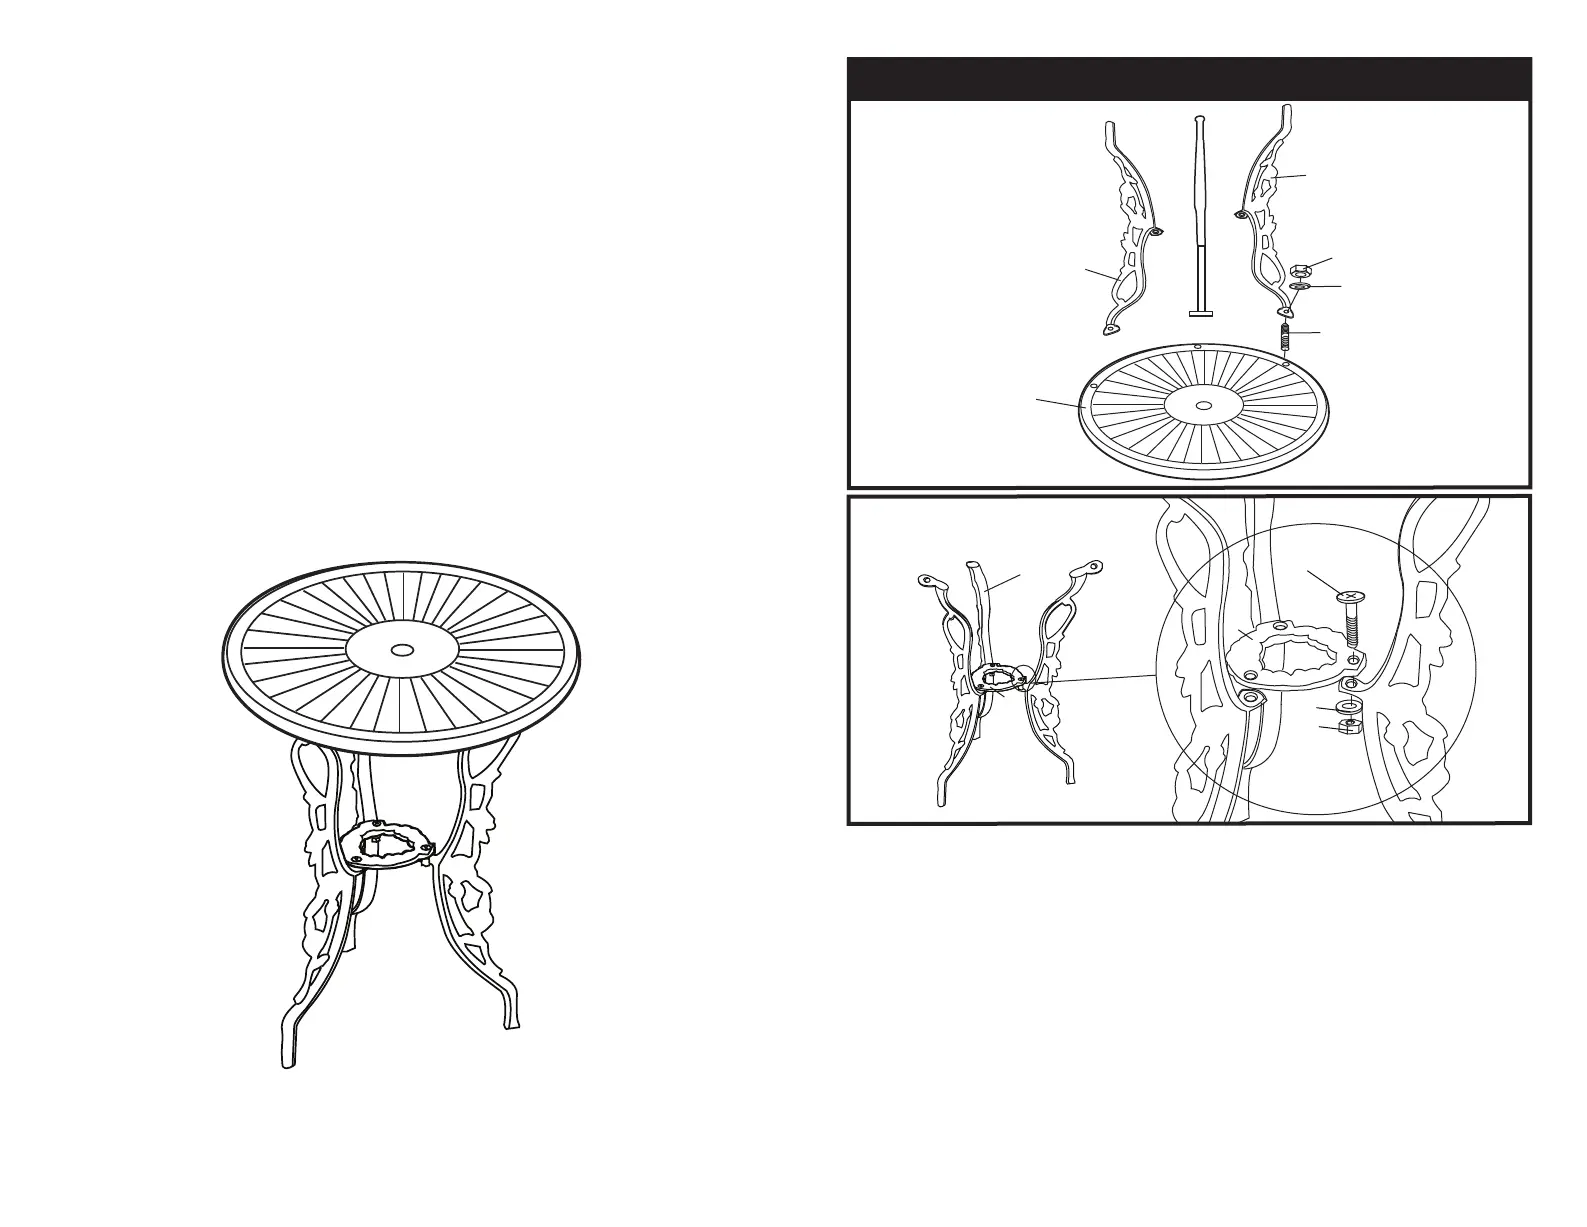
Figure 2
D
E
E
G
I
J
6. (SEE FIGURE 2) Position table top (D) upside down on a clean surface. Thread studs (G) into holes
on bottom of table top (D).
7. Place the holes at top of leg (E) over threaded studs (G) on bottom of table top (D).
8. Secure using washers (I) nuts (J). Do not over tighten fasteners.
9. Attach remaining legs, repeat step 7 and step 8.
10. (SEE FIGURE 3) Position table right side up.
11. Place table center brace (F) on top of tabs on table leg (E) and align holes.
12. Insert bolt (H) through top of table center brace (F) and table leg tab. Secure with washer (I) and
nut (J). Do over tighten fasteners.


 To Previous Page
 Loading...
