3
www.lockncharge.com www.pclocs.com.au
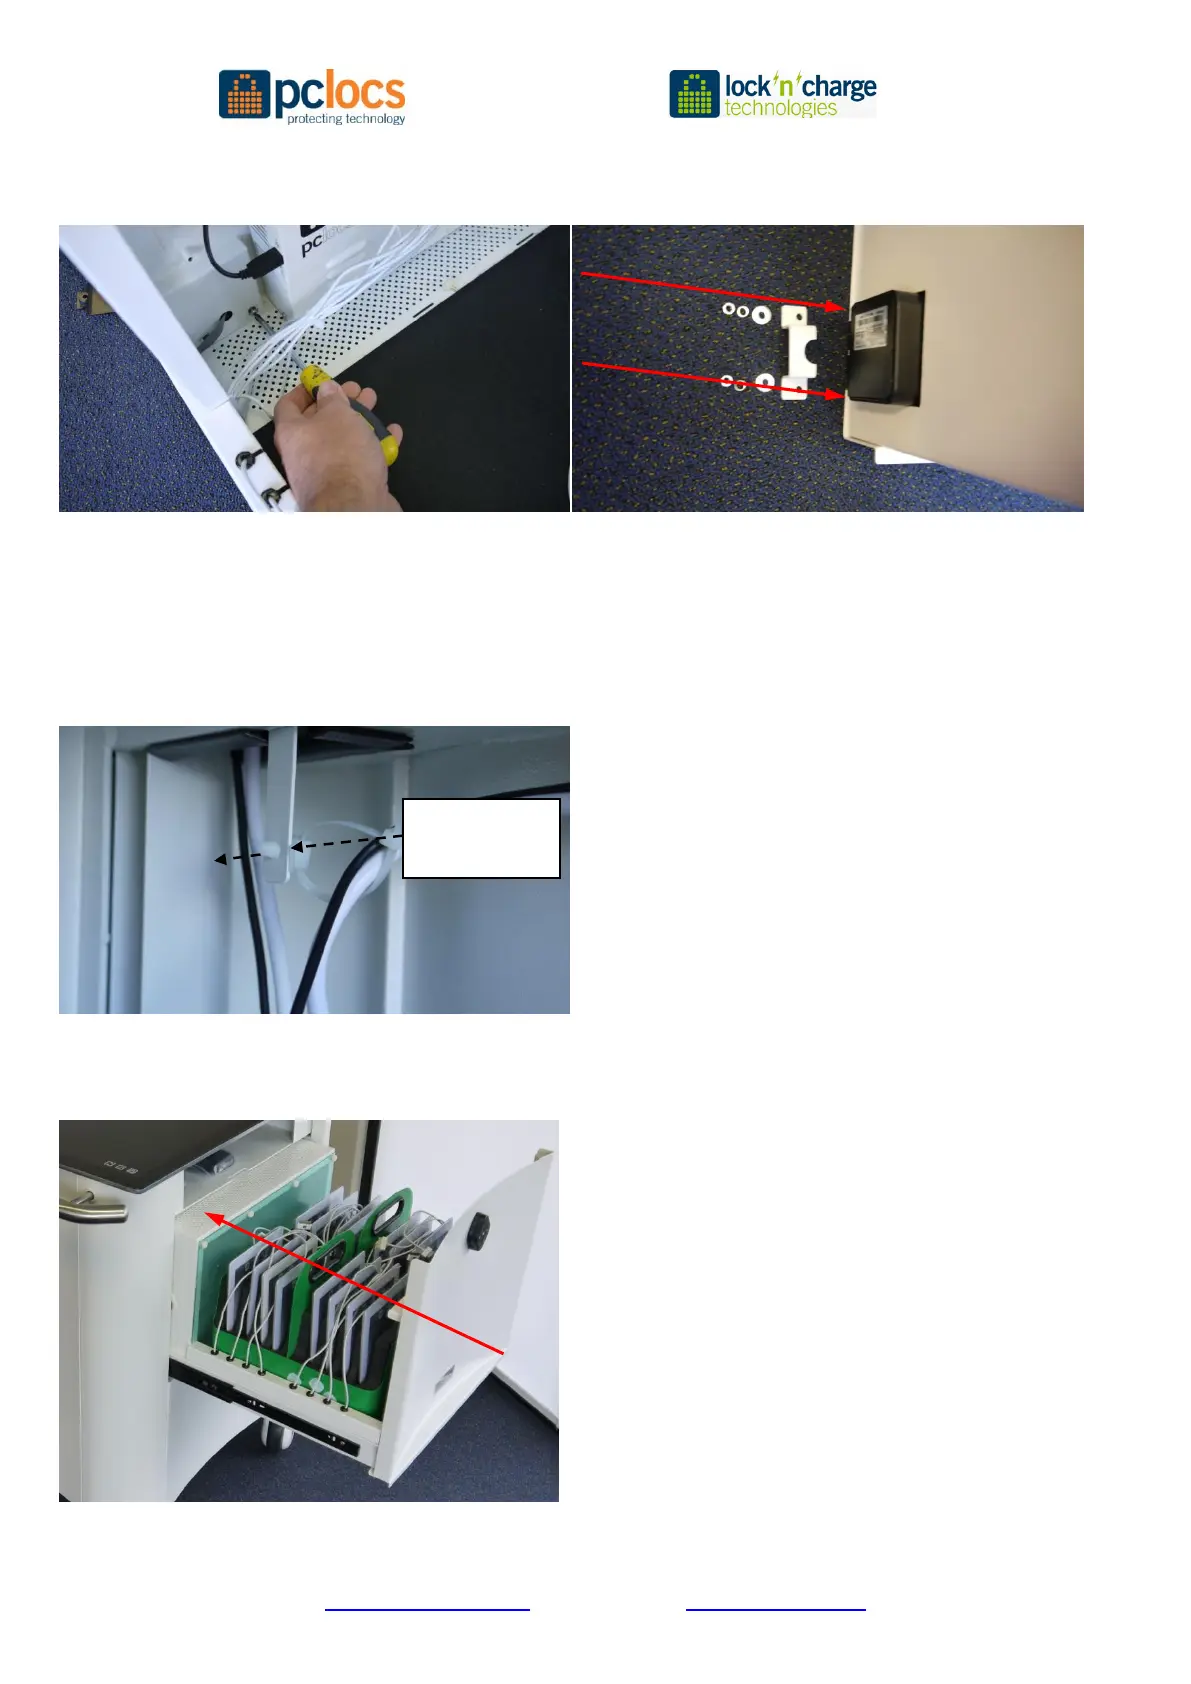
10. For Version (A) replace the two screws using a Philips screwdriver and an 8mm socket for the nuts on the rear
Note the bracket, washers and nut in this order
Note:
For version (A) the lock mounting location may be altered, so when re-assembling do not allow the lock body to
protrude lower than the bottom of the top drawer otherwise it may catch on the lower drawer when the cart is re-
assembled.
11. For all versions:
Replace the power cord cable tie by pushing through hole
12. Replace the drawer - Follow the reverse of steps 1 to 4
Extend the drawer runners to full extension and align the two sections. Gently push the drawer in taking care to
maintain the parallel relationship both sides – do not twist or insert unevenly.
13. Test the lock to ensure everything works OK
 Loading...