6
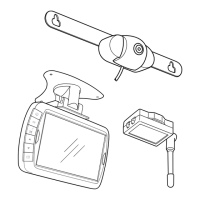
18. Remove the Űlm from the foam adhesive pad and press stand Űrmly onto mounting surface.
NOTE: After mounting, protect the mounting surface from direct sunlight for 24 hours.
19. Slide the monitor onto the monitor arm. The monitor angle can be adjusted by loosening the
monitor angle adjustment knobs, tilting the monitor, then tightening the knobs.
20. Plug the monitor cigarette lighter/accessory socket power cord into the monitor power port.
21. Plug the monitor cigarette lighter/accessory socket power cord into a 12-volt DC power port. The
screen will Ųash, then turn oŮ, and the monitor’s blue power LED will blink, indicating the monitor is
in standby mode (monitor has power and is turned on, but the vehicle is not in reverse).
22. Route and secure all wires as needed.
OPERATION
Testing the System
1. Push the ON/OFF button. The blue LED will light.
2. With the park brake applied, turn the vehicle ignition switch to the ON position. Do not start the
vehicle.
3. Shift the vehicle to reverse to power the transmitter. The blue power LED will light continuously until
it picks up a signal. Then the monitor will display the image from the camera.
4. If the image does not display, check your connections and make sure the camera view is not
obstructed.
5. If the image still does not display, the unit may need to be “paired”. See “Adjusting Monitor
Settings” section. Also see “Troubleshooting” section.
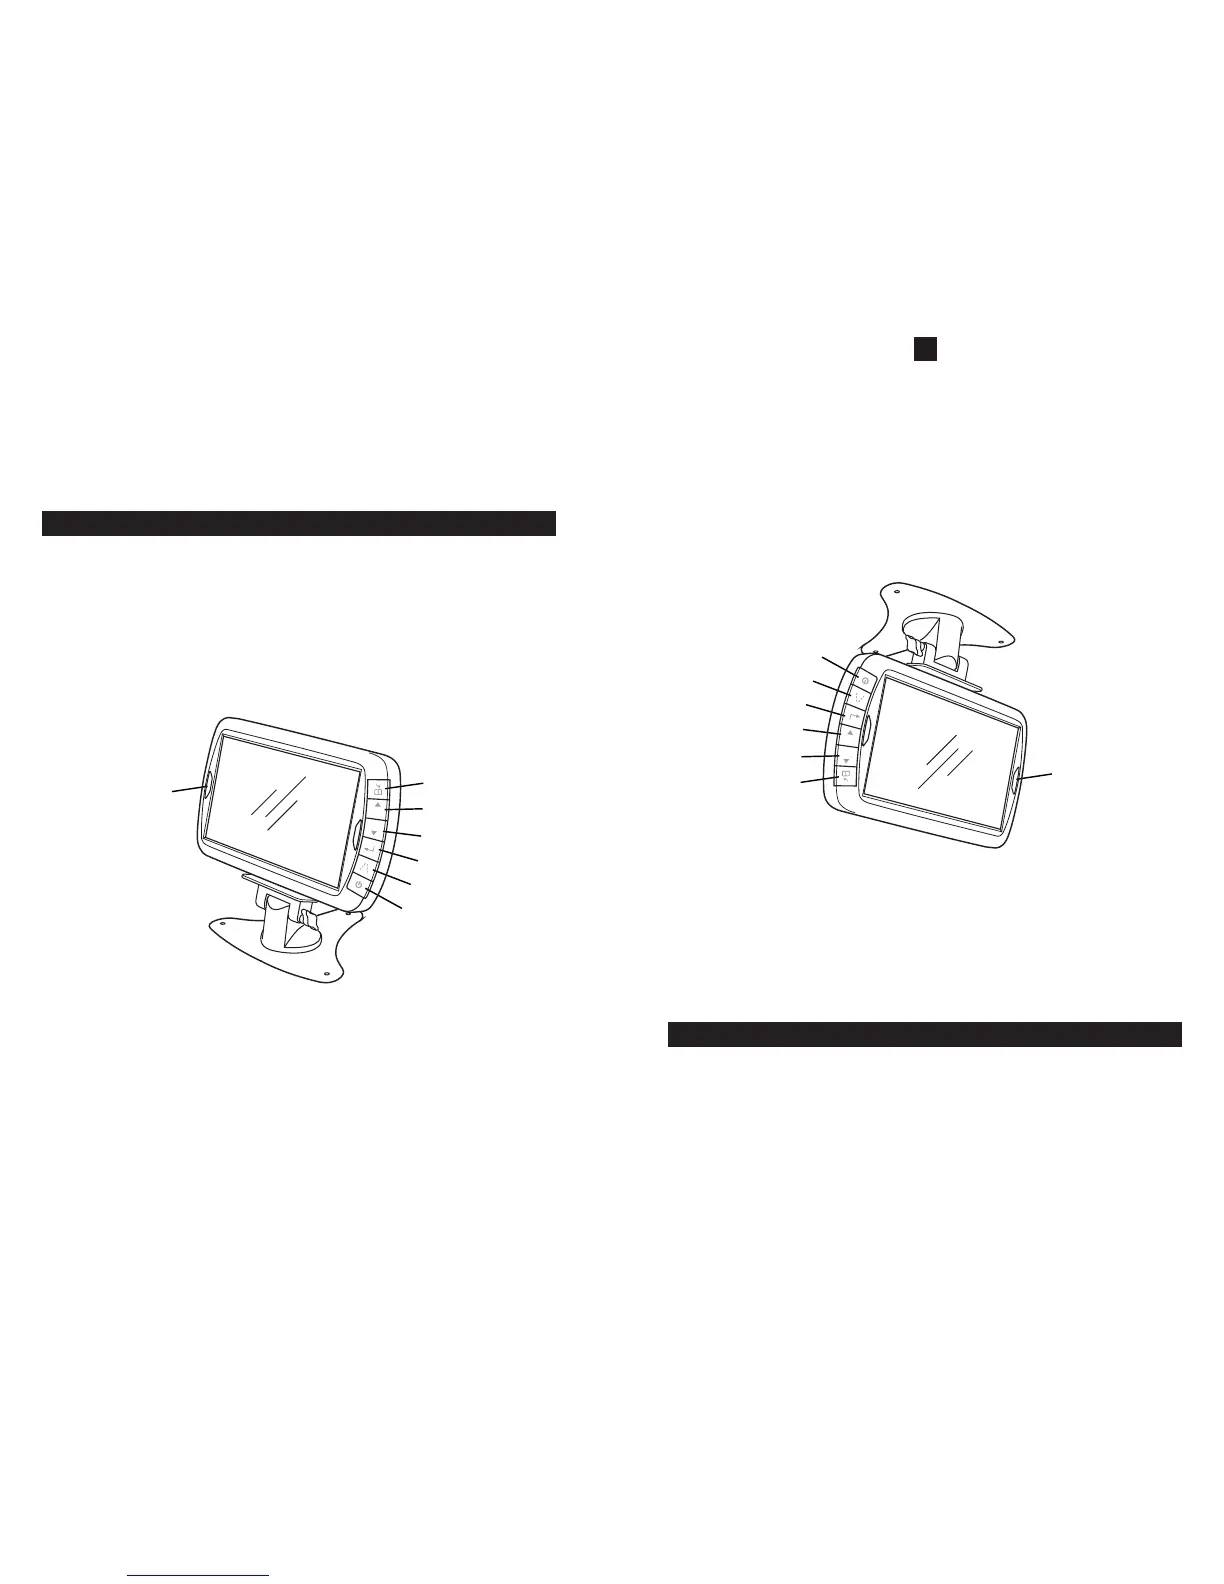
Monitor Controls
1
3
4
5
6
2
7
A
M
Legend
1. Menu Button
2. UP Button
3. DOWN Button
4. Select Button
5. Guidelines Button (turns guidelines on and oŮ)
6. ON/OFF Button
7. Blue Power LED
ON/OFF Button
Press to turn the display on. Press it again to turn the display oŮ.
NOTE: In menu mode, the menu button also serves as a “back” button to navigate menu levels.
Blue Power LED
When the vehicle is in reverse or not in reverse (standby mode), and the monitor has power and is
turned on, the LED will light continuously.
6
18. Remueva la película de la almohadilla adhesiva y oprima Űrmemente el soporte sobre la superŰcie
de montaje.
NOTA: Después del montaje, proteja la superŰcie de montaje de la luz solar durante 24 horas.
19. Deslice el monitor en el brazo del monitor. El ángulo del monitor puede ser ajustado aŲojando los
botones de ajuste de ángulo del monitor, inclinando el monitor y luego apretando los botones.
20. Enchufe el cordón de energía del tomacorriente del encendedor de cigarrillos/accesorios en el
puerto de energía del monitor.
21. Enchufe el cordón de energía del tomacorriente del encendedor de cigarrillos/accesorios en el
puerto de energía de 12 voltios CC. La pantalla destellará, luego se apagará y el LED azul del
monitor parpadeará, indicando que el monitor está en la modalidad de espera (el monitor tiene
energía y está encendido, pero el vehículo no está en reverso).
22. Encamine y asegure todos los cables como sea necesario.
OPERACIÓN
Comprobación del Sistema
1. Oprima el botón ON/OFF. La luz LED azul se encenderá.
2. Con el freno de mano puesto, gire el interruptor de ignición del vehículo sólo a la posición ON
(ENCENDIDO). No encienda el vehículo.
3. Cambie el vehículo a reverso para energizar el transmisor. La luz LED azul de energía estará
encendida de forma continua hasta que reciba una señal. A continuación, el monitor mostrará la
imagen de la cámara.
4. Si la imagen no aparece, veriŰque sus conexiones y asegŋrese de que la visión de la cámara no
esté obstruida.
5. Si la imagen todavía no aparece, pueda que la unidad necesite ser “apareada”. Vea la sección
“Ajuste de la conŰguración del monitor”. Vea también la sección de “Resolución de Problemas”.
Controles del Monitor
1
3
4
5
6
2
7
A
M
Leyenda
1. Botón de menŋ
2. Botón hacia ARRIBA
3. Botón hacia ABAJO
4. Botón de Selección
5. Botón de directrices (enciende y apaga
las directrices)
6. Botón de ON/OFF
7. LED azul de energía
Botón de ON/OFF
Oprima para encender el monitor. Oprima de nuevo para apagar el monitor.
NOTA: En la modalidad de menŋ, el botón de menŋ también sirve como botón de retroceso para navegar
los niveles del menŋ.
LED azul de energía
Cuando el vehículo esta en reverso o no en reverso (modalidad de espera) y el monitor tiene energía y
está encendido, la luz LED se prenderá continuamente.
Ajuste de los Parámetros del Monitor
Para ajustar los siguientes parámetros del monitor, asegŋrese de que el freno de emergencia está
puesto, gire el interruptor de ignición a la posición ON y ponga el vehículo en reverso.
 Loading...