INSTRUCTIONS
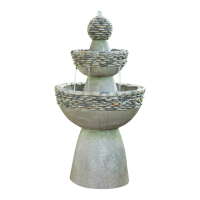
Item Description: Ripple Wall Fountain
Vendor Item # F40241AA
--------------------------------------------------------------------------------------------------------------------------------------
Questions, Problems, Missing Parts? Before returning to your retailer, CALL OUR CUSTOMER SERVICE
DEPARTMENT at 1(866)728-6187 8 a.m.– 6 p.m. EST, Monday – Friday or e-mail us at
customerservice@srg-usa.com
PARTS LIST:
Part# Description Quantity Part# Description Quantity Part# Description Quantity
01. Fountain Body 1 05. Lamp Holder 1 09. Hook 1
02. Water Pump 1 06. Lamp 1 10. Lamp cover 1
03.
04.
Transformer
Light Plate
1
1
07.
08.
Splashguard
Screw
1
4
TOOLS REQUIRED FOR ASSEMBLY:
z Flat head screw driver
not included
FOUNTAIN ASSEMBLY INSTRUCTIONS:
1. Unpack the contents of the box and check to make sure that all items are accounted for and in good condition.
2. Select a flat, level surface for the assembly and final location of your fountain.
3. Locate the light plate and attach it to the top of the fountain body using (2) screws.
4. Attach the lamp holder to the top of the light plate using (2) screws and route the power cable from the lamp holder along the back wall of the fountain
body as shown. Use the clip to secure the cable.
5. Locate the water pump and turn the flow control knob on the pump to the maximum (+) setting (see figure #2).
6. Connect the low voltage power cord from the lamp holder into the low voltage power cord coming from the pump. Connect the other low voltage power
cord, coming from the pump, to the transformer (see figure #1).
7. Connect the plastic tube, which you will find suspended in the rear cavity of the fountain body, to the outlet of the pump (see figure #1).
8. Add clean water into the reservoir of the fountain. The water level should be approximately 2” below the top rim on the front surface of the fountain.
9. Push the splashguard over the rim on the front surface of the fountain (see figure #1).
10. Secure a firm floor location in front of a wall by fastening the hook (part #9) attached at the back of the fountain body to some affiliated parts in the wall.
11. Connect the power cord from the transformer to a properly grounded, grounding type receptacle. The power cord between the pump and the transformer
has a thumb switch that may need to be turned to provide power to the pump. The water will begin to flow over the surface of the fountain.
12. To distribute the flow of the water over the entire face of the fountain, use your fingers or a small paint brush to direct the flow of water and “wet” the
surface of the fountain.
13. To eliminate the possibility of water damage to areas around your fountain, check for leaks and excessive splashing after the initial setup of your fountain.
It is highly recommended that this fountain be placed in an area that will not be damaged should the area come in contact with liquid.
14. Do not leave your fountain running for extended periods of time when no one is present to observe the performance.
15. Check the area around your fountain on a regular basis to ensure that there is no leakage.
MAINTENANCE OF YOUR FOUNTAIN:
1. Keep water clean - using clean water will reduce mineral deposits and improve water clarity.
2. Clean the fountain periodically to prevent mineral deposits and contamination. Use warm soapy water and a stiff brush for heavily stained surfaces.
Do not use harsh chemicals as this will damage the finished surface and void the warranty.
3. Add clean water periodically to ensure that the pump is fully submersed in water.
4. Disconnect the power and empty the basin if the fountain will not be used for an extended time.
5. If installed outdoors and in a freeze-area of the country, ensure that all water is removed and the unit is completely dry. This product is NOT to be
operated below 41°F (5°C) freeze damage may occur.
SPECIAL WARNINGS & CAUTIONS:
WARNINGS:
1. To reduce the risk of electric shock, connect only to a properly grounded, grounding type receptacle.
2. Do not exceed the voltage shown on the pump.
3. Always disconnect the pump from the power source prior to beginning any maintenance or work on the pump or fountain.
4. Inspect the power cord for damage before installation and/or maintenance. Replace the entire pump if damage is found.
5. For pumps with a 3-prong, grounded type plug, do not remove the grounding pin from the plug on the power cord.
CAUTIONS:
1. The fountain shall not be installed within 10 feet (3.05m) of a pool or spa. When the pump is connected to a GFCI protected circuit, the fountain unit has
the option of being installed no less than 5 feet (1.52m) from a pool or spa.
2. Use only with portable, self contained fountains no larger than 5’ in any direction.
3. Use a proper power source as indicated on the pump label. Keep the cord away from high temperature and/or heat sources.
4. Do not lift the pump by its power cord.
5. Keep the fountain out of reach of children.
6. Do not let the pump run dry. Pump must be completely submerged for proper operation and cooling.
7. Do not pump heated liquids.
8. Operate in freshwater only. Avoid heavily chlorinated water and water with high PH levels.
PUMP ASSEMBLY INSTRUCTIONS:
1. Remove the pump from the package and untie the power cord.
2. Place the pump in the desired location in your pond or fountain ensuring that it is completely submerged in the water. If the pump is to be used in a pond,
raise the pump off of the pond floor to ensure that it is above any dirt that will collect as this will adversely affect the performance of the pump.
3. Adjust the flow rate (if applicable) to the maximum (+) position.
4. If there is a light included with the fountain, connect the low voltage power cord from the light to the pump.
5. Connect the low voltage power cord from the pump to the transformer. Place the transformer in a clean, dry area.