EasyManua.ls Logo

Peavey Artist

Peavey Artist
4 pages
To Next Page IconTo Next Page
To Previous Page IconTo Previous Page
Loading...
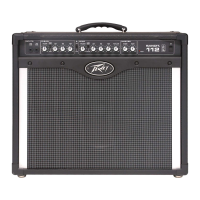
The
“ARTIST”
features
an
extremely
compact
enclosure
containing
either
a
12”
or
a
15°
super
heavy
duty
professional
grade
speaker
and
is
powered
by
a
TUBE
TYPE
120
watt
RMS
(@
5%
THD)
amplifier.
A
full
complement
of
Equalization
controls
is
featured
and
in¬
cludes
low,
middle
and
high
frequency
controls
for
total
tonal
balance
between
these
frequency
bands.
We
have
built
into
this
series
a
new
type
of
reverberation
cir¬
cuit
that
delivers
over
14
volts
RMS
to
the
built
in
reverberation
unit.
The
preamplifiers.,
equalization,
and
reverb
circuitry
is
complemented
by
a
MASTER
VOLUME
CONTROL
for
even
greater
control
of
sus¬
tain,
dynamics
and
sensitivity
for
recording
studio
applications.
Our
exclusive
“AUTOMIX”
ciruitry
is
built
into
this
series
for
even
greater
flexibilty
and
“on
stage"
versatility.
Your
new
Artist
features
two
channels,
"Bright"
and
“Normal”
with
four
inputs
that
function
along
with
the
Automix
footswitch
to
allow
you
to
play
through
either
channel,
both
channels
in
parallel,
or
both
channels
in
series.
Please
read
the
explanation
of
each
input
and
become
familiar
with
the
effects
possible
with
the
Automix
footswitch.
1
The
Bright
input
places
the
signal
from
your
instrument
into
the
bright
channel
only.
This
channel
provides
treble
boost
for
a
"brighter”
sound
from
your
guitar.
2
The
Normal
input
places
the
signal
from
your
instrument
into
the
normal
channel
only.
3
The
Parallel
input
places
the
signal
from
your
instrument
into
both
channels.
Plugging
into
this
parallel
jack
is
the
same
as
using
a
patch
cord
lo
bridge
into
the
normal
and
bright
channels,
except
that
the
in¬
ternal
circuitry
automatically
performs
the
patching
function.
When
plugged-into
this
jack,
both
normal
and
bright
channel
volume
controls
are
active
and
the
desired
blend
of
each
can
be
found
by
varying
the
level
of
each,
relative
to
the
other.
4
The
Series
input
places
the
signal
from
your
instrument
into
both
channels
in
series.
By
placing
the
channels
in
series
incredible
sustain
and
overload
har¬
monics
can
be
generated.
Experimentation
with
various
combinations
of
volume
control
settings
will
yield
an
in¬
finite
variety
of
harmonic
characteristics
and
sustain
durations.
These
functions
can
be
used
in
conjunction
with
the
master
volume
control
to
avoid
driving
the
power
amplifier
to
full
output
while
seeking
the
desired
effects
enabling
the
operator
to
obtain
sustain
and
overload
effects
at
very
low
volume
levels,
such
as
those
required
in
some
recording
studio
applications.
5,6
Both
the
bright
and
normal
channels
have
separate
volume
controls.
These
volume
controls
set
the
gain
of
the
input
preamp,
thereby
controlling
the
sensitivity
of
the
preamp,
not
the
power
of
the
amp.
It
is
entirely
possible
for
the
amp
to
be
driven
to
full
power
output
on
very
low
volume
settings
if
the
signal
from
your
instrument
is
extremely
high.
Please
remember
that
the
volume
conlrol
does
not
indicate
power
output,
but
the
gain
of
the
preamp.
7
The
bass
control
varies
the
amount
of
bass
response
in
the
system
and
is
very
effective
in
achieving
a
balanced
tonal
blend.
8
The
middle
control
enables
the
musician
to
tailor
the
vital
mid
range
response.
Experimentation
with
the
unique
middle
circuit
will
show
that
it
is
much
more
effective
than
conventional
circuits.
9
The
treble
control
varies
the
high
end
response
of
the
amplifier.
10
The
reverb
control
determines
the
amount
ol
delayed
signal
(reverb)
blended
into
the
output.
This
circuit
is
able
to
produce
tremendous
sustain
and
clarily
by
properly
damping
the
driver
coils
of
the
reverb
unit.
The
reverb
is
effective
in
both
channels.
11
The
Standby
Switch
removes
the
B+
supply
from
the
output
tubes
while
leaving
the
filament
voltage
on.
This
function
keeps
the
tubes
at
operating
temperature
and
allows
for
instant
operation
when
the
Standby
switch
is
thrown.
12
The
master
volume
control
is
very
useful
for
obtaining
a
number
of
effects.
The
most
common
use
of
this
control
is
for
obtaining
overdrive
and
sustain
at
low
sound
levels.
The
master
volume
control
is
the
final
gain
determining
element
before
the
signal
is
fed
into
the
output
amplifier
and
could
more
accurately
be
called
a
“sensitivity"
con¬
trol.
To
obtain
maximum
overdrive
and
sustain,
the
in¬
dividual
channel
volume
controls
should
be
set
near
maximum,
and
the
output
of
the
system
should
be
ad¬
justed
with
the
master
volume
control.
You
will
discover
that
many
different
and
pleasing
harmonic
effects
can
be
obtained
by
trying
different
settings
of
the
tone,
volume,
and
master
volume
controls.
It
has
been
found
that
when
operating
the
amp
in
the
overdriven
condi¬
tion.
lower
settings
of
the
treble
control
tend
to
give
a
smoother
“natural
distortion
characteristic”
The
normal
background
noise
(hiss,
hum,
etc.)
can
be
very
effec¬
tively
controlled
for
recording
studio
applications
by
use
of
the
master
volume
control.
To
reduce
these
noises,
reduce
the
setting
of
the
master
volume
control
13
The
pilot
light
indicates
when
the
electrical
supply
(mains)
is
supplying
power
to
the
amplifier
14
The
fuse
is
located
within
the
cap
of
the
fuse
holder
and
should
be
replaced
with
one
of
the
proper
value
if
it
should
fail.
It
is
necessary
that
the
proper
value
fuse
be
used
to
avoid
damage
to
the
equipment
and
to
avoid
voiding
the
warranty.
If
your
amplifier
repeatedly
blows
fuses,
the
unit
should
be
taken
to
a
qualified
ser¬
vice
center
for
repair.
15
The
line
power
switch
is
of
the
three
posilion
type
with
the
center
position
being
off.
The
three
posi¬
tion
switch
has
two
ON
positions,
one
of
which
is
used
to
ground
the
amplifier
properly.
One
of
the
ON
positions
will
yield
the
least
hum
or
popping
when
the
instrument
is
touched
and
this
is
the
position
that
should
be
used.
For
your
safety,
we
have
incorporated
a
3
wire
line
(mains)
cable
with
a
grounding
lug.
It
is
not
advisable
to

Related product manuals