14
open the holes by moving the 4 levers outwards. To limit
the entry of air (in winter), move the levers inwards.
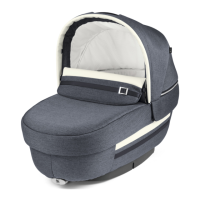
13 To fasten the bassinet, position it on the frame and press
down with both hands until it clicks into place.
Always enable the brake on the frame before fastening and
unfastening the bassinet.
IMPORTANT: Ensure the bassinet is properly fastened.
• To release it, raise the lever of the Ganciomatic clip
(arrow_a) and lift up the Culla Elite (arrow_b).
Removing the lining
14 REMOVING THE HOOD LINING:
To remove the hood, unbutton the 6 buttons on the lower
edge.
15 Press the buttons on the two attachments and remove the
hood.
16 Remove the flap of fabric from under the handle of the
hood and remove the two rigid supports.
17 REMOVING THE CULLA ELITE INNER LINING:
Raise the backrest (fig_a). This makes it easier to remove
the per mattress (fig_b).
18 Remove the inner lining by opening the two zips on the
edge of the Culla Elite.
19 REMOVING THE CULLA ELITE OUTER LINING:
- Unfasten all the rubber bands as illustrated.
- Remove the outer fabric.
20 WARNING: when replacing the outer lining of the
bassinet, ensure you fit it on correctly with all external
components left on the outside, i.e.:
rings for fastening the vehicle kit (fig_a),
handle for adjusting the backrest (fig_b),
release handles (fig_c).
21 When placing the lining on the hood, ensure you insert the
rigid supports correctly. Insert the tube bearing the carry
handle into the hood’s front slot, ensuring the handle is
centered correctly (fig_a). Pull the flap of fabric out from
the opening on the hood (fig_b) and slide it under the
handle (fig_c).
22 Finally, slip the second metal support into the hood’s inner slot.
23 Fasten the hood to the appropriate supports and fasten
the 6 buttons.
Padding cleaning instructions
Brush the fabric parts to remove dust.
• When washing, closely follow the instructions stated on
the label sewn into the cover.
• Do not use chlorine bleach.
• Do not iron.
• Do not dry clean.
• Do not remove stains with solvents and do not tumble dry.
Product cleaning
• This product requires a small amount of maintenance.
Cleaning and maintenance must only be carried out by adults.
• Keep all moving parts clean and if necessary lubricate
them with light oil.
• Clean the plastic parts periodically with a damp cloth. Do
not use solvents or similar substances.
• Brush the fabric parts to remove dust.
• Do not clean the polystyrene shock absorbing device with
solvents or other similar products.
• Protect the product from atmospheric agents: humidity,
rain or snow. Extended exposure to sunshine can cause
colour changes in many materials.
• Store the product in a dry environment.
• Remember to regularly ventilate the interior of the carrycot.
Culla Elite car kit
• Culla Elite can be installed in your vehicle by purchasing
the Culla Elite Car Kit.
• Only the Culla Elite Car Kit should be used to fasten to Culla
Elite to your vehicle securely.
The Original Accessory PegPerego
PegPerego accessories are designed as a useful, practical
means of simplifying the lives of parents. Discover all your
product’s accessories on www.pegperego.com.
Serial numbers
24 Information about the production date of Culla Elite can be
found under the base.
• Product name, production date and serial number.
This information is required for any complaints.

 Loading...