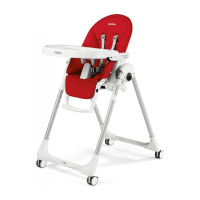
ATTENZIONE
• QUESTO VEICOLO È STATO PROGETTATO PER
IL TRASPORTO DI 1 BAMBINO NELLA SEDUTA.
NON UTILIZZARE PER UN NUMERO SUPERIORE DI
OCCUPANTI
• QUESTO VEICOLO Eʼ OMOLOGATO PER BAMBINI
DALLA NASCITA, FINO A 15 KG DI PESO.
• QUESTO VEICOLO Eʼ STATO PROGETTATO PER ESSERE
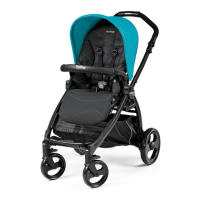
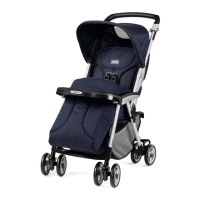
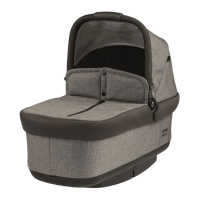
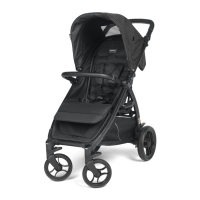
USATO IN COMBINAZIONE CON I PRODOTTI PEG
PEREGO GANCIOMATIC: NAVETTA, PRIMO VIAGGIO,
PRIMO VIAGGIO SIP.
• LE OPERAZIONI DI ASSEMBLAGGIO E PREPARAZIONE
DELLʼ ARTICOLO DEVONO ESSERE EFFETTUATE DA
ADULTI.
• NON UTILIZZATE IL PRODOTTO SE PRESENTA PARTI
MANCANTI O ROTTURE.
• UTILIZZATE SEMPRE LE CINTURE A CINQUE PUNTI;
UTILIZZATE SEMPRE LO SPARTIGAMBE DELLA
CINTURA IN COMBINAZIONE CON IL GIROVITA.
• POTREBBE ESSERE PERICOLOSO LASCIARE IL VOSTRO
BAMBINO INCUSTODITO.
• DA FERMI UTILIZZARE SEMPRE I FRENI.
• PRIMA DELLʼ USO ASSICURARSI CHE TUTTI I
MECCANISMI DI AGGANCIO SIANO INGAGGIATI
CORRETTAMENTE.
• PRIMA DELLʼ USO ASSICURARSI CHE IL SEGGIOLINO
AUTO O LA SEDUTA RIPORTATA SIANO
CORRETTAMENTE AGGANCIATI.
• EVITARE DI INTRODURRE LE DITA NEI MECCANISMI.
• PRESTARE ATTENZIONE ALLA PRESENZA DEL
BAMBINO QUANDO SI EFFETTUANO OPERAZIONI
DI REGOLAZIONE DEI MECCANISMI (MANIGLIONE,
SCHIENALE).
• OGNI CARICO APPESO AL MANIGLIONE O ALLE
MANIGLIE PUÒ RENDERE INSTABILE IL PRODOTTO;
SEGUIRE LE INDICAZIONI DEL COSTRUTTORE
RIGUARDO AI MASSIMI CARICHI UTILIZZABILI.
• IL FRONTALINO NON È PROGETTATO PER REGGERE
IL PESO DEL BAMBINO; IL FRONTALINO NON È
DISEGNATO PER MANTENERE IL BAMBINO NELLA
SEDUTA E NON SOSTITUISCE IL CINTURINO DI
SICUREZZA.
• NON INTRODURRE NEL CESTELLO CARICHI PER
UN PESO SUPERIORE A 5 KG. NON INSERIRE NEI
PORTABIBITE PESI SUPERIORI A QUANTO SPECIFICATO
NEL PORTABIBITE STESSO E MAI BEVANDE CALDE.
NON INSERIRE NELLE TASCHE DELLE CAPOTTE (SE
PRESENTI) PESI SUPERIORI A 0.2 KG.
• NON UTILIZZARE IL PRODOTTO IN VICINANZA DI
SCALE O GRADINI; NON UTILIZZARE VICINO A FONTI
DI CALORE, FIAMME LIBERE OD OGGETTI PERICOLOSI
A PORTATA DELLE BRACCIA DEL BAMBINO.
• POTREBBE ESSERE PERICOLOSO UTILIZZARE
ACCESSORI NON APPROVATI DAL COSTRUTTORE.
• QUESTO PRODOTTO NON Eʼ ADATTO PER IL JOGGING
O LA CORSA COI PATTINI.
• IMPORTANT: Carefully read instructions and
keep for future use.
The childs safety could be put at risk if the
instructions are not followed.
• PEG PEREGO reserves the right to make any
necessary changes or improvements to the products
shown at any time without notice.
Peg Perego S.p.A. is an ISO 9001 certified
company.
The fact that we are certified provides
a guarantee of our honesty for our
customers, and fosters trust in the
companyʼs way of working.
CUSTOMER SERVICE
If parts of the model are accidentally lost or damaged,
use only original Peg Perego spare parts. Contact
the Peg Perego Customer Service for all repair work,
replacements, information about products, and sale of
original spare parts and accessories, at the following:
tel.: 0039-039-60.88.213
fax: 0039-039-33.09.992
e-mail: assistenza@pegperego.it,
www.pegperego.com
Peg Perego is at the consumer's service, meeting
every need in the best way possible. This is why our
customers' opinions are so important and valuable
to us. We would be very grateful if you would kindly
fill in the CUSTOMER SATISFACTION QUESTIONNAIRE
after using one of our products. You will find the
questionnaire on the Internet at "www.pegperego.com
Please note any observations or suggestions you may
have on the questionnaire.
INSTRUCTIONS FOR USE
OPENING THE STROLLER
1• Unfasten the safety hook before opening the
stroller, as shown in the figure.
2• Grab the handle with your left hand as shown in
the figure and use your right hand to lift the rod
all the way up to the last click.
ASSEMBLING THE STROLLER
3• To mount the handle, remove the protective
packing caps from the stroller pipes, as shown
in the figure. Use a screwdriver to loosen the two
screws and the two caps from the handle, taking
care not to lose them.
4• Line the handle up with the two pipes by pushing
it all the way in. Pay attention to the direction the
handle is in; place it as shown in the figure, and
not backwards!
5• Place the cap and the screw as shown in the
figure, then use a screwdriver to fasten the screws
on both sides of the handle firmly, without forcing
them.
6• Fasten the brake cord by slipping it into the slot,
as shown in the figure.
7• To mount the rear wheels, push them into the
openings on the sides of the stroller and click
them into place.
8• To mount the front wheel, press the button on the
footboard while slipping the wheel into place. Pull
downward on the wheels to make sure they are
securely fastened.
9• To mount the basket, press the side buttons and
pull to extract the basket rod.
10• Slip the rod through the basket fabric. Insert the
EN•ENGLISH
 Loading...