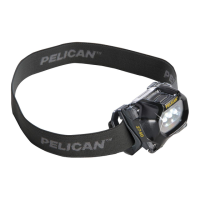
2780R LED
INSTRUCTION MANUAL
LED Head Modes:
Rotate the side knob A to to turn on both main and
downcast leds.
Rotate the side knob A to to turn on downcast led only.
Rotate the side knob A to to turn on main led only.
Rotate the side knob A to for flashing.
To adjust brightness
At any position, press the center blue button on the side knob B
to adjust brightness from 100%, 50%, 10% except on flashing mode.
Red LED on battery pack
To activate the rear mounted RED LED, press the switch one time.
For flashing, press the switch twice within 1 second.
To turn off from either mode, press the switch after 2 seconds.
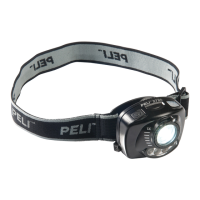
Charging
- Rotate the knob counter clockwise (symbol on the knob) with
the tool on the strap as shown and the battery tray will pop out
automatically (or pull gently)
- Connect the USB cable provided to the battery tray
- The Battery status indicator will blink indicating the battery level
- All three blue LEDS will illuminate when fully charged.
- When finished charging push the battery tray all the way in and
rotate the knob clockwise until the two(2) silver lines align.
Silver Triangle
Markings
To replace and install the Li-Ion battery
(use only Peli approved battery)
- Rotate the battery knob counter clockwise
until the battery tray pops out automatically
- Pull the tray out
- Remove the battery by lifting the end of the battery (the negative end)
- To install the battery tray, align the silver triangle
marking on the tray to the housing (see image)
- Push the battery tray all the way in and rotate clockwise
until the silver markings align
Battery status indicator
- 75% to 100%, 3 blue solid LEDS
- 50% to 75%, 2 blue solid LEDS
- 25% to 50%, 1 blue solid LED
- 25% or below, 1 blue blinking LED
Battery status indicator while charging
- 3 blue blinking LEDS, charging 0% to 25%
- 1 blue blinking LED, charging 25% to 50%
- 1 solid blue LED, and 1 blue blinking LED, charging 50% to 75%
- 2 solid blue LEDS, and 1 blue blinking LED, charging 75% to 100%
- 3 solid blue LEDS, fully charged
Battery Safety Information
WARNING: HANDLE AND STORE BATTERIES PROPERLY
TO AVOID INJURY OR DAMAGE. BATTERIES CAN BE DANGEROUS!
Most battery issues arise from improper handling of batteries, and particularly from the use of
damaged or counterfeit batteries. Please review the information below to avoid serious injury
and/or damage to your property.
Rechargeable Batteries
1. Hazardous location safety approvals for explosive environments are only valid
for the Peli battery pack that is supplied with the light.
2. For replacement battery packs only use the approved Peli battery pack for the model of the
light that you are using. The use of other battery packs will invalidate the safety approval.
3. Lights should only be charged in a non-hazardous location.
4. Lights should only be charged using the Peli charger base that is supplied with the light.
5. Lights should be charged and operated between the temperatures shown:
Charge Temperature: 0°C to 45°C (32°F to 113°F)
Operating Temperature: -20°C to 60°C (-4°F to 140°F)
6. Do not charge with alkaline batteries installed in the light. Attempting this can cause
internal gas or heat generation resulting in venting, explosion or possibly re.
7. Deep discharge of the rechargeable battery may cause batteries to
vent potentially dangerous gasses and electrolytes.
Always dispose of all batteries properly at an approved battery recycling center.
TORCHES/HEADLAMPS
LIMITED LIFETIME* GUARANTEE
Peli Products, S.L.U. (“Peli”) guarantees its torches and headlamps for a lifetime*
against breakage or defects in workmanship. This guarantee does not cover
the lamp or batteries. Peli will either repair or replace any defective product,
at our sole option. All claims under this guarantee, of any nature, are barred
if the product has been altered, damaged or in any way physically changed,
or subjected to abuse, misuse, negligence or accident.
*Lifetime guarantee not applicable where prohibited by law.
For complete details, see: www.peli.com/peli-warranty
Battery Tray
Battery tray tool is
attached to the strap
Align Markings
USB
LED SWITCH
RED LED
A
B
Battery
Status
Indicator
EN