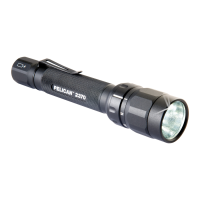
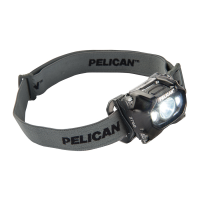
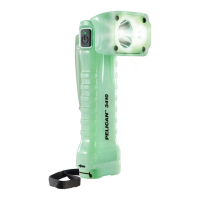
PELICAN
TM
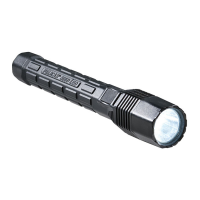
8060 Rechargeable
CAT. #8060
WARNING: Before disassembling any part of the 8060 flashlight, ensure that
the flashlight has not been operating for five (5) minutes prior to removing the
lamp module. During operation, the lamp module can become extremely hot
and may cause injury if touched.
Flashlight Operation
The 8060 is a high performance flashlight for use by professionals. This flashlight
comes equipped with a high output LED pre-focused lamp module that emits a
strong tight beam of white light. There is no need to focus the 8060.
Your 8060 battery pack comes to you partially charged and will need
to be charged for at least 24 hours prior to use.
To select a program, partially depress the button repeatedly within .5 seconds of each
other (momentary press, do not click) as indicated in the table below and HOLD until
the 8060 flashes in acknowledgment. The light will flash to let you know that a new
program has successfully been selected. The number of confirmation flashes
indicates the program number. Now set.
To change the mode within a program, depress the button (momentary, do not click)
once for each step in the program. Presses need to be within .5 second.
Fully depress the button to turn OFF from any activated mode. Depress fully in
order to lock in the choosen mode.
Low Battery Indication
A red flashing LED (mounted in front of the switch area) indicates a below 25%
charge level has been reached. The light should be charged as soon as possible.
Battery Replacement
After an an extended period of use, the NiMH battery stick may no longer hold a
charge and must be replaced. The battery stick is available at any location where
Pelican flashlights are sold or directly from Pelican Products, Inc.
Note: The 8060 flashlight can also perform using 4 “C” cell disposable alkaline
batteries in place of the rechargeable NiMH battery stick. Make sure to remove
alkaline batteries prior to attempting to charge the 8060 flashlight.
To replace the battery stick:
1. Unscrew the rear battery cap.
2. Remove the old battery stick.
3. Install new battery stick with the positive end (+) first.
4. Replace the battery cap.
NOTE: Please act responsibly when disposing of the NiMH Battery Stick. This part is recyclable and should not be
disposed of in the municipal waste system. Please check with your local waste disposal authority for information.
To charge the 8060:
The charger is capable of charging the battery pack in under 5 hours.
The LED Charge Lights will indicate where the battery is
in the charge cycle as follows:
Solid Red = 8060 Not Connected
Flashing Red Light = 8060 Fast Charging
Solid Green Light = 8060 Fully Charged
The 8060 will need to run through several charge/discharge cycles before
achieving maximum lamp run-time There is no need to fully discharge the
8060 before charging the battery. Charging can occur whenever required
and the 8060 can be left indefinitely in the charger housing without fear of
over-charging.
To Charge:
1. Turn off the 8060.
2. Snap the 8060 into the arms of the charger with the switch facing
towards you and the charger contacts engage with the 8060 contacts.
The LED will turn from a SOLID RED to a FLASHING RED to indicate
the fast charging cycle.
3. When the LED turns SOLID GREEN the battery pack is fully charged.
NOTE: A flashing green LED indicates a charging problem. Remove the flashlight from the charger and clean
the charging contacts. If the problem persists, please return the flashlight for warranty related repair.
23215 Early Ave. • Torrance, CA 90505 USA
Tel 310.326.4700 • FAX 310.326.3311 • www.pelican.com
PELICAN PRODUCTS ULC
10221-184th Sreett. • Edmonton, Alberta T5S 2J4 Canada
Tel.780.481.6076 • FAX 780.481.9586 • www.pelican.ca
8063-311-002 5-11368 Rev A JA/15
© 2015 Pelican Products
All trademarks are registered and/or unregistered trademarks
of Pelican Products, Inc., its subsidiaries and/or affiliates.
PELICAN LIMITED LIFETIME GUARANTEE OF EXCELLENCE
Pelican Products, Inc. guarantees its lights for a lifetime against breakage or defects in workmanship.
This guarantee does not cover the lamp or batteries.
Pelican will either repair or replace any defective product, at our sole option. TO THE EXTENT
PERMITTED BY LAW, THE REMEDIES HEREBY PROVIDED SHALL BE THE EXCLUSIVE AND SOLE
REMEDY OF THE PURCHASER.
TO THE EXTENT PERMITTED BY LAW: (A) THIS WARRANTY IS IN LIEU OF ALL WARRANTIES,
EXPRESS OR IMPLIED, INCLUDING, BUT NOT LIMITED TO, THE IMPLIED WARRANTIES OF
MERCHANTABILITY AND FITNESS FOR A PARTICULAR PURPOSE; AND (B) ALL OTHER IMPLIED
WARRANTIES AND ANY LIABILITY NOT BASED UPON CONTRACT ARE HERBY DISCLAIMED AND
EXCLUDED.
TO THE EXTENT PERMITTED BY LAW, IN NO EVENT SHALL PELICAN BE LIABLE FOR ANY
INDIRECT, PUNITIVE, INCIDENTAL OR CONSEQUENTIAL DAMAGES, OR SPECIAL DAMAGES,
REGARDLESS OF WHETHER A CLAIM FOR SUCH DAMAGES IS BASED ON WARRANTY,
CONTRACT, NEGLIGENCE OR OTHERWISE. To the extent permitted by law, in no event shall Pelican’s
liability to the purchaser for damages hereunder exceed the purchase price of the product in respect of
which damages are claimed.
To make a warranty claim, the purchaser must contact Pelican Products, Inc. at 23215 Early Avenue,
Torrance, CA 90505 or csrwarranty@pelican.com, or by calling 1-800-473-5422, extension 5. Any
warranty claims shall be made by the purchaser as soon as practicable. The purchaser must obtain a return
authorization number from Pelican Customer Service prior to returning any product, and is responsible for
paying for all warranty freight costs. If Pelican determines that any returned product is not defective, within
the terms of this warranty, the purchaser shall pay Pelican all costs of handling, return freight and repairs
at Pelican’s prevailing rates.
All warranty claims of any nature are barred if the ashlight has been altered, damaged or in any way
physically changed, or subjected to abuse, misuse, negligence or accident.
Some states and countries do not allow limitations on how long an implied warranty lasts or the exclusion
or limitation of incidental or consequential damages, so the above limitation or exclusion may not apply to
you. This warranty gives you specic legal rights, and you may have other rights which vary from state to
state and country to country.
In Australia: The benets provided to you under this warranty are in addition to your rights and remedies as
a consumer under the Competition and Consumer Act 2010 (Cth). Nothing in this warranty limits the rights
or obligations of a party under provisions of the Competition and Consumer Act 2010 (Cth) in relation to
the supply to consumers of goods which cannot be limited, modied or excluded. If applicable, our goods
come with guarantees that cannot be excluded under the Australian Consumer Law. You are entitled to a
replacement or refund for a major failure and compensation for any other reasonably foreseeable loss or
damage. You are also entitled to have the goods repaired or replaced if the goods fail to be of acceptable
quality and the failure does not amount to a major failure. If you
are not a consumer under the Competi-
tion and Consumer Act 2010 (Cth), then your rights may be limited. To make a warranty claim,
the purchaser must contact Pelican Products Australia, Suite 2.33, West Wing, Platinum Bldg.,
Erina NSW 2250, Tel: +612 4367 7022. Any warranty claims shall be made by the purchaser
as soon as practicable. The purchaser must obtain a return authorization number from Pelican
Customer Service prior to returning any product, and is responsible for paying for all warranty
freight costs. If Pelican determines that any returned product is not defective, within the terms
of this warranty, the purchaser shall pay Pelican all costs of handling, return freight and repairs
at Pelican’s prevailing rates. In the event that Pelican determines that any returned product is
defective, within the terms of this warranty, Pelican shall pay the purchaser all reasonable costs
of the purchaser in making claim under this warranty.
Lifetime Guarantee does not cover Roto Molded cases, Refer to www.pelican.com/warranty for
full details.
Pour charger :
1. Éteignez la 8060.
2. Insérez la 8060 dans les bras du chargeur avec le commutateur ori-
enté vers vous et veillez à ce que les contacts du chargeur s’alignent
avec ceux de la 8060. La DEL passera du ROUGE FIXE au ROUGE
CLIGNOTANT pour indiquer que le cycle de charge rapide est en
cours d’exécution.
3. Le bloc-piles sera complètement chargé lorsque la DEL passera au
VERT FIXE.
Remarque : Une DEL clignotant en vert indique un problème de charge. Retirez la lampe-
torche du chargeur et nettoyez les contacts de recharge. Si le problème per-
siste, veuillez renvoyer la lampe-torche en vue de sa réparation sous garantie.
Pour connecter l’adaptateur d’alimentation CA/CC :
1. Faites pivoter le chargeur de manière à ce que la base soit orientée
vers vous.
2. Utilisez la fiche mâle à angle droit de l’adaptateur d’alimentation et
insérez l’extrémité métallique dans la prise femelle qui se trouve dans
un renflement de la base du chargeur. Vous devrez peut-être utiliser
un petit tournevis plat pour guider avec soin la fiche dans la prise.
3. Faites passer le cordon dans le canal provenant du renflement.
Entretien du bloc-piles
Le bloc-piles de la 8060 atteindra sa capacité maximale uniquement après
un certain nombre de cycles de charge/décharge.
• Ne pas faire fonctionner votre lampe-torche 8060 au-delà du point où la
puissance lumineuse devient faible. Le fonctionnement au-delà de ce
point endommagera le bloc-piles et en raccourcira la durée de vie.
• Ne pas décharger excessivement votre lampe-torche afin de tenter de
sortir du mode “mémoire”.
Effectuer cela est inutile, car les piles modernes au NiMH, lorsqu’elles sont
utilisées dans des lampes-torches telles que la 8060, n’entraineront prob-
ablement pas ce résultat. En outre, une décharge complète des piles peut
potentiellement entrainer une fuite dangereuse de gaz et de l’électrolyte.
Montage du chargeur
La base du chargeur de la 8060 peut être montée de façon permanente
dans la plupart des positions, sauf à l’envers dans les véhicules. Deux ori-
fices de montage sont fournis pour permettre la fixation au moyen de vis
#10. L’adaptateur d’alimentation CA/CC doit être branché avant de monter le
chargeur (voir ci-dessus).
Installation dans un véhicule
Le chargeur de la 8060 peut être installé de façon permanente dans la
plupart des véhicules, cette opération devant être effectuée par un technicien
professionnel. Le chargeur ne doit pas être installé à l’envers, au risque
d’une éjection de la 8060 dans certaines conditions.
Lors de l’installation du chargeur, assurez-vous que le système de câblage
direct (vendu séparément) est connecté sur un circuit commandé par clé de
contact.
La forte intensité requise par ce chargeur peut vider la batterie du véhicule
s’il est connecté directement à la batterie.
Entretien des joints toriques
Enlevez toute trace de saleté ou les corps étrangers des surfaces
d’étanchéité des joints toriques. Maintenez les joints toriques lubrifiés avec
de la graisse de silicone.
NUM. CAT. DESCRIPTION
8056F CORDON ENFICHABLE 12 V POUR CHARGEUR RAPIDE.
6057F TRANSFORMATEUR 110 V POUR CHARGEUR RAPIDE.
8069 BLOC-PILES NiMH DE REMPLACEMENT
8070F BASE DE CHARGEUR RAPIDE POUR BUREAU/TABLEAU
DE BORD
6061F FAISCEAU DE CÂBLAGE DIRECT POUR CHARGEUR RAPIDE.
8052YW EMBOUT LUMINEUX POUR CONTRÔLE DU TRAFIC (JAUNE)
8052OR EMBOUT LUMINEUX POUR CONTRÔLE DU TRAFIC (ROUGE)
8060FBC CHARGEUR À 5 BASES
CARACTÉRISTIQUES DU PRODUIT
Type d’ampoule : DEL
Durée de fonctionnement de la batterie 2,5 - 69,0 avec bloc-piles NiMH
Type de piles : Bloc-piles rechargeable 4C NiMH
Informations de sécurité relatives aux piles
AVERTISSEMENT : MANIPULEZ ET STOCKEZ LES PILES DE MANIÈRE
APPROPRIÉE POUR ÉVITER TOUT RISQUE DE BLESSURE, LES
ENDOMMAGER PEUT ÊTRE DANGEREUX !
La plupart des problèmes relatifs aux piles découlent d’une manipulation
inappropriée, et particulièrement de l’utilisation de piles endommagées ou
contrefaites. Veuillez consulter les informations ci-dessous afin d’éviter des
blessures graves et/ou des dommages matériels.
Piles rechargeables
1. Les homologations de sécurité concernant les environnements explosifs
sont uniquement valables pour le bloc-piles Pelican qui est fourni avec la
lampe-torche.
2. Lors du remplacement du bloc-piles, vous devez uniquement utiliser le
modèle homologué Pelican qui a été prévu pour la lampe-torche que
vous utilisez. L’utilisation d’autres blocs-piles invalidera l’homologation
de sécurité.
3. Les lampes-torches doivent uniquement être chargées dans un
emplacement non dangereux.
4. Les lampes-torches doivent uniquement être chargées à l’aide de la
base de recharge Pelican qui est fournie avec.
5. Les lampes-torches doivent être chargées et utilisées entre les
températures indiquées ci-dessous :
Température de charge : -20°C à 50°C (-4°F à 122°F)
Température de fonctionnement : -20°C à 50°C (-4°F à 122°F)
6. Ne procédez pas une charge alors que des piles alcalines sont installées
dans la lampe-torche. Procéder à une telle charge peut entrainer une
accumulation interne de gaz ou une hausse de température provoquant
une fuite, une explosion ou un incendie.
7. Une décharge poussée du bloc-piles rechargeable peut provoquer une
libération potentiellement dangereuse de gaz et de l’électrolyte.
Mettez toujours les piles au rebut dans un centre de
recyclage homologué.
LINTERNAS
CON LA GARANTÍA LIMITADA DE EXCELENCIA DE POR VIDA DE PELICAN
Pelican Products, Inc., ofrece una garantía de por vida en sus linternas contra roturas o defectos
de fabricación. Esta garantía no cubre la lámpara ni las pilas. Las reclamaciones de garantía de
cualquier clase se
considerarán nulas en caso de que el producto haya sufrido alteraciones, daños o modificaciones
físicas de
cualquier tipo, se haya hecho un uso incorrecto, abusivo o negligente o haya sufrido accidentes.
En Australia: véase http://www.pelican.com/warranty Para obtener toda la información relativa a
la garantía, véase http://www.pelican.com/warranty.
La garantía de por vida no cubre las maletas rotomoldeadas,
TORCHES
GARANTIE D’EXCELLENCE À VIE LIMITÉE DE PELICAN
Pelican Products, Inc. garantit à vie ses torches contre la casse et les défauts de fabrication.
Cette garantie ne couvre pas l’ampoule ou les piles. Toute demande de prise en charge sous
garantie, de quelque nature que ce soit, sera refusée si le produit a été transformé,
endommagé ou physiquement modifié d’une façon ou d’une autre, ou encore sujet à un traitement
abusif, une mauvaise utilisation, une négligence ou un accident.En Australie : voir http://www.
pelican.com/warranty
Pour une version complète et détaillée de la garantie,
voir http://www.pelican.com/warranty.
La garantie à vie ne couvre pas les valises rotomoulées,
Program 1
(default)
High > Strobe > Medium > Low 8
*
Program 2 High Only 10
**
Program 3 High > Medium > Low > Flashing 12
***
Program 4 Low > Medium > High > Flashing 14
****
Momentary
presses
Conrmation
ashes