INTRODUCTION
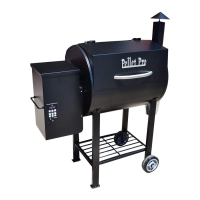
Congratulations on your purchase of the Pellet Pro® Pellet Grill. With proper set-up,
operation and maintenance, this grill will provide you with delicious food and years of
cooking enjoyment.
Parts packed are as listed
➢ Grill Body w/ Attached Hopper
➢ Hardware Kit
➢ Chrome Door Handle
➢ Smoke Stack
➢ Chimney Cap Assembly
➢ Grease Drain Pan
➢ Porcelain Grill
➢ Heat Diffuser
➢ Grease Bucket
➢ Wheel Legs
➢ Solid Legs
DIY assembly includes the following:
1) Mounting the solid legs and wheel legs to the grill.
2) Attaching the bottom storage rack to the grill legs
3) Attaching the smoke stack to the grill.
4) Attaching the side handle located below the smoke stack.
5) Mounting the chimney cap assembly.
6) Positioning the heat diffuser over the fire pot.
7) Positioning the grease drain pan over the heat baffle.
8) Positioning the porcelain grill on the grill supports.
9) Hanging the grease bucket.
SUPPLY TOOLS FOR ASSEMBLY
(1) Open end wrench
(2) Allen Wrench