OFF
ON
OFF
ON
Horizon LTD.
(c) 2002 V2.01aUS
00120d
Battery 85%
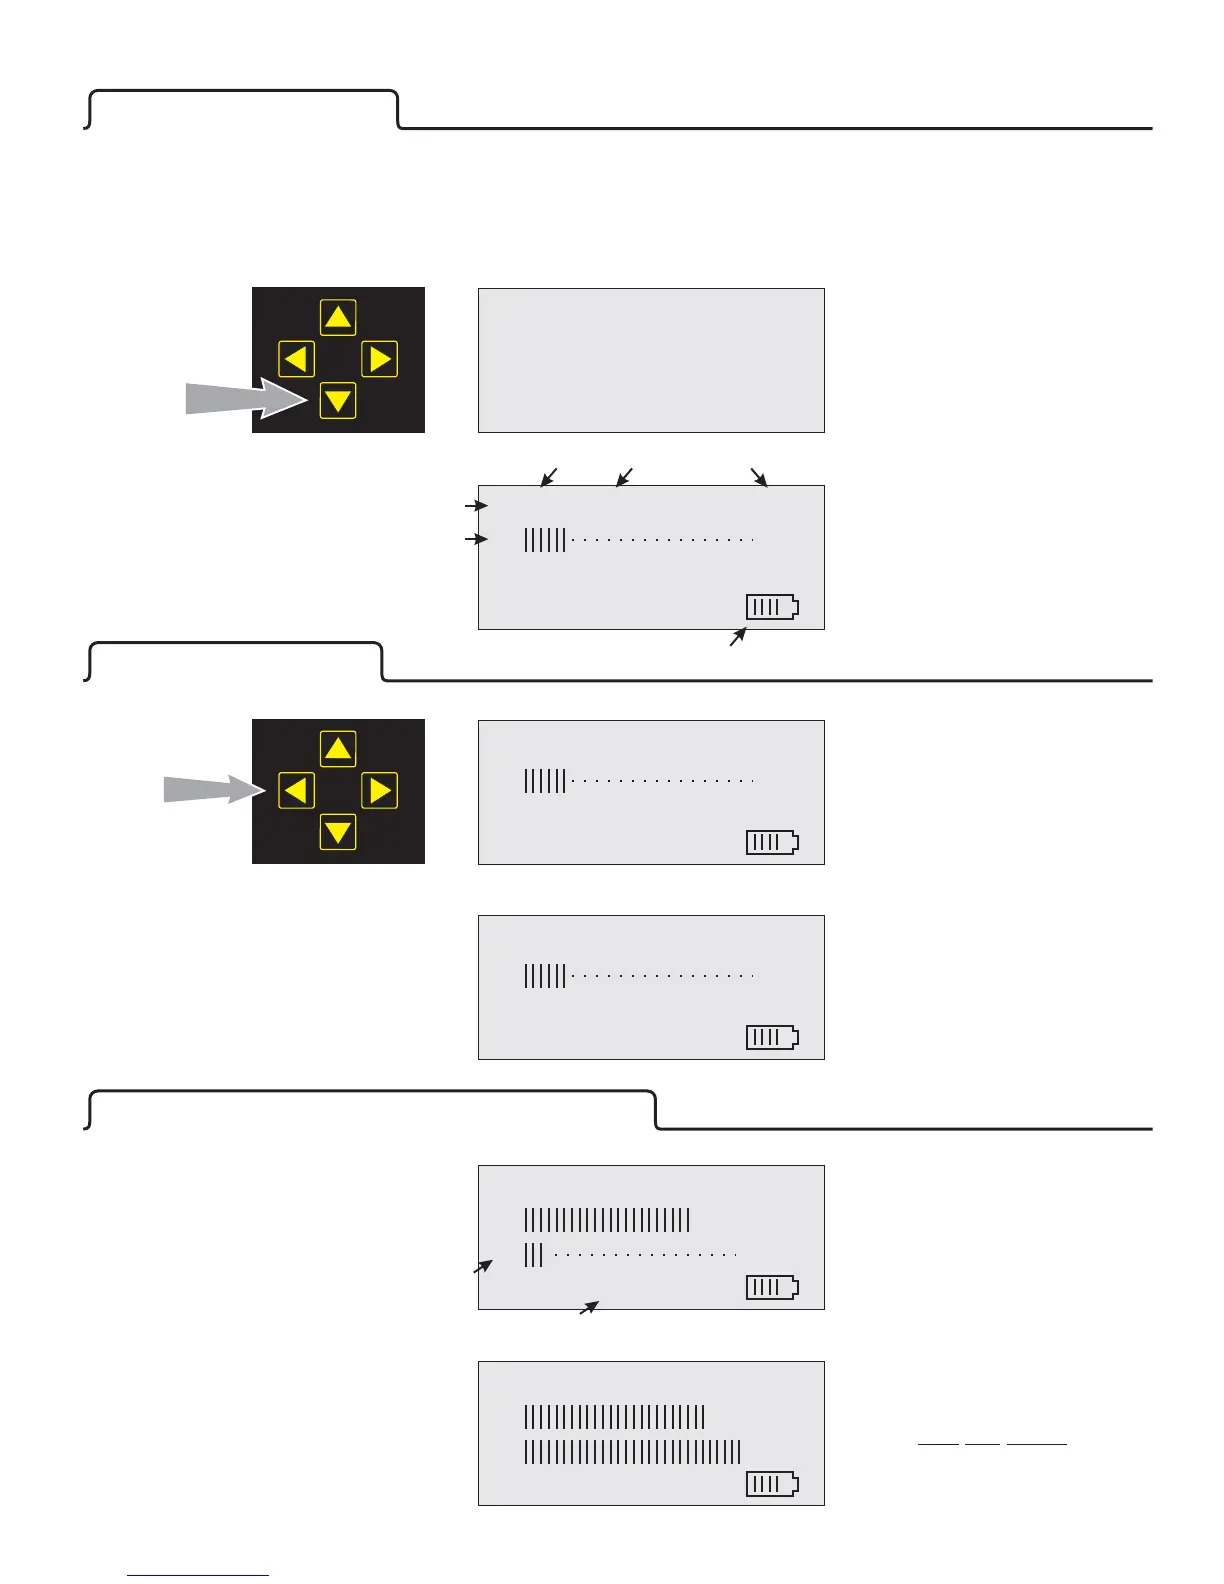
Press and
Hold 5 seconds
First screen indicates version
number, satellite list code and
battery strength. The meter
scrolls to next screen
automatically.
The second screen indicates the
first satellite in the menu, the
longitude of the satellite, raw
signal received, battery strength
and “Searching” since the
satellite has not been found yet.
K V GE3 81
S55
Searching
To Turn The Meter ON
Aligning the Dish On The Selected Satellite
Getting close, the dish is pointing
at the edge of the
DirecTV satellite. Note that the
word “Found” appears. Keep
moving the dish until the “Q” and
“S” levels are maximized.
®
“Q” is now maxed out,
“S” is maxed out. That’s it......
Tighten the mount bolts.
You are done.
Move the dish until “Found”
S 165
Q25%
Found
Maximize signal and Tighten Bolts
S 175
Q95%
Found
Type Satellite
B = Circular
C = C band
K = Ku band
Satellite
Name
Longitude
Note “S” = Raw Signal Level
Battery Strength
Correct Satellite
Is Confirmed
Connect a RG-6 jumper from the BirDog “INPUT” jack on the front of the meter to the LNBF on the antenna.
Generally point the antenna in the azimuth (magnetic) direction specified by the software in your satellite receiver,
or in the case of a DirecWay installation, a laptop, or customer’s PC.
®
3
Polarity
Selecting A Satellite
The display indicates a weak raw
signal “S” and the text message
“Searching”. Keep scanning the
sky until the “S” increases and the
“Q” bar appears.
Find the satellite you are
interested in by scrolling through
the stored memory. In this
example, the DirecTV satellite
located at 101° is selected.
®
B R DirecTV 101
Right & Left
arrows scroll
satellites
Searching
S55
Searching
S55
B R DirecTV 101
B R DirecTV 101
B R DirecTV 101
Note “Q” = Inverse of Data Error Rate


 To Next Page