This document is an owner's manual for a Perfect Aire Portable Air Conditioner remote control, providing instructions on its operation, features, and maintenance.
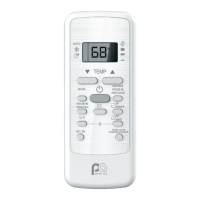
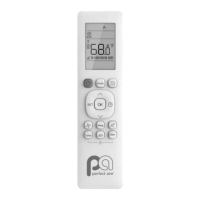
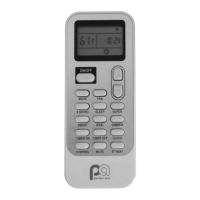
The remote control serves as the primary interface for managing the portable air conditioner, offering a range of functions to optimize comfort. Users can power the unit on or off, adjust the temperature, select operating modes, control fan speed, and set timers for automatic operation. The remote features a clear display that shows the current settings, making it easy to monitor and adjust the air conditioner's performance.
Function Description
The remote control allows users to select from several operating modes:
- AUTO Mode: In this mode, the air conditioner automatically cycles through different operations (cooling, dry, or fan) based on the indoor temperature and the user-set temperature. This intelligent function aims to maintain a comfortable environment without constant manual adjustments. The fan speed is automatically controlled in this mode and cannot be manually changed.
- COOL Mode: This is the primary cooling function, where the unit actively cools the room to the desired temperature. Users can adjust the temperature in 1°F (1°C) increments, with a minimum setting of 62°F (17°C) and a maximum of 86°F (30°C).
- DRY Mode: This mode functions as a dehumidifier, continuously removing moisture from the air. In DRY mode, the fan speed is fixed and cannot be adjusted, as the unit focuses solely on dehumidification.
- HEAT Mode: (Note: Some models may not support HEAT mode.) When available, this mode allows the unit to provide heating, increasing the room temperature to the desired setting.
- FAN Mode: In this mode, the unit operates as a fan, circulating air without cooling or heating. Users can select different fan speeds (LOW, MED, HIGH) to control the intensity of airflow.
Usage Features
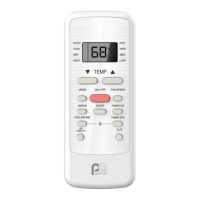
The remote control is designed for intuitive use, with dedicated buttons for each major function:
- ON/OFF Button: Powers the air conditioner on or off.
- MODE Button: Cycles through the available operating modes (AUTO, COOL, DRY, HEAT, FAN).
- TEMP Buttons (Up/Down Arrows): Adjust the desired temperature setting in 1°F (1°C) increments.
- FAN SPEED Button: Cycles through fan speed options (AUTO, LOW, MED, HIGH) when in COOL, HEAT, or FAN modes.
- SWING Button: Activates or deactivates the louver swing function, which moves the air conditioner's louvers from side to side to distribute air more evenly across the room.
- SLEEP Button: Engages the sleep function, which gradually adjusts the temperature over several hours to optimize comfort and energy efficiency during sleep. In COOL mode, the unit increases the temperature by 2°F (2°C) every 30 minutes for the first hour, then maintains that temperature for the next 6 hours before returning to the original setting. In HEAT mode, the unit decreases the temperature by 2°F (2°C) every 30 minutes for the first hour, then maintains that temperature for the next 6 hours. This feature is available for COOL and HEAT modes only.
- TIMER ON Button: Allows users to set a specific time for the air conditioner to automatically turn on. Increments of 30 minutes can be selected up to 10 hours, and hourly increments can be made up to 24 hours after that.
- TIMER OFF Button: Allows users to set a specific time for the air conditioner to automatically turn off, using the same increment logic as the TIMER ON function.
- FOLLOW ME Button: Transforms the remote control into a thermostat. When activated, the remote measures the ambient temperature at its location and sends this information to the air conditioner, allowing the unit to adjust its operation based on the temperature at the remote's position. The remote's display will show the room temperature when this feature is active.
- LED DISPLAY Button: Toggles the display on the air conditioner unit on or off.
- ENERGY SAVER Button: Activates an energy-saving function available in COOL, DRY, and AUTO modes. When the compressor shuts off, the fan will run for 3 minutes, then cycle on/off every 2 and 10 minutes until the room temperature rises above the set temperature, at which point the compressor will resume cooling.
- LOCK Function: To prevent accidental changes, the remote control can be locked by pressing the °C/°F and TIMER OFF buttons together for 5 seconds. Repeating this procedure will unlock the remote.
Remote Screen Icons
The remote control's display features various icons to indicate the current settings and status:
- Mode Icons: Icons for AUTO, COOL, DRY, HEAT, and FAN modes are displayed when active.
- Signal Transmission Icon: Appears when the remote is sending a signal to the unit.
- Unit ON Icon: Indicates that the air conditioner unit is powered on.
- TIMER ON/OFF Icons: Displayed when a timer is set for the unit to turn on or off.
- Set Temperature/Room Temperature/Timer Increments Icon: Shows the set temperature, room temperature (when FOLLOW ME is active), and desired timer increments.
- Lock Icon: Appears when the remote control buttons are locked.
- FOLLOW ME Icon: Indicates that the FOLLOW ME feature is active.
- SLEEP Icon: Appears when the SLEEP feature is activated.
- Fan Speed Arrows: Arrows indicate the selected fan speed (HIGH, MED, LOW). If no arrow is displayed, it signifies Auto fan speed.
Maintenance Features
- Battery Replacement: The remote control uses two AAA batteries. Instructions are provided for inserting and replacing them by sliding down the back cover.
- Battery Care: Users are advised not to mix old and new batteries or different types of batteries. It is also recommended to remove batteries if the remote will not be used for more than two months to prevent leakage or damage.
- Battery Disposal: Instructions emphasize disposing of batteries according to local laws, not as unsorted municipal waste.
Important Notes
- The remote control must be within 26 feet (8 meters) of the unit for effective communication.
- The unit will emit a beep when it receives a signal from the remote.
- Obstacles like curtains or direct sunlight can interfere with the infrared signal, so it's important to ensure a clear line of sight between the remote and the unit.
- If the indoor unit does not possess a particular function, pressing the corresponding button on the remote will have no effect.
- Button designs on the unit may vary slightly from those shown in the manual.