7
1
3
2
OPERATION
3. Apply solder to the wire splice or metal to be soldered, not the Soldering Tip. When the
splice or metal is hot enough, it will melt the solder causing it to ow within the splice or
between the metal surfaces.
4. When the solder has owed over the entire wire splice or metal surface, remove the
Soldering Tip and release the Trigger Switch. If you are new to soldering, you may nd
it helpful to practice soldering rst on scrap wires and splices.
WARNING: Before each use, inspect the general condition of the Soldering
Gun. Check for loose screws, misalignment or binding of moving parts, cracked
or broken parts, damaged electrical wiring, and any other condition that may
affect its safe operation. If abnormal noise or vibration occurs, have the problem
corrected before further use. Do not use damaged equipment.
NOTE: Maintenance requiring disassembly of this tool should only be performed
while the product is disconnected from the electrical supply circuit.
1. When you are nished soldering, heat up the Soldering Tip (1) again and apply a small
amount of rosin-core solder to coat the tip. Wipe off with a rag. This will leave the tip
clean and ready for use again.
2. If the Soldering Tip cracks or becomes eroded, the Soldering Tip needs to be replaced.
In this condition, it will not heat up properly.
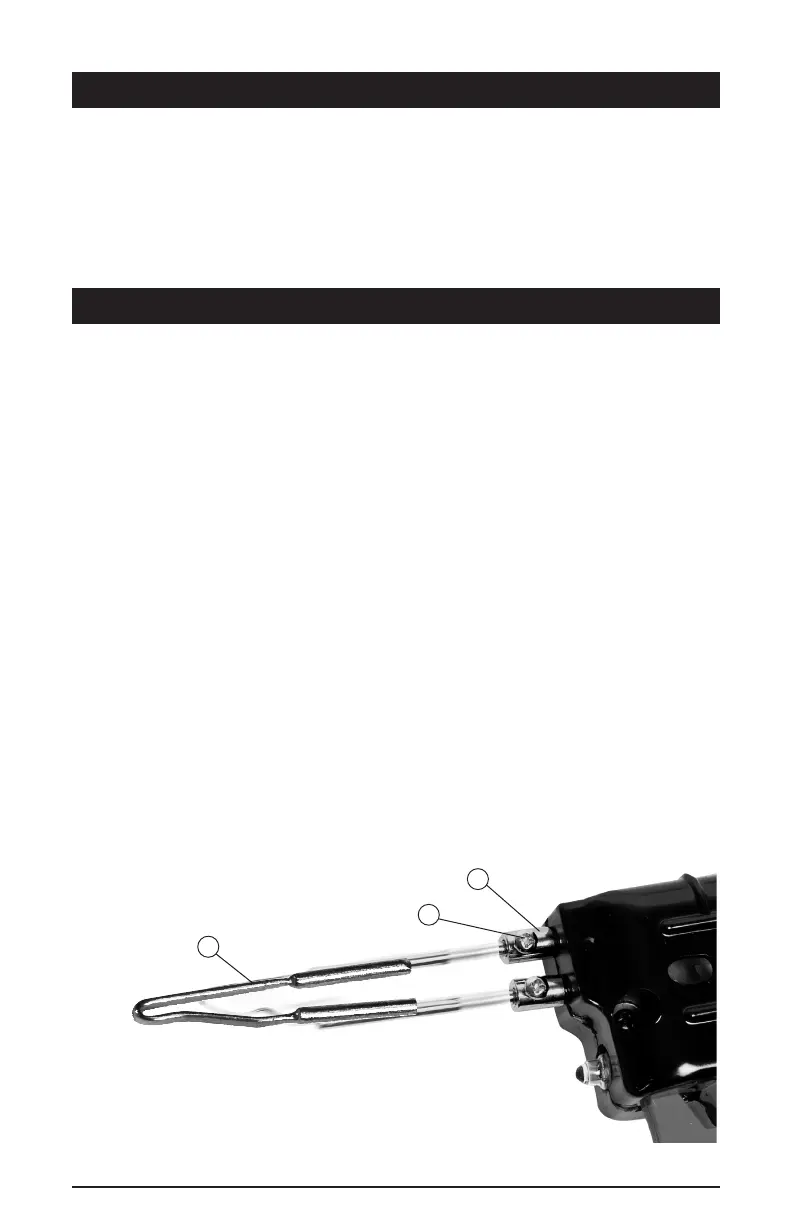
Replacing the Soldering Tip
1. To replace the Soldering Tip, use a Phillips (#1) screwdriver to remove each screw (1)
by turning counterclockwise.
2. Guide the old Soldering Tip (2) out of the Transformer Assembly mounting posts (3).
3. Guide the prong ends of the new Soldering Tip (2) into the Transformer
Assembly mounting posts (3)
4. Carefully tighten the Screws (1) over the Transformer Assembly mounting posts (3).
Make sure that the Screws t straight into the slots. Do not overtighten.
MAINTENANCE