WARNING:
Do not use the tool if the trigger does not function properly. Any tool that
cannot be controlled with the ON / OFF switch is dangerous and must be repaired.
1. Use the correct tool for the job. Maximize tool performance and safety by using the
tool for its intended task.
2. Do not modify this tool or use for a purpose for which it was not designed.
3. This tool was designed for a specic function.
Do Not:
a. Modify or alter the tool; all parts and accessories are designed with built-it safety
features that may be compromised if altered.
b. Use the tool in a way for which it was not designed.
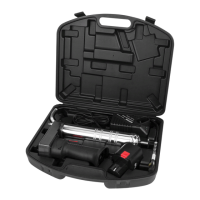
Unpacking
1. Carefully remove the tool from the package.
2. Retain packing material until you have carefully inspected and satisfactorily installed
or operated the tool.
3. Inspect the parts carefully to make sure the tool was not damaged while shipping.
Charger Operation
1. Insert the battery pack into the charging socket of the charger. Then, plug the
charger into the nearest grounded, electrical outlet. To start charging, press the SET
button on the charger. The battery is charging when the green light is illuminated and the
red light goes out.
NOTE: Make sure the power circuit voltage is the same as that shown on the charger
specifications plate.
2.
Before using the grease gun for the first time, be sure to discharge the new battery
before charging. All new rechargeable batteries come with 80% charge from the factory. If the
battery pack is installed in the gun, remove it by depressing the two battery release buttons
(one button on each side of the battery pack) and pull the battery pack out of the gun.
3. As a battery pack approaches the discharged state, you will notice a sharp drop in
tool performance. When the tool is unable to perform the task at hand, it is time to
recharge the battery pack. Recharging the battery pack before this condition is reached
will reduce the total work life of the pack. Discharging the pack beyond this point can
damage the pack.
4. Start the charging process by plugging in the battery charger to the power source
and inserting the battery into the battery charger slot. After the charging process is
complete (approximately 1 to 2 hours), the green light will go out and the red light will
illuminate. Remove the charger from the wall outlet and disconnect the battery pack.
NOTE: Battery temperatures will increase during and shortly after use. Batteries may not
accept a full charge if they are charged immediately after use. Allow the battery pack to
cool to room temperature before charging for the best results.
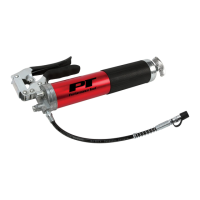
Installing Grease Cartridge
1. Depress the follower key and pull back on the follower handle. When the follower rod
is fully extended (approximately 8 in. or 20 cm), release the follower key.
NOTE: It may be necessary to loosen the grease tube assembly in order to break the
vacuum seal.
2. Remove the plastic cap from the grease cartridge and insert the cartridge into the
container.
3. Remove the pull-tab from the grease cartridge and insert the grease tube into the
pump assembly.
4. To release the follower rod, depress the follower key and push the follower rod
forward into the grease tube assembly. Purge the air from the pump.
TOOL USE AND CARE
 Loading...