0166ES | 03/2019 | 3 of 6MOHAWK TECHNICAL SERVICES DEPARTMENT | 508 EAST MORRIS STREET, DALTON, GA. 30721 | 888.387.9881
Pergo Extreme Installation Instructions
Installation
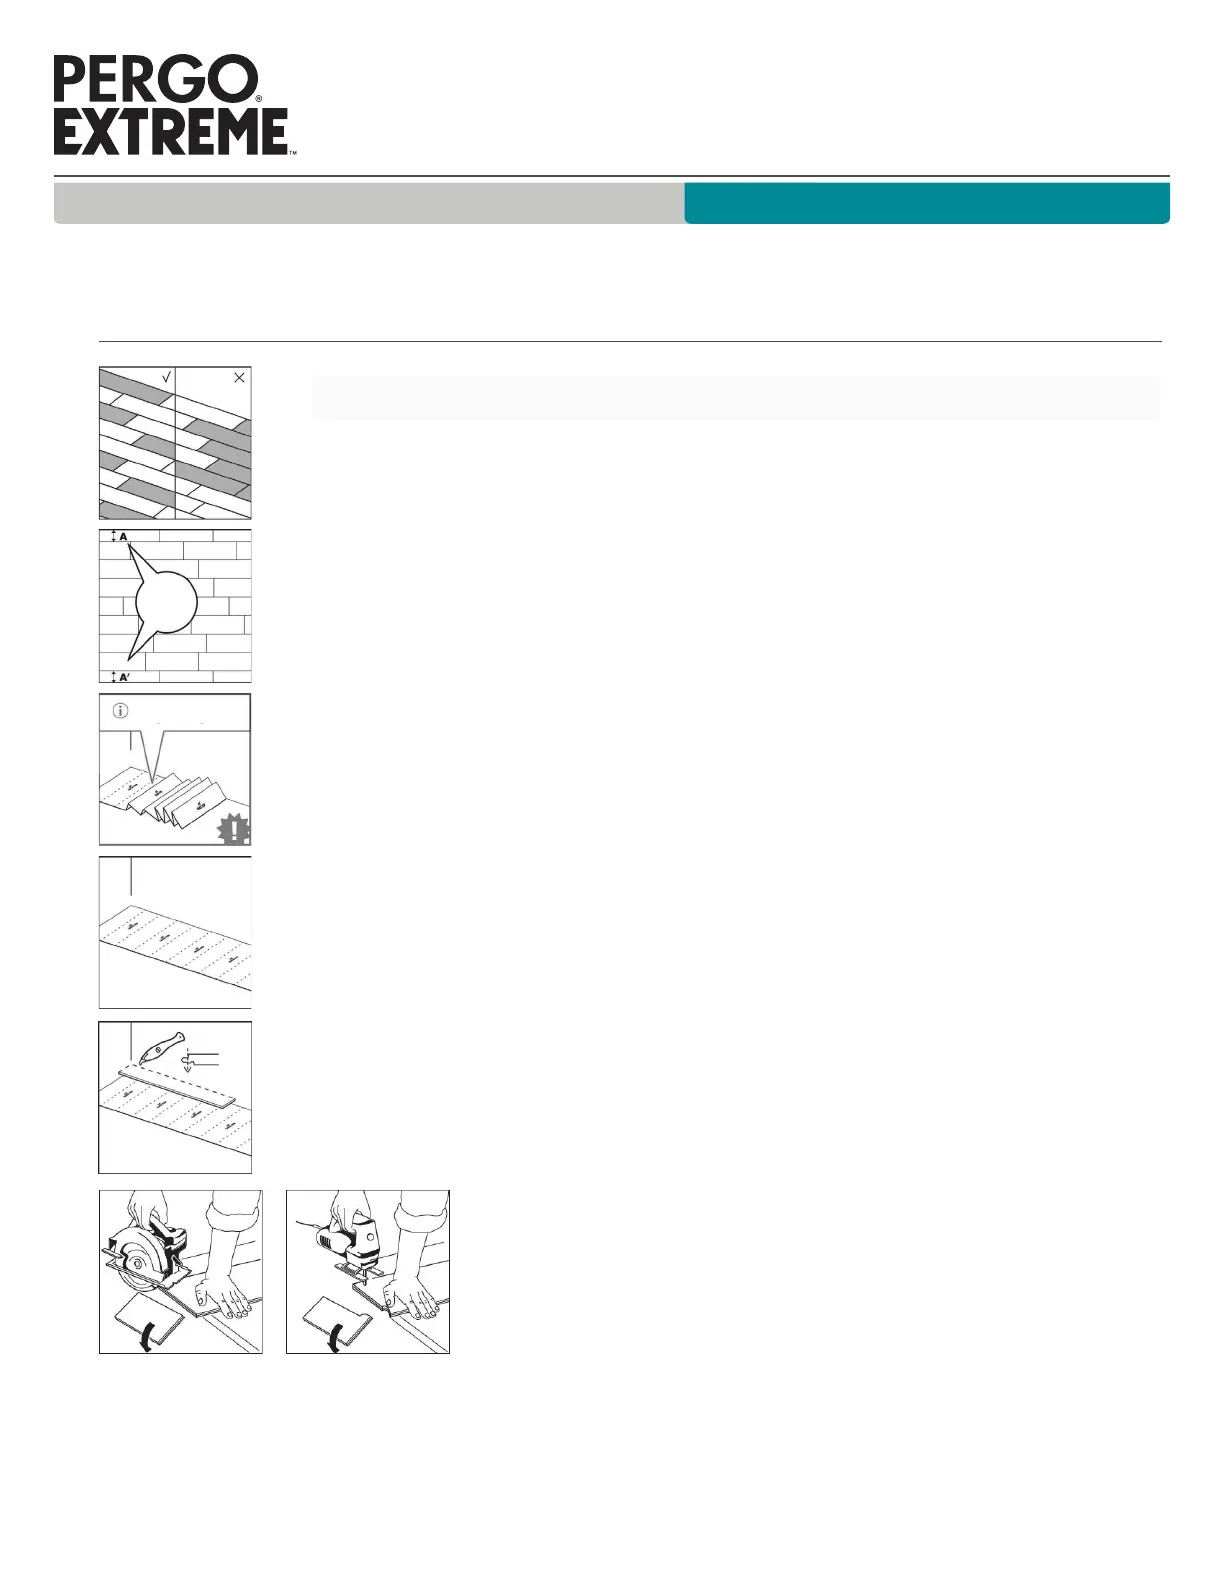
1. During installation, blend the planks by working out of multiple cartons to avoid laying too
many identical lighter or darker panels adjacent to one another. For optimal results, it is best
to fit the panels in the direction of the longest wall and parallel to the light source in the
room. Avoid installing plank flooring using the “brick” method of staggering. It is best to use a
random stagger of at least 8 inches (20 cm).
2. Measure the room before you start installing underlayment or flooring planks. Make sure that
the last row of panels is at least 3 inches (7.6 cm) wide when finishing the installation. We
recommend snapping a chalk line to ensure a perfectly straight installation.
3. Pergo Extreme flooring has been designed for floating installations in indoor areas including
three season environments with or without underlayment inclusive of sunrooms and solariums
with ambient temperatures ranging between 0 and 140°F (-17 and 40°C). Please contact your
flooring dealer or Mohawk Technical Services if you have any questions.
4. If you choose to use underlayment, install it simultaneously with the floor installation. We
recommend Mohawk ActiveSound underlayment, which helps ensure joint integrity, reduces
sound, helps prevent indentation, and insulates and helps level the subfloor. Pergo Extreme
products with pad attached cannot be installed over separate underlayment.
5. Begin in the left corner of the room. Start the first row with a whole plank. Cut o the long side
tongue (end and edge) for the first panel. Position the cut edges adjacent to the wall.
6. Fit the plank with cut side against the walls. Make sure that you leave an expansion space of 1/4
inch (6 mm) [5/8 inch (16mm) for areas that will be exposed to temperatures greater than 85°F
(30°C)] between the plank and the wall, using spacers as needed.
7. Cut using a circular saw or reciprocating jigsaw.
Pergo Extreme
www.Pergo.com
A≥3 in
(7.6 cm)
A≥3 in
(7.6 cm)
 Loading...