Do you have a question about the Perky-Pet Home Style Squirrel-Be-Gone II and is the answer not in the manual?
| Brand | Perky-Pet |
|---|---|
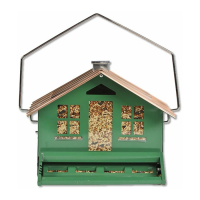
| Model | Home Style Squirrel-Be-Gone II |
| Category | Pest Control |
| Language | English |
Remove the feeder lid by turning it counter-clockwise and lifting up.
Insert the hanger end with bends into the upper hole of the left side panel.
Bring the other end of the hanger around the back of the feeder.
Place the other hanger end into the single hole on the right side panel.
Lift the hanger into the upright position to lock it via spring action.
Fill the feeder and place the roof on the base, positioning the chimney.
Press down on the chimney to insert the locking key into the cross beam.
While pressing down, turn the chimney clockwise 3/8 turn until tight.
Experiment with settings by lowering or raising the adjustment pin for tension.
Use standard 3/4" pipe for pole mounting or a 4'x4' wood post with adapter.
Place adapter with downward slant, secure with four screws to attach.
