PERLICK RESIDENTIAL UNDERCOUNTER CUBELET ICE MAKER PRODUCT MANUAL
perlick customer service (800)558-5592 | 17
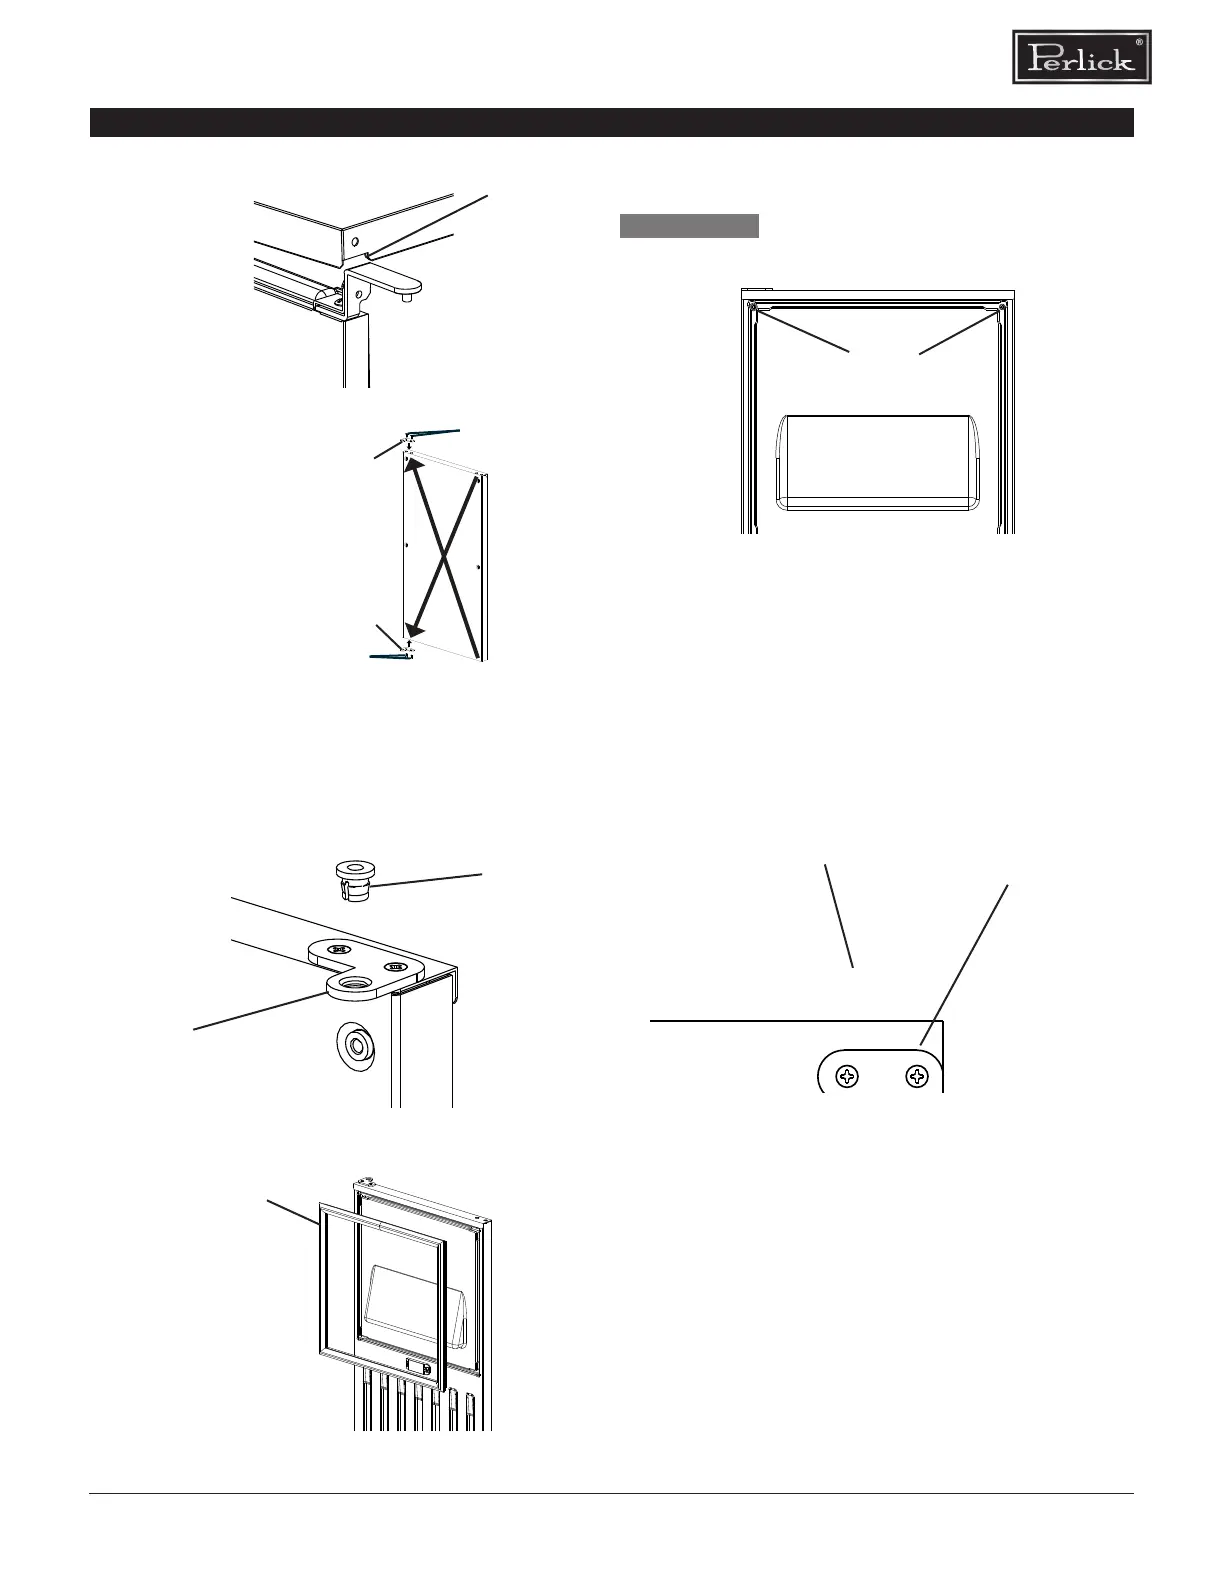
Notch
Top Panel
Fig. 7
Hinge (C1)
Hinge (C2)
Fig. 8
Screws
Screws
7) Remove the bushings from hinge (C1) and hinge (C2)
(the hinges aached to the door) (See Fig. 9).
8) Remove the gasket from the door (See Fig. 10).
Hinge
Bushing
Fig. 9
Gasket
Fig. 10
9) Temporarily fasten the overlay panel to the door using
2 of the M4×25 pan head screws provided.
Ensure that the back surface of overlay panel
is at before aaching (See Fig. 11).
WARNING
Screws
Fig. 11
10) Mark the centerpoint of the hinge (C1) and hinge (C2)
holes that extend over the overlay panel (See Fig. 12).
11) Remove the overlay panel from the door.
12) Drill 3/8” diameter holes 1/4” (7 mm) deep where you
marked on the overlay panel to accommodate the
hinge (C1) and hinge (C2) bushings.
Fig. 12
Mark the center point.
Overlay Panel
Door
Hinge
INSTALLATION INSTRUCTIONS
 Loading...