PERLICK RESIDENTIAL UNDERCOUNTER CUBELET ICE MAKER PRODUCT MANUAL
28 | perlick.com/residential
MAINTENANCE
CLEANING AND SANITIZING INSTRUCTIONS
The appliance must be cleaned and sanized at least twice a
year. More frequent cleaning and sanizing may be required
in some condions.
To prevent injury to individuals and damage
to the appliance, do not use ammonia type cleaners.
Carefully follow any instrucons provided
with the cleaning and sanizing soluons.
Always wear liquid-proof gloves and goggles
to prevent the cleaning and sanizing soluons from coming
into contact with skin or eyes.
DANGER
!
DANGER
!
DANGER
!
Do not use ice made from the cleaning and
sanizing soluons. Aer cleaning and sanizing, be careful
not to leave any soluon in the appliance.
Do not place ngers or any other objects
into the ice discharge opening (extruding head).
DANGER
!
DANGER
!
1. Cleaning Soluon
Dilute 1.6 . oz. (47 ml or 3.2 tbs) of Nu-Calgon “Liquid Ice
Machine Cleaner” with 1 qt (1 l) of warm water. This is a
minimum amount. Make more soluon if necessary.
For safety and maximum eecveness, use
the soluon immediately aer diluon.
2. Cleaning Procedure
1) Move the control switch to the “OFF” posion.
2) Remove all ice from the storage bin.
3) Move the control switch to the “DRAIN” posion.
4) Allow the water system to drain for 1 minute.
5) Move the control switch to the “OFF” posion.
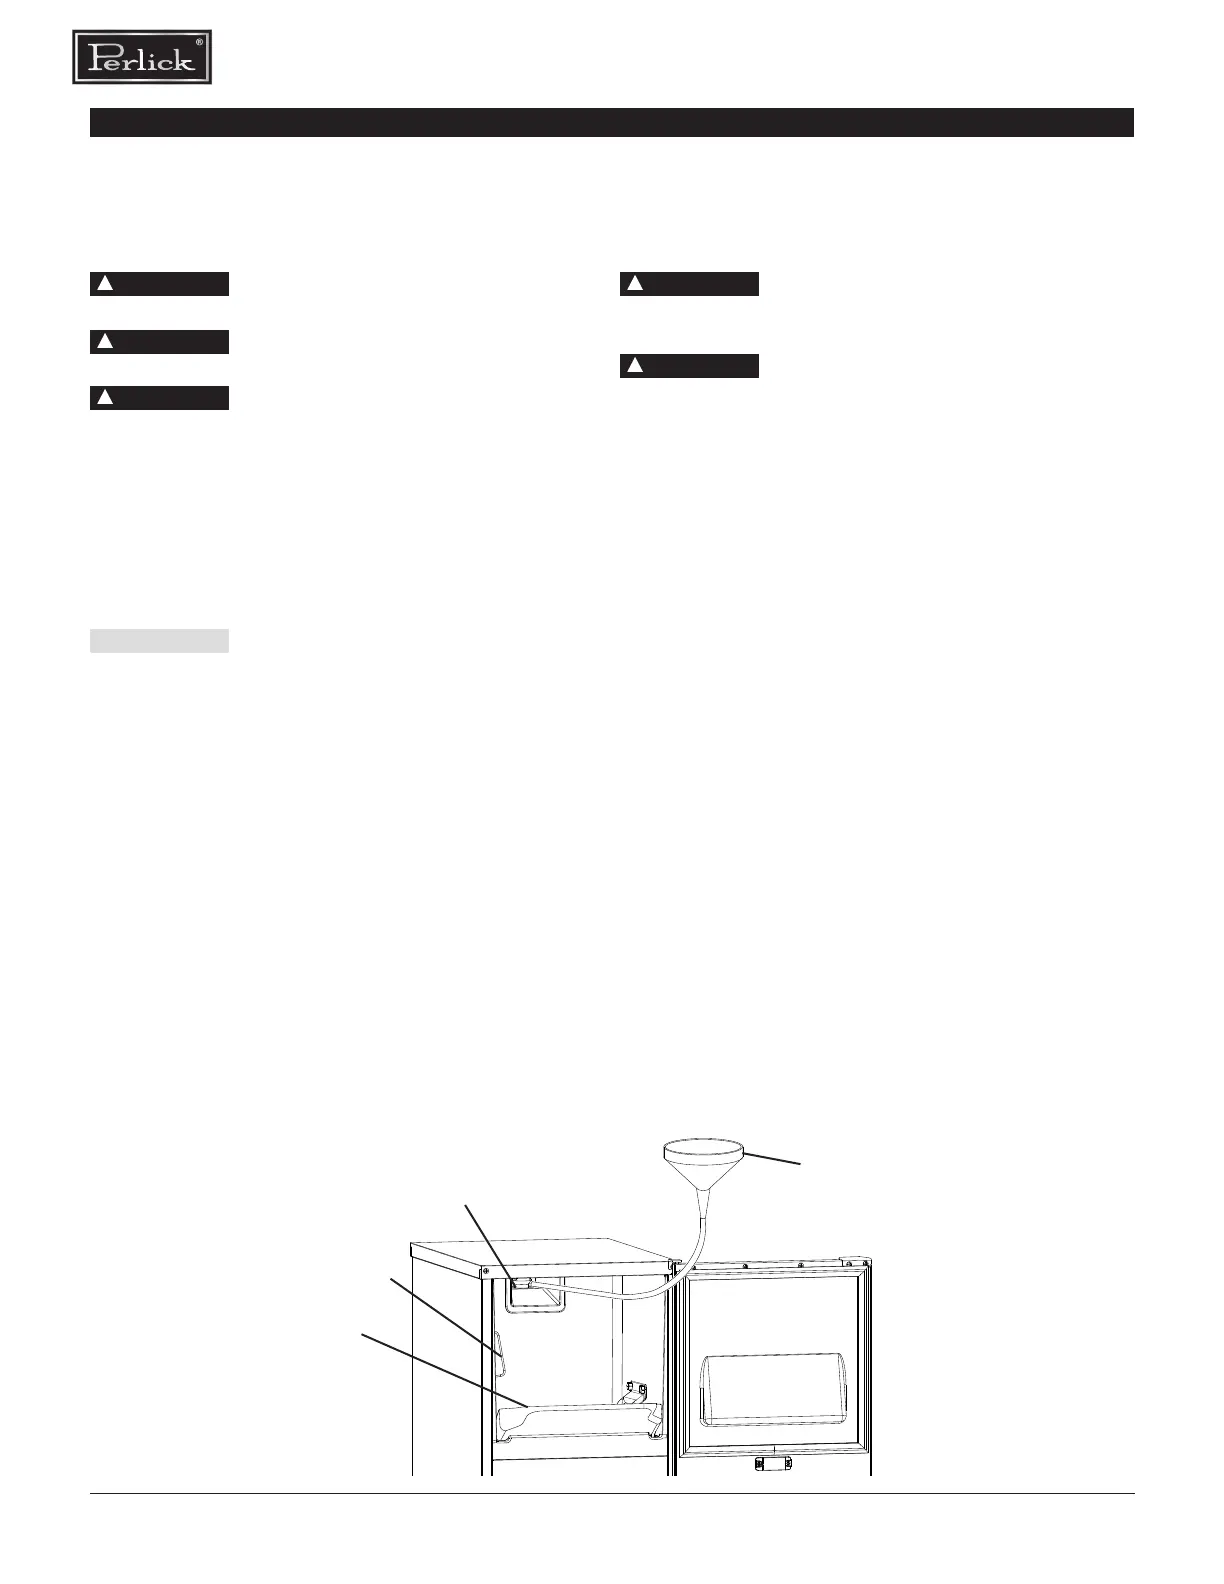
6) Using a clean funnel and hose (not included),
pour 1 qt (1 l) of cleaning soluon over the extruding
head (See Fig. 24.) Allow the appliance to sit for
10 minutes before operaon.
7) Make sure at least 10 minutes have elapsed since you
poured the cleaning soluon over the extruding head,
then move the control switch to the “ICE” posion.
8) Allow the appliance to make ice for 20 minutes, then
move the control switch to the “DRAIN” posion.
9) Allow the water system to drain for 1 minute.
10) Move the control switch to the “ICE” posion.
11) Aer the gear motor starts, move the control switch
to the “DRAIN” posion.
12) Allow the water system to drain for 1 minute.
13) Move the control switch to the “OFF” posion. In
severe water condions, repeat the cleaning
procedure.
Fig. 24
Slope
Scoop Holder
Extruding Head
Funnel and Hose
(not included)
CAUTION
 Loading...