25
www.petex.de
4.2 Installation of the cloth cover
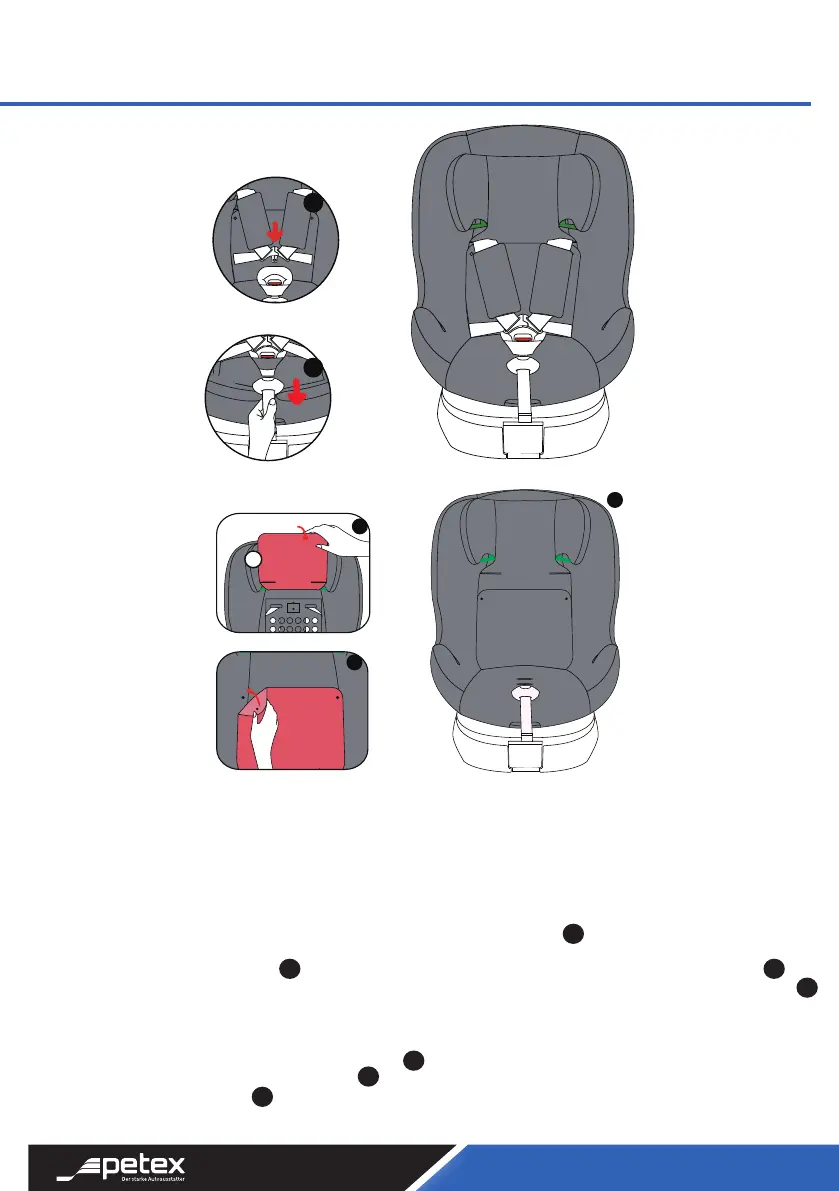
1. Insert the cloth cover in the direction of the arrow shown, align the hole (No. 1) with the central adjuster (04), and
insert the edge of the sleeve into the central adjuster and seat joint gap, 5-point seat belt buckle (14) through the
housing (optional according to the body type of the child), cross belts (05) pass through (No. 2), and the edge of
(No. 3) cloth cover should be stuck into the gap of adult seat belt guide (27) , (No. 4). The edge of the cloth
cover, which is marked with the red dotted line, should be clamped into the seat connection gap. Fasten the snap
buttons on the sides of the seats , and buckle the hook and loop fasteners on the back of the headrest.
2. Insert the cloth cover in the direction of the arrow shown, and, by pressing the elastic clip inside the cloth cover
(No.4)., insert the head-part into the guide groove (18). The edge of the cloth cover, which is marked with the red
dotted line, should be clamped into the seat connection gap. Pull the shoulder belts through (No 5), then connect
the hook and loop fasteners with the cloth cover of the headrest.
3. Put the 5-point seat belt buckle into the crotch pad , connect the left and right part of the belt-tongue, and
insert it into the the 5-point seat belt buckle.
4. Tighten the central adjuster.
5. Cloth cover installation is complete.
59
60
27
28
29
08
60
59
58
57
56
55 54
4.0 Demontage und Montage der Stoabdeckung
4.0 Disassembly and installation of cloth cover
 Loading...