Questions/Issues
with your product?
We’re here to help!
Please visit the page
petratools.com/support
to get the fastest resolution to your problem.
Toll free: 1-800-613-6889
Contact us: support@petratools.com
Website: www.petratools.com
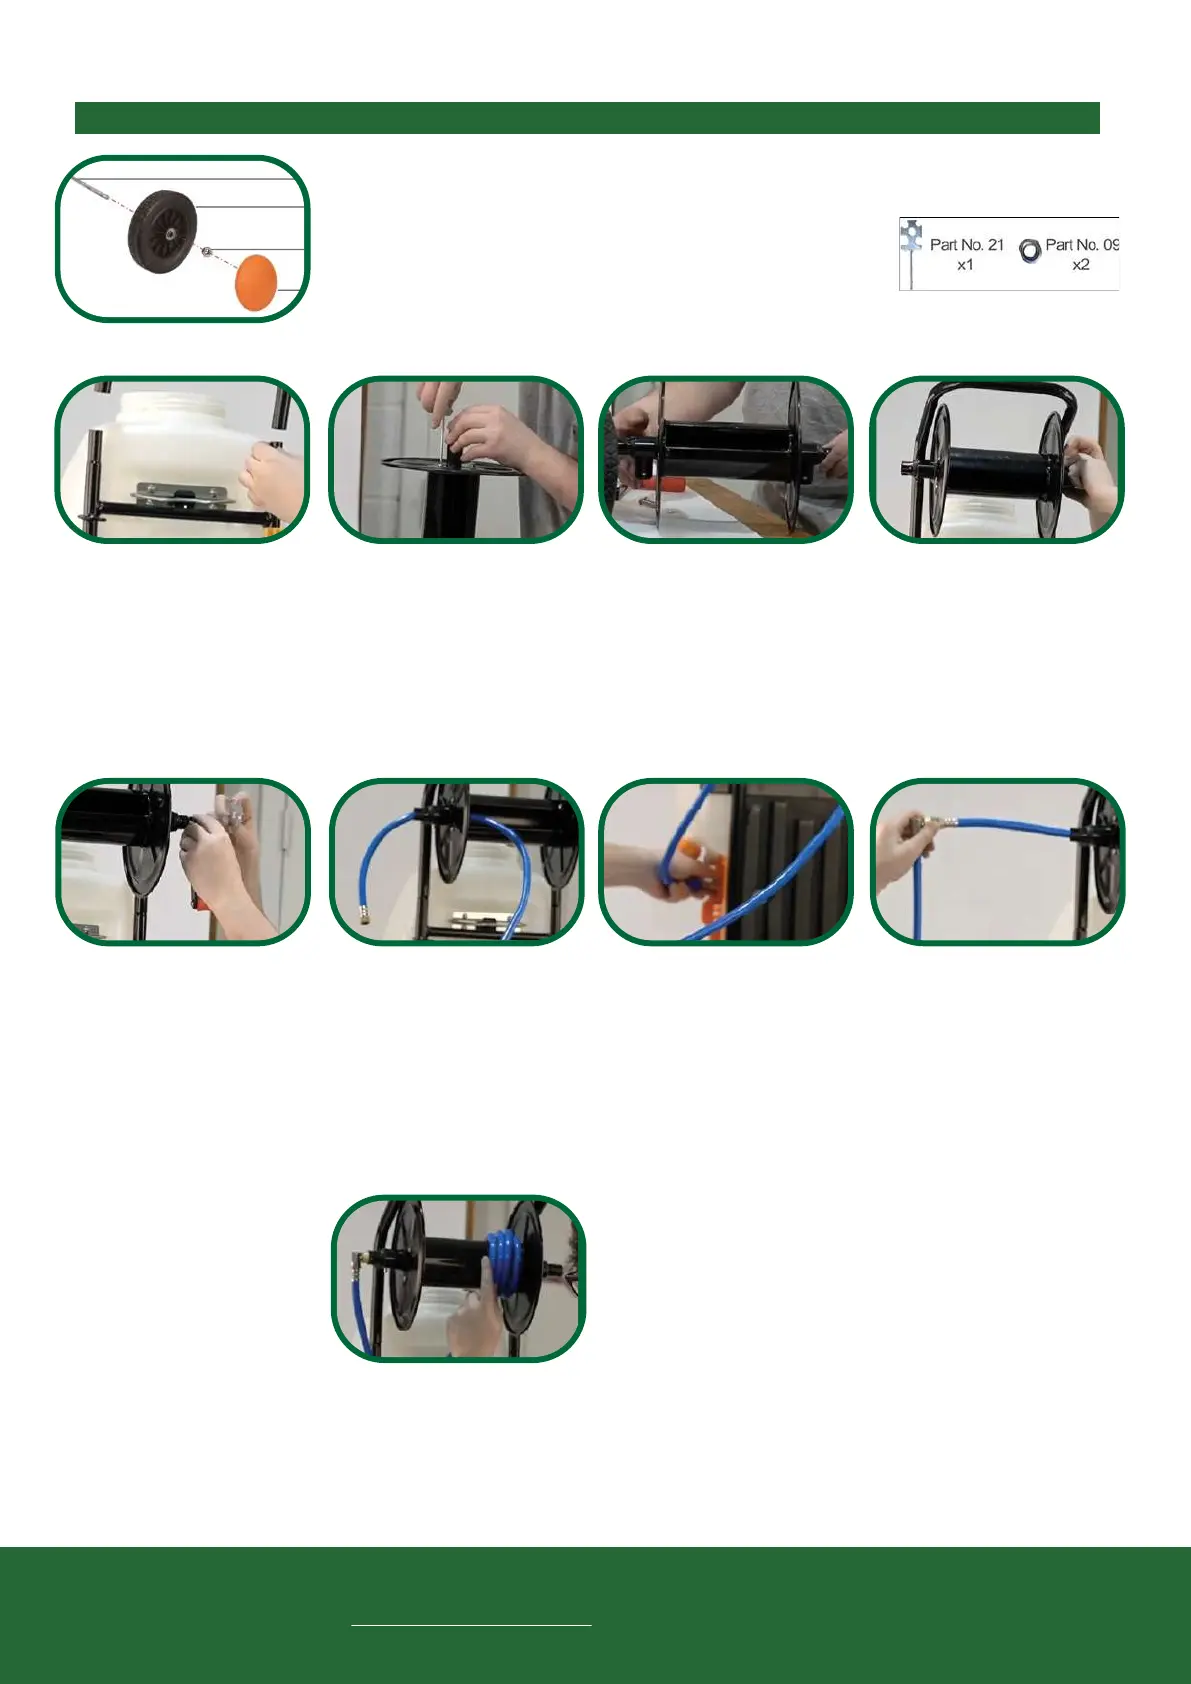
HD5000 Reel Cart Assembly Instructions – Visit Petratools.com/start for full instructions and videos.
Step 8: Screw shorter blue
‘connecting hose’ into the
sprayer. Hand tighten and then
tighten with wrench.
(Recommended to apply teflon
tape to the threads of the outlet
prior to connecting).
Step 2: Connect the handle
frame to the main cart section.
Step 3: Place ‘reel pad’ over
‘reel rod’ ends and align holes.
Use the included tool screwdriver
end or a drill to screw in 3 screws
per side (do not over tighten). Do
this for both sides.
Step 4: Place ‘reel connectors’
over the reel rod ends and reel
pads (completed in step 3).
Step 5: Slide the reel connectors
into the frame, making sure that
the small hole that fits a screw is
on the right side, and the large
opening is on the left side. Place
the “Pin/Clip/Gasket” through the
reel connectors and frame hole
on each side.
Step 6: Insert the the handle
over the reel connector onto the
right side (if looking at reel and
cart from the back) and then use
the screw to connect. Tighten
screw using the edge of the
included tool (part no. 21).
Step 7: Turn the reel rod so
that the opening is accessible
and then feed one end of the
100 foot blue hose through the
opening and out the reel
connector.
Step 9: Thread the connecting
hose up through the support ring.
Screw together the connecting
pipe end to the 100 foot blue
hose. Use included tool (part no.
21) to tighten hose connections to
prevent leaks. Push the connec-
ting hoses into the reel connector
as far as they will go without
forcing it.
Step 10: Wrap the hose
tightly around the reel rod.
Once you have wrapped the
first row tightly around the rod,
use the handle to reel the
remaining length of the hose.
Step 1 (attaching wheels): Place the wheel rod through the bottom base of the cart. Place a
wheel on each side (making sure the side with the inner circle is facing outwards) of the wheel
rod and then use the tool (part No. 21) to attach screw nuts (part No. 09)
to secure the wheel to the wheel rod. Place the ‘Lock Pin” through the
wheel rod to secure to the cart frame. Lastly, place the orange wheel
covers on the wheels.
 Loading...