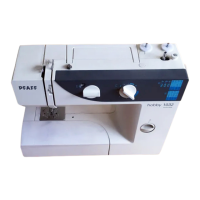
Do you have a question about the Pfaff 1029 and is the answer not in the manual?
Prepare by selecting the appropriate sewing foot and edge guide for topstitching.
Attach and adjust the edge guide for consistent stitching margins parallel to edges or other stitches.
Use a clear-view foot and buttonhole thread for 6-mm long fancy stitch topstitching.
Set up the machine with the blindstitch foot, correct tension, thread, and needle for blindstitching.
Adjust the needle position using screw D to catch only one thread in the material.
Perform elastic blindstitching on stretch fabrics, overedging and sewing the hem in one operation.
Prepare with buttonhole foot, appropriate tension, thread, and needle for buttonhole creation.
Distinguish buttonholes with/without filler thread; use filler for prominent, non-stretching buttonholes.
Use scale F to determine length and adjust stitch density for desired buttonhole size and appearance.
Drop feed, position needle, and use button 17 for sewing buttons.
Use a shank (needle or match) for buttons in heavy materials, creating a raised stitch for strength.
Use adhesive tape to temporarily hold buttons in place, being careful not to damage fabric.
Insert and position the zipper foot to the left, middle, or right for various zipper insertion operations.
Baste zip, position foot to left, sew along guiding edge, then continue seam after closing zip.
Baste zip to placket, sew along guiding edge, then finish seam after opening/closing zip.
Pin and baste the overlapping edge, then use an edge guide for a neat seam finish.
Rub zipper teeth with wax or soap for smoother operation after cleaning.
Prepare with darning foot, correct tension, thread, and drop the machine feed.
Remove sewing foot holder, secure darning foot with screw H, ensuring wire I rests on screw J.
| Type | Mechanical |
|---|---|
| Built-in Needle Threader | No |
| Drop Feed | Yes |
| Free Arm | Yes |
| Stitch Types | Decorative |
| Buttonhole Styles | 4-step |
| Presser Feet Included | Buttonhole foot, zipper foot |


