Adjustment
11 - 15
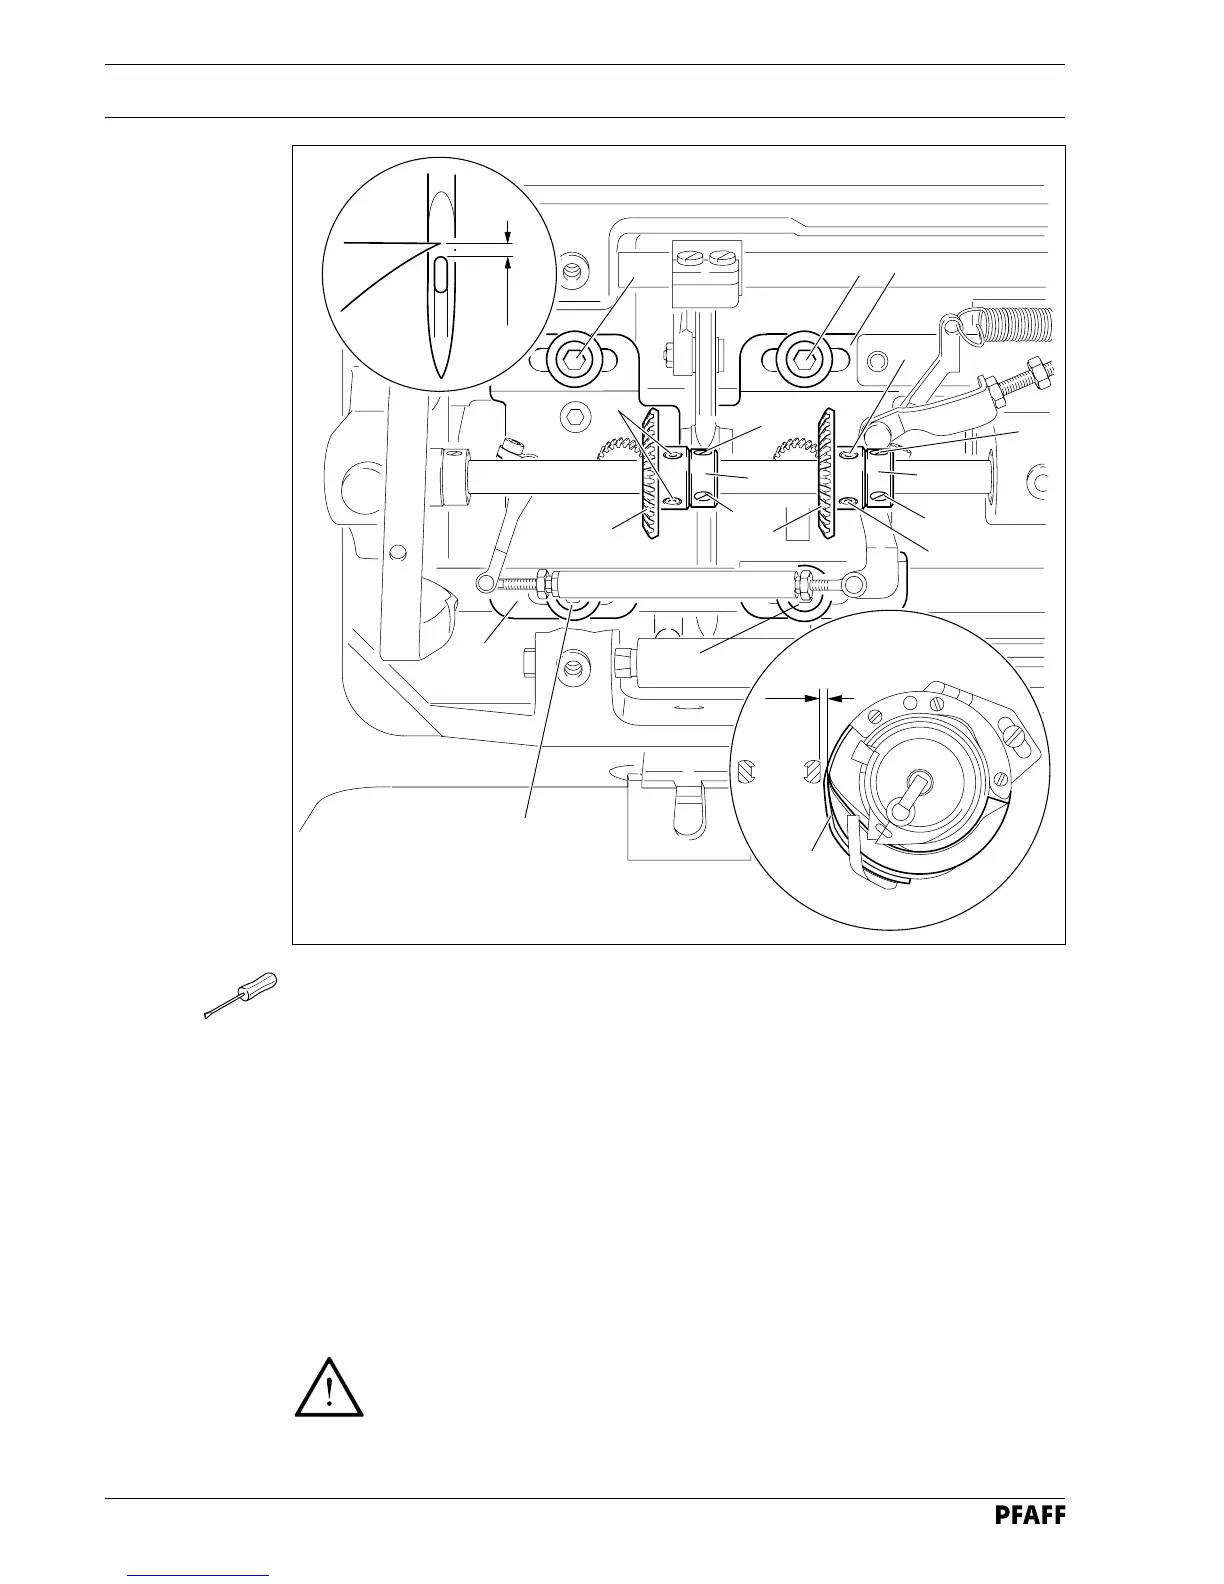
Fig. 11 - 13
0.05 - 0.1 mm
5
0.8 - 1 mm
11
4
3
3
2
2
7
6
7
3
3
2
1
1
4
6
● Position the adjustable clamp against the feeler gauge and screw it tight.
● Remove the feeler gauge and turn the balance wheel in its direction of rotation until the
adjustable clamp is touching the needle bar bearing.
● Move hook bearing 4 in accordance with requirement 1.
● Tighten screws 1.
● Position the hook point at the needle centre, taking care to ensure that the needle is not
deflected by needle guard 5.
● While ensuring that bevel gear 6 is not too close, and that the hook does not have too
much play, tighten screws 2.
● Position retaining collar 7 so that it rests on bevel gear 6 and tighten screws 3.
● Adjust the needle height in accordance with requirement 2.
● Align needle guard 5 in accordance with requirement 3.
If the needle distance is altered, it is absolutely necessary to re-adjust the
linkage to the thread trimmer (see Chapter 11.05.10 Thread trimmer linkage).