Do you have a question about the Pfaff 471 and is the answer not in the manual?
Machine construction according to European regulations and other legal requirements.
Guidelines for safe operation, maintenance, and personnel qualifications.
Explanation of danger and caution symbols used in the manual.
User responsibilities regarding manual availability, reading, and machine operation.
Roles and obligations for operating and specialist personnel.
Identifies specific dangers and required safety measures during operation.
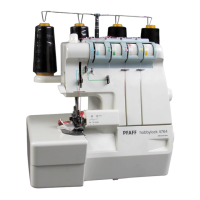
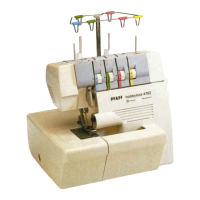
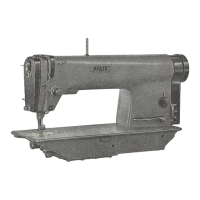
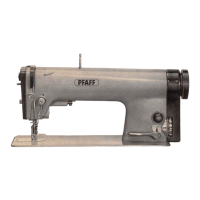
Describes the PFAFF 471, 474, 491 models and their intended use in industries.
Technical specifications including stitch type, dimensions, speed, and noise levels.
Details on recommended needle types and thread strengths for different models.
Lists available models and their associated additional equipment like edge trimmers.
Customer responsibility for machine disposal and handling of lubricant-soiled parts.
Details on how machines are delivered within Germany and for export.
Guidelines for safe transport of machines within customer facilities.
Customer responsibility for the proper disposal of packing materials.
Recommendations for storing the machine to prevent dust, moisture, and corrosion.
Defines symbols used in the manual for notes, cleaning, lubrication, and maintenance.
Operation of the on/off switch and status indication via diode.
Operation of the on/off switch and diode for machines with edge trimmer.
Function of the button on the machine head for reverse sewing.
Description of pedal positions: neutral, sewing, presser lifter, and thread trim.
How to raise the roller presser using a lever.
How to raise the roller presser using the knee lever.
Using a key to set the stitch length via the balance wheel.
Procedure for swinging out the roller presser after raising it.
Operation of the edge trimmer knife drive and edge guide.
Operation of the edge trimmer for models 474 and 491.
Operation of the edge trimmer for model 491.
Requirements for machine installation site and connections.
Procedure for adjusting the table height after packing.
Instructions for fitting the tilt lock for safety.
Procedure for tensioning the v-belt on machines without a mini-stop motor.
Steps for attaching the top v-belt guard.
Steps for attaching the bottom v-belt guard.
Procedure for fitting and adjusting the synchronizer.
Instructions for fitting the reel stand to the machine.
Checks and procedures for commissioning the machine after installation.
Instructions for switching the machine on and off.
Procedure for inserting the needle on models 471 and 491.
Procedure for inserting the needle on model 474.
Steps for winding the bobbin and adjusting primary thread tension.
Instructions for removing and inserting the bobbin case.
Procedure for threading the bobbin case and adjusting its thread tension.
How to thread and adjust needle thread tension on models 471/491.
How to thread and adjust needle thread tension on model 474.
Procedure for setting the stitch length using the balance wheel and scale.
Daily cleaning of the hook and hook compartment.
Daily procedure for oiling the hook and hook race.
Instructions for filling the oil reservoir for thread lubrication.
Annual lubrication procedure for bevel gears.
Checking and adjusting air pressure on the machine.
Procedure for cleaning the air filter and draining the water bowl.
General guidelines and requirements for performing adjustments.
List of necessary tools, gauges, and materials for adjustments.
Definitions of abbreviations like TDC and BDC used in adjustments.
General adjustments for the basic machine setup.
Procedure for adjusting the synchronizer according to specific requirements.
Adjusting needle position for sewing direction on models 471 and 491.
Adjusting needle position for sewing direction on model 474.
Procedure for preliminary adjustment of the needle height at TDC.
Adjusting needle rise, hook clearance, height, and guard on model 471.
Adjusting needle rise, hook clearance, height, and guard on model 474.
Adjusting needle rise, hook clearance, height, and guard on model 491.
Adjusting needle position crosswise on model 471.
Adjusting needle position crosswise on model 474.
Adjusting needle position crosswise on model 491.
Adjusting the height of the bobbin-case opener.
Adjusting the stroke of the bobbin-case opener.
Adjusting the height of the feed wheel on model 471.
Adjusting the height of the feed wheel on model 474.
Adjusting the height of the feed wheel on model 491.
Adjusting the stitch length control eccentric.
Adjusting the stitch length scale disk.
Adjusting the shaft crank for the feed wheel drive.
Adjusting the shaft crank for the roller presser drive.
Setting the clearance between the roller presser and feed wheel.
Adjusting the roller presser for parallel alignment and centering.
Adjusting stitch length based on measurement on the scale.
Synchronizing the roller presser and feed wheel for consistent length.
Adjusting the retainer on model 474 for needle clearance.
Adjusting the knee lever for proper operation and angle.
Adjusting the needle thread tension release mechanism.
Adjusting the thread check spring for correct movement.
Adjusting the bobbin winder for reliable operation and auto-stop.
Adjusting roller presser pressure for smooth material feed.
Procedure for re-engaging the safety coupling after thread jams.
Adjustments for the edge trimmer model -725/04.
Positioning the knife holder parallel to the post on model 471.
Positioning the knife holder on models 474 and 491.
Adjusting the knife stroke range on model 471.
Adjusting the knife stroke range on models 474 and 491.
Adjusting the cutting stroke of the knife on model 471.
Adjusting the cutting stroke of the knife on models 474 and 491.
Adjusting the knife position for proper contact with the needle plate.
Adjustments for the thread trimmer model -726/05 on model 491.
Ensuring the knife is parallel to the needle plate insert.
Setting the knife position to be vertical and lightly touching the needle plate.
Adjusting knife height to match the needle plate edge.
Adjusting the cutting stroke of the thread trimmer.
Adjusting the knife stroke range for the thread trimmer.
Adjustments for the thread trimmer model -900/53.
Procedure for removing the cutter from the thread trimmer.
Adjusting control cams relative to bobbin opener and tripping lever.
Adjusting the radial position of the tripping lever.
Procedure for engaging the solenoid for the thread trimmer.
Adjusting the cutter drive lever for proper clearance and function.
Adjusting control cams using a gauge for bobbin opener and cutter.
Adjusting control cam radial position without a gauge.
Adjusting the control cam for the cutter without a gauge.
Adjusting the cutter control lever relative to the control cam.
Adjusting the cutter return lever for proper function.
Adjusting the cutter return control for correct clearances.
Procedure for fitting the cutter and ensuring minimal play.
Adjusting the eccentric sleeve for flush cutter position.
Adjusting the cutter driving rod for starting position and clearance.
Performing tests to ensure proper cutter function and thread cutting.
Adjusting tension release for machines with specific thread tension control.
Adjustments for the backtacking mechanism -911/..
Ensuring correct needle distance from needle hole edges for backtacking.
Adjusting the coupling for the roller presser drive for correct distance.
Adjusting bevel gears for feed wheel drive on models 471 and 474.
Adjusting bevel gear play on models 471 and 474.
Adjusting bevel gears for feed wheel drive on model 491.
Adjusting bevel gear play on model 491.
Settings for the Quick-Ministop Motor parameters via the operating panel.
| Brand | Pfaff |
|---|---|
| Model | 471 |
| Category | Sewing Machine |
| Language | English |