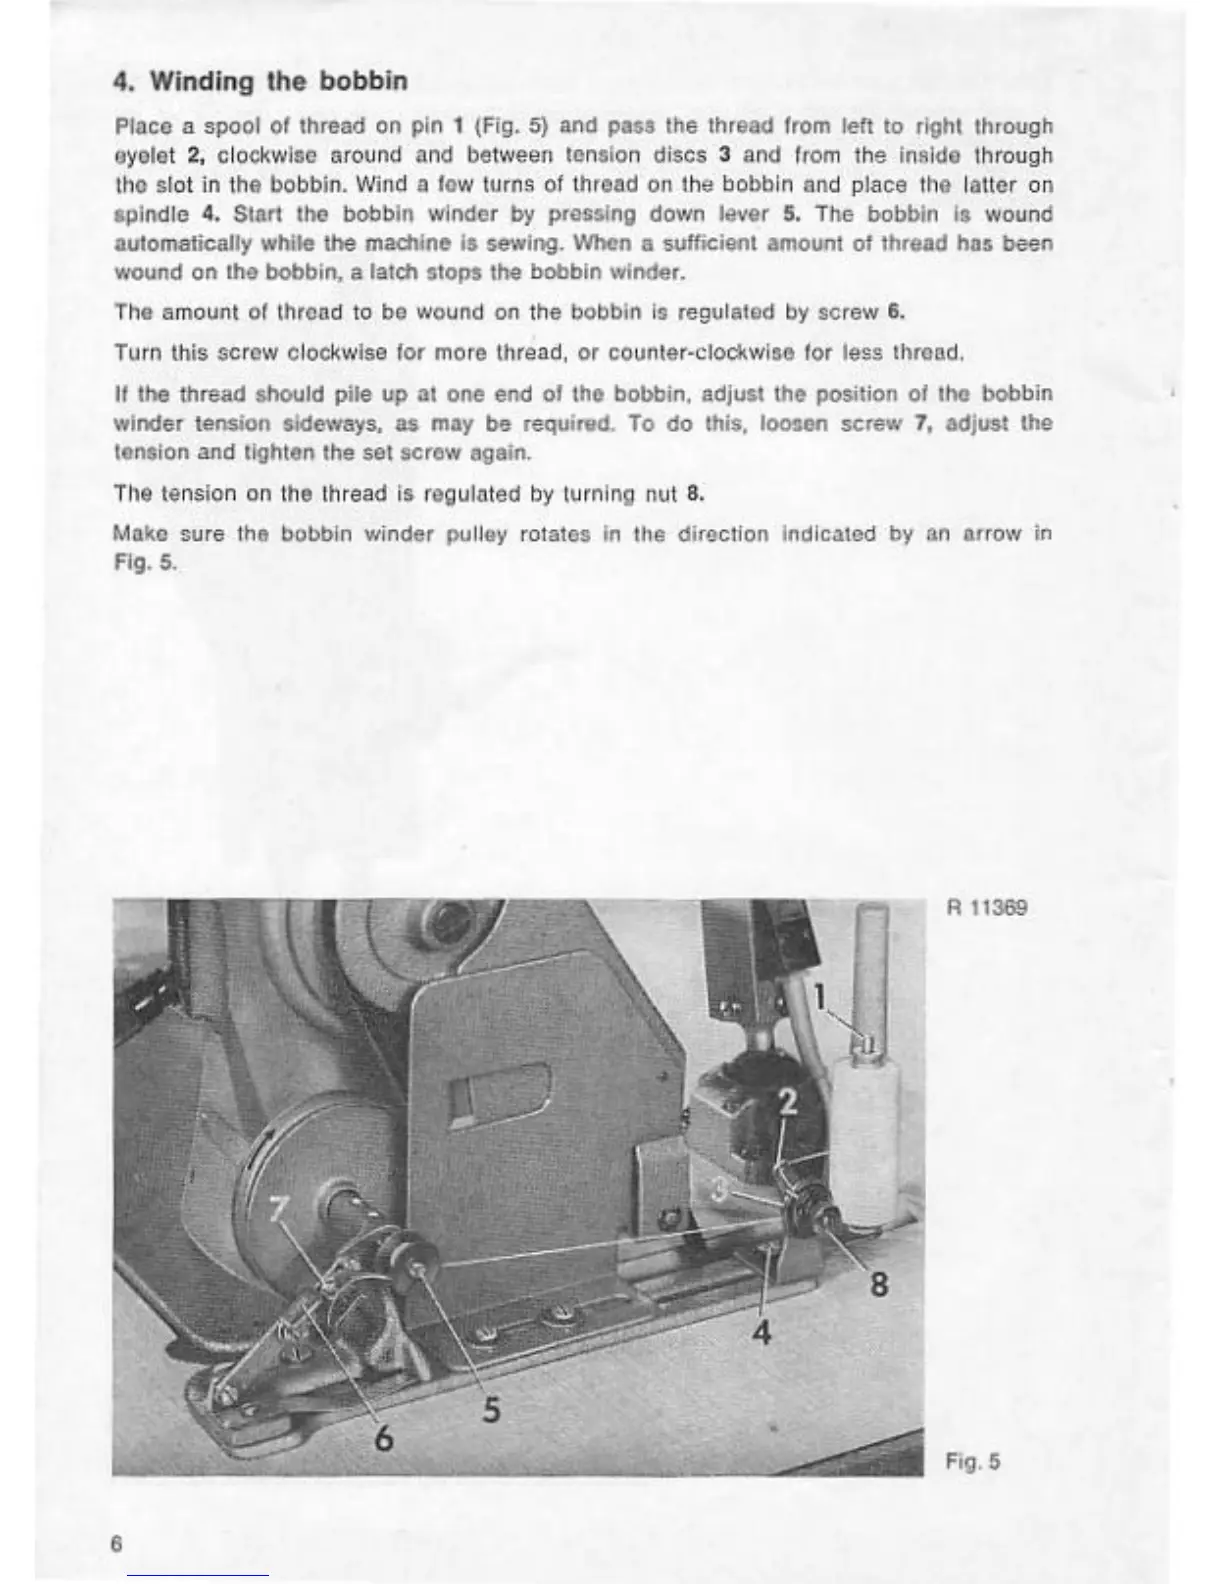
4. Winding
lhe
bobbin
Place a
spo
ol of thread on pin 1 (Fig. 5) and
pasa
the thread from len to right through
o
ye
let 2, cloc
kwi
se
around
and between tension
discs
3 and from the
ins
i
do
through
lho slot in
th
e bobbin.
Win
d a
tow
turns of thread
on
the bo
bb
in and place lho latter on
spindle
4.
Start the bobb
in
winder by pressing down lever 5. T
he
bobbin
is
wound
automatically
while
the
mad'llne
is
sewing.
When
a sufficient
amount
of thread
has
been
wound
on
tho
bobbin,
a
latch
stops
the
bobbin
winder.
Th
e amount of thread
to
be wo
und
on
the bobbin is
re
g\
ll
ated
by
sc
rew 6.
Turn
th
is scr
ew
cl
ockw
is
e for
more
th
read,
or
coun
ter·clo
ckwlse
f
or
t
es
s
th
rea
d.
If
lhe thread should
pile
up
at one end
of
tho bobbin. adjust the position of tho
bo
bb
in
winder
tenSion
sideways,
as
may
be required. To do this, loosen screw 7, adjust the
tonsion
and
tighten
the
set
screw
again.
The tension on lhe thread
is
regulated by turni
ng nu
l
8.
Make sure the bobbin winder
pu
ll
&~
rol
atcs
In
the dire
c1io
n
Jn
dicatod
by
an
o.rr
ow in
Fig. 5.
R 11369
Fig. 5
8