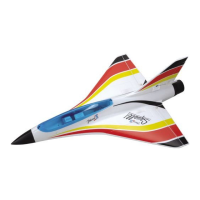
FLYING THE SQUALL
OUR GUARANTEE
Phase 3 Models guarantees this kit to be free from defects in both material and workmanship, at the date of purchase. This
does not cover any component parts damaged by use, misuse or modification. in no case shall Phase 3 Model’s liability
exceed the original cost of the purchased kit.
In that Phase 3 Models has no control over the final assembly or material used for final assembly, no liability shall be
assumed for any damage resulting from the use by the user of the final user-assembled product. By the act of using the final
user-assembled product, the user accepts all resulting liability.
Always turn on the transmitter before connecting the Li-Po battery. Ensure the throttle stick is at
its low position. Connect the Li-Po battery and check that all control surfaces deflect in the correct
direction when the sticks are moved. Ensure the model balances correctly and that the control throws
are correct.
Perform a range check. While the Squall! is very easy to hand launch on your own we recommend
that you ask a friend to help for the first flight so you can concentrate on trimming. Grip the model by
the fuselage under cowl. Test the motor by pushing the throttle fully open then pull it fully back.
If there is any wind, get your helper to turn and face directly into it. Open the throttle and have model
launched from shoulder height with a firm, level push. The model will accelerate quickly. Allow it to
gain speed in straight and level flight.
The Squall! is a high performance jet that yields its best performance when flown smoothly. It is
perfect for high speed beat-ups and large open aerobatics. The Squall! HP on 4 cell packs is in its
element when being wrung out through extreme manoeuvres. With a quality battery, the vertical
performance is limitless as it will have a greater than 1:1 thrust to weight ratio.
After landing, unplug and remove the battery from the model and allow it to cool completely before
recharging it for your next flight.
REPAIRING THE SQUALL
Most damage can be repaired quickly and easily. If the damage is beyond repair, spare parts are
available for purchase. If a foam part is going to break during a crash it will usually break cleanly. To
repair a clean break, follow the procedures below:
• Glue the broken parts together, using a thin layer of 5 minute epoxy or white glue. Hold the parts
together and in alignment until the glue fully cures.
• Apply a strip of clear tape over the seams to strengthen the joint even more.
WARNING It is very important that you use no solvents or Cyanoacrylate (C/A) glue, which can damage
foam. If any of these chemicals comes in contact with the foam parts, the parts will be destroyed. Use
only epoxy or white glue to repair damaged foam parts.
 Loading...