EasyManua.ls Logo

PHI MAESTRO 2 - User Manual

PHI MAESTRO 2
16 pages
Print Icon
To Next Page IconTo Next Page
Loading...
1
Manual Version 1.02 vom 19.09.2022
Question and Answer IconNeed help?

Do you have a question about the PHI MAESTRO 2 and is the answer not in the manual?

Summary

MAESTRO 2 Product Details

Product Overview

The MAESTRO 2 offers maximum performance and passive safety in the High B class.

Technical Description

Details the 78 cells, miniribs, line configuration, and optimized shaping for performance.

Safety and Handling

Discusses high stability in turbulence and responsive, progressive brake control.

Performance and Target Group

Highlights flat polar performance and targets ambitious, trained pilots with an active style.

Pilot Requirements and Preparation

Pilot Requirements

Emphasizes pilot judgment, education, and use of protective equipment for safe flying.

Pre-Flight and Registration

Covers initial checks, dealer inspection, and warranty registration.

Modifications and Harness

Guidelines on paraglider modifications, harness selection, and weight limits.

Flight Operations and Maneuvers

Take-off and Ground Handling

Essential checks for launch, ground handling advice, and start behavior.

Flight and Turning Techniques

Describes straight flight, accelerator use, active flying, and turning.

Landing and Descent Techniques

Guidance on landing, rapid descents, big ears, B-stall, and safety altitudes.

Advanced Maneuvers and Collapses

Details deep spirals, collapses, stalls, spins, and cravate recovery.

Speed System and Risers

Information on speed system mounting, usage, and R07 riser specifics.

Service, Maintenance, and Disposal

General Maintenance Advice

Guidelines on UV radiation, folding, dirt, and line care for longevity.

Storage, Transport, and Cleaning

Recommendations for ideal storage, transport, and cleaning methods.

Repair and Inspection Checks

Details on authorized repairs and recommended inspection intervals.

Warranty and Environmental Care

Instructions for registration, warranty, and environmentally friendly operation.

Technical Data

Overview

The MAESTRO 2 is a high-performance paraglider designed for ambitious and experienced pilots who engage in regular, active flying. It builds upon a long tradition within the High B class, setting new standards in performance and speed. The glider offers maximum performance for a broad target group, characterized by an easy-to-fly, limited aspect ratio and low line drag, which contributes to its exceptional performance at high speeds.

Function Description

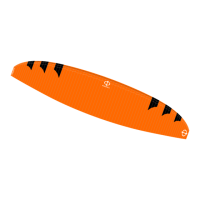
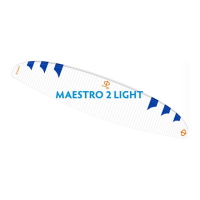
The MAESTRO 2 features 78 cells across its span, with 9 closed cells on each Stabilo, creating a very form-stable and homogeneous wing. The profiles combine high performance with forgiving flight behavior. The line system consists of 4 levels on the sail, leading to 3 or 2 main lines on each side, depending on the A, B, C cascades and size. The outermost A lines are attached to a separate riser for easy "big ears" maneuvers. The suspension system is highly optimized to minimize line resistance, and the speed system is attached to the front A riser. For better distinction, all A-lines on the maillon rapide are covered in red.

The glider is designed to provide very high stability in turbulent air, and if a collapse occurs, the reaction is typical for a B-class wing, with no dynamic movements. Its maneuver ratings of B in EN/LTF tests confirm a large safety margin.

Usage Features

Pilot Requirements: While a B-classification paraglider does not demand exceptionally high pilot skills, self-evident action is crucial. Pilots must have prior experience and have flown in various conditions to safely operate the MAESTRO 2. It is essential for pilots to accurately assess their skills and equipment against expected flying conditions. Continuous education in theory and practice, along with wise decision-making, is vital. Pilots are also responsible for using appropriate protective equipment and ensuring their gear is always functional.

Before the First Flight: Each MAESTRO 2 must undergo a test flight and inspection by a PHI dealer before being delivered to the customer. This initial flight, along with the date and pilot, must be recorded on the glider's type table sheet. To access all service and warranty benefits, pilots must register their paraglider on the PHI homepage under "SERVICE / REGISTRATION."

Start: Before take-off, pilots must ensure all equipment (wing, harness, rescue system) is in good condition and within the legal weight range. Essential pre-flight checks include:

  1. Strapped in: Leg and chest straps closed, helmet chin strap fastened.
  2. Hooked in correctly: Risers untwisted, hooked into carabiners, accelerator connected, carabiners locked.
  3. Lines: A-line above, all lines sorted, brake line running freely to the pulley.
  4. Canopy: Canopy prepared in a bow with open leading edges.
  5. Wind and Airspace: Wind direction from the front, clear airspace. The pilot must visually confirm the wing is fully open overhead, with no knots in the lines. Any faults require an immediate stop to the launch for safety reasons. The MAESTRO 2 offers simple forward and reverse launch behavior, rising steadily without strong forward shooting, making it forgiving and suitable for standard launch techniques. Regular practice on a training hill or through ground handling is recommended.

Straight Flight: The MAESTRO 2 achieves its best glide performance at trim speed with fully released brakes in calm air. In headwinds or sinking air, maximum glide is achieved by using the accelerator. In turbulent air, dynamic reactions to collapses in accelerated flight should be considered, necessitating a greater safety altitude. The accelerator should never be pushed with insufficient safety altitude. In strong turbulence, a light, symmetrical brake input is recommended to enhance stability and provide feedback for active flying. Active flying involves constant control and correction of the angle of attack and airspeed in turbulent conditions, which can prevent most collapses.

Flying Turns: Turns are an interplay of inner brake, outer brake, and weight shifting. The MAESTRO 2 features sensitive handling, requiring small brake inputs for precise turns. It excels in modern, dynamic thermal flight, efficiently "carving" around turns and climbing dynamically. Tight, controlled, and swing-free curve changes are skills to be practiced. If brake lines become uncontrollable (e.g., due to a faulty start check), the MAESTRO 2 can be controlled to a limited extent via the C-risers, allowing for directional corrections and safe landings. C-risers should only be pulled down slightly to avoid a stall.

Rapid Descents: All rapid descent maneuvers should be practiced in calm air with sufficient safety height, ideally as part of a safety training course under teacher guidance. Before initiating maneuvers, pilots must ensure the airspace below and around is clear and constantly monitor altitude.

  • Big Ears: This maneuver is highly effective and easy to perform. Initiate by symmetrically pulling down the outer A-risers (red/orange) at the top of the shackle, keeping brake handles in hand. Holding the risers down increases the sink rate. If wingtips don't fold completely, repeat the initiation with a faster or more impulsive pull. Accelerating the wing additionally increases the sink rate and forward speed, compensating for the increased angle of attack. To release, simply release the outer A-risers; the MAESTRO 2 will recover independently. If ears don't refill, a short, limited brake input can help.
  • B-Stall: Initiated by symmetrically pulling down the B-risers about 20cm, with relatively high initial forces that decrease as more is pulled. Grabbing risers at the top of the shackles is recommended for maximum effect. The wing immediately loses forward speed and enters a stable stall, with the pilot shifting slightly in front. Further pulling increases sink rates up to 9m/s. If pulled too far, the glider may rotate slowly. Recovery involves quickly moving hands upwards, ensuring brakes are fully released. The big ears maneuver increases drag and angle of attack, so using the accelerator is strongly recommended to avoid a stall.

Collapse:

  • Asymmetric Collapse: Occurs in strong turbulence when one side loses lift. Small collapses have minimal reaction, but larger collapses (over 50% span) result in dynamic reactions. The glider will turn towards the collapsed side and pitch forward due to reduced wing surface. Pilots can prevent pitching and turning by applying brake on the non-collapsed side.
  • Frontal Collapse: A consequence of turbulence where the entire leading edge folds down. The MAESTRO 2 automatically reopens from frontal and side collapses. A slight double-sided braking can speed up reopening.

Stall Maneuvers:

  • Spin: A negative rotation where airflow detaches on one wing half, causing the canopy to turn around its vertical axis. Caused by pulling a brake line too far/fast or slowing one side too much. Immediate correction (releasing the pulled brake) returns the MAESTRO 2 to normal flight without significant altitude loss. After a prolonged negative turn, the paraglider may shoot on one side, potentially leading to an impulsive collapse or cravate.
  • Fullstall: A complex maneuver requiring expert supervision, ideally during safety training. Brake travel to the stall point varies with wing size and air conditions.
  • Parachutal Stall: A flight condition with no forward speed and a significantly higher sink rate, initiated by strong symmetrical braking. The MAESTRO 2 exits automatically by fully releasing brakes. A heavily used wing, porous cloth, or incorrect trim can lead to a stable parachutal stall. Wet gliders or flying in rain/cold air also increase this tendency. To exit a stable parachutal stall, release brake inputs and push A-risers forward or pull them down, or push the accelerator. After a slight pendulum, the glider returns to normal flight. Close to the ground, pilots must decide if there's enough altitude for a pendulum or if a hard landing is imminent. Additional brake input during a parachutal stall may result in a fullstall.

Cravates: A situation where part of the wing is tangled in the lines after a collapse or badly executed full stall. While rare with the MAESTRO 2, recommended actions include:

  1. Counter steer: To prevent a stable deep spiral.
  2. Impulse braking: Applying brake with an impulse movement on the cravate side while keeping the wing straight with the other brake.
  3. Pulling the stabilo line: Strongly pulling the orange line on the B-riser.
  4. Induce a collapse: On the side with the cravate.
  5. Full stall: Only for pilots with solid experience.
  6. Reserve: If control is lost or height is insufficient for recovery attempts, deploy the reserve immediately.

Winch Launch: The MAESTRO 2 is easy to launch on a winch, starting with a flat angle climb. Using a towing adapter connected to the main carabiner and tow release is recommended.

Speed System:

  • Mounting: Most harnesses have two pulleys (or simple rings for light harnesses). The two accelerator cables are guided through the pulleys/rings and fixed to the speed bar. Correct length adjustment is crucial; too short leads to constant acceleration, too long prevents full travel. Slightly longer initial setting is recommended to estimate free travel, then shorten if needed.
  • Using in Flight: Before take-off, connect the speed system rope to the risers using "brummel hooks" or the ball/loop system. Pushing the speed bar reduces the angle of attack, increasing airspeed by 15-17km/h. Useful for penetrating headwinds or covering distance during XC flights. Braking during accelerated flight reduces gliding performance and increases instability, potentially leading to collapses. Always release the speed bar before pulling brakes. Asymmetrical speed bar input or weight shift can be used for turns.

Flying with R07 Riser (C handle): The MAESTRO 2 can be optionally equipped with the R07 riser, offering an ergonomically optimized C handle. This setup allows effortless changes in the angle of attack in any flight position. The riser is spartan, clearly designed, and uses high-quality ball bearing rollers for easy operation. The central Edelrid 8001U-800 line can be replaced by a competent person or dealer. Pulling the C handle too far will stall the wing; it is not a substitute for the brake line and is primarily for adapting accelerator travel or correcting direction when accelerated.

Maintenance Features

General Advice: Proper and careful handling ensures the paraglider remains in perfect technical condition for years.

  • Avoid unnecessary UV radiation (e.g., leaving it unpacked at the landing site).
  • When folding, do not bend polyamide rods at the leading edge more than necessary.
  • If packed wet or damp, dry it later; never leave it packed wet.
  • During ground handling, avoid crashing the glider hard on the ground with the leading edge to prevent damage.
  • Avoid unnecessary dirt or sharp stones touching lines and cloth. Do not step on lines on stony surfaces.
  • Humidity combined with dirt can cause lines to shrink, affecting trim. Salt water (sweat) can damage lines over time.

Storage: Ideal storage is light-protected and dry. Avoid permanent storage at very high temperatures (e.g., in a car during summer). For longer storage, the paraglider should not be compressed.

Transport: The paraglider can be compressed tightly for transport. Nylon monofilaments for nose stiffening are highly insensitive to permanent deformation. A compression bag can be used for very small pack volumes. Ensure the paraglider is dry to minimize weight, as nylon cloth absorbs water. During transport (e.g., motorcycle), ensure fittings (line locks) do not touch the sail cloth (use riser bags).

Cleaning: Only use water and a cleaning cloth. Never use solvents. Remove sand, dirt, or small stones from the canopy, as they can damage the coating and seams.

Repair: Repairs should only be carried out by the manufacturer or authorized companies. For questions, contact PHI directly. Exceptions include replacing lines and repairing small tears (up to 5 cm, not affecting seams) or holes in the cloth, which can be fixed with the original PHI repair set (a small set of sticking cloth is supplied with the wing).

Check: The general check interval is two years, unless the checker specifies a shorter interval for heavily used wings. Commercially used equipment (school gliders, tandems) must be checked annually. This is also recommended for gliders under heavy load (e.g., over 150 flight hours in two years) or with regular acro maneuvers. An annual check is advised for frequent flying in terrain that strains the material (rocky areas, salty air, or after salt water contact). Regular checks for damage are even more crucial in these cases. Each check must be confirmed by a check-stamp; non-compliance voids the quality seal. Further information on maintenance checks is available on the PHI homepage.

Environment-Friendly Behavior: Operate the sport in a nature and landscape-friendly manner. Do not leave garbage and avoid scaring animals by flying too close, especially in cold seasons when stress can be life-threatening for them.

Disposal: The plastic materials used in the paraglider require proper disposal. Return your used wing to PHI for disassembly and disposal.

PHI MAESTRO 2 Specifications

General IconGeneral
EngineRotax 912 ULS
ManufacturerPHI Aviation
ModelMAESTRO 2
Crew1
Passenger Capacity1
Power100 hp
Cruise speed220 km/h
Engine TypePiston
Range1, 000 km

Related product manuals