`
four: handling
handle
1.
Push hood forward to access top
of frame.
2. At top of seat push down fabric to
expose top of frame. Remove plastic
covers (this is for packing purposes
only).
3. Take top handle
and p
ush in silver
buttons on either side of handle
‘a’.
4.
Line up handle with holes at top of frame.
5. Push handle in until you hear a clear
‘click’. Ensure buttons pop through
frame on both sides. Test drive buggy
with handle in this position.
If you’re not happy with lower handle
setting adjust to higher setting:
6
.
Push in silver buttons poking through
on sides of top frame and pull handle
to remove.
S
afety Wrist Strap
- Your buggy can be free wheeling
without the brakes so the safety wrist strap should be
worn at all times when pushing the buggy. Just loop it
round your wrist.
`
a
‘a’
push
in
a
7
6
brakes
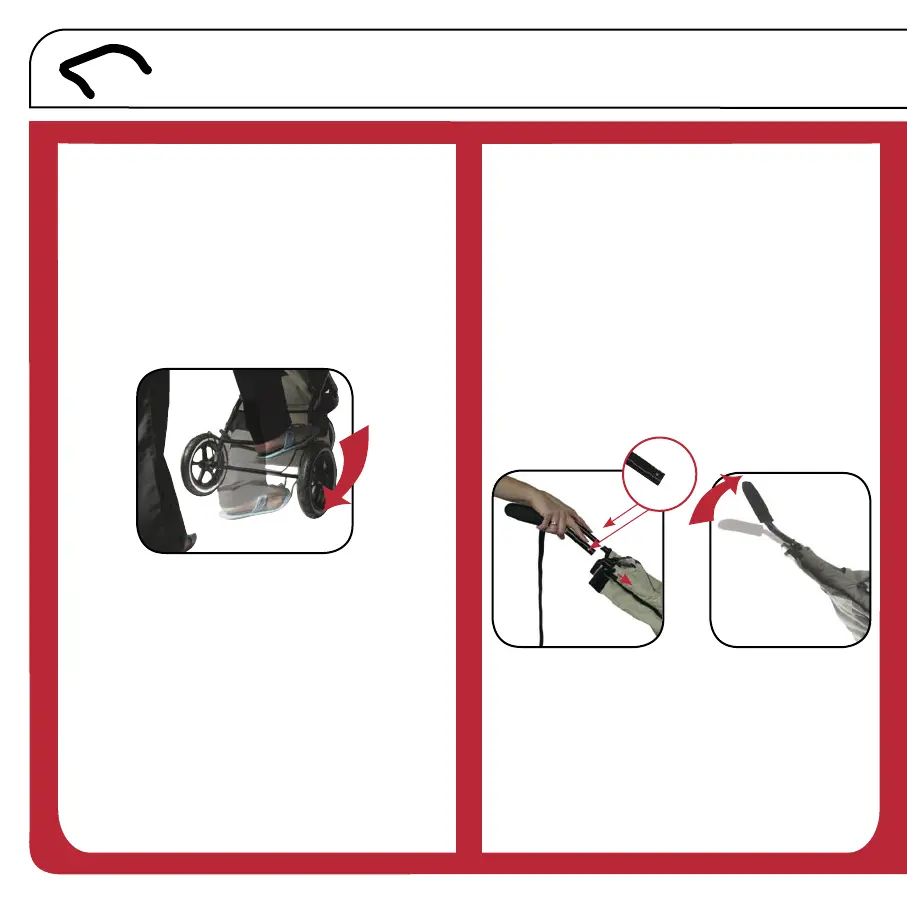
Now you’re up and running don’t let buggy
get away on you - use brakes.
1. Stand behind buggy and push brake
lever down with foot. This will put
brakes on.
Push up to take brakes off.
Always apply brakes when parking your buggy.
Brakes will be off when you unpack your buggy.
Apply brakes before loading
children.
on
7.
Turn handle over
and
push in silver
buttons and re-insert into top of frame.
Ensure buttons pop through frame on
both sides.
 Loading...