Next, highlight Settings.2.
Then, click on Control Panel.3.
Now, click on Add/Remove Programs 4.
Finally, select LightFrame from the list and then click on the Add/Remove button. 5.
Operating LightFrame™
After installation, LightFrame™ starts up automatically whenever the computer is started. At system start up,
LightFrame™ checks the selected resolution of the monitor and if the monitor is LightFrame™ capable.
Icon and Colors
An icon of a monitor represents LightFrame™ on your desktop. This icon appears as a shortcut on the Windows
desktop. LightFrame™ has three (3) modes of operation: Active, Inactive, and Suspended. The same icon with a
different color in its center represents each mode.
Active = LightFrame™ icon has bright green center.
Inactive = The icon has a gray center.
Suspended = The icon has a yellow center with a red cross.
Notes
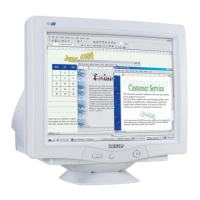
An active window must be 100% visible, i.e. it must be on top of all other windows or areas. If any part of another
window or area overlaps a highlighted window, LightFrame™ automatically suspends operation. That means the icon
goes from a green center to a yellow on with a red cross and the feature ceases. Once that window or area is removed
and the original highlighted window is on top again, LightFrame™ automatically re-engages and the icon regains its
bright green center.
An active window must also be 100% on the monitor 's viewing area. If part of a highlighted window moves off the
monitor 's viewing area, LightFrame™ automatically goes into the Suspended mode. If part of a window is off the
viewing area, you will not be able to use LightFrame™ on that window.
Only one window or area at a time can be highlighted.
How To Activate LightFrame™
Click on the LightFrame™ icon in the systemtray (the area to the far right in the taskbar). . The icon will turn
from gray to a green center.
1.
Guide the mouse to the window you want displayed. As you move the mouse, the cursor changes to a small
arrow with a light bulb.
2.
3a) Click on the window you want to have highlighted. The brightness and sharpness are automatically
adjusted.
3b) If you want to highlight only an area of a window, click on the left mouse button and drag the cursor over
the area to be highlighted while holding the mouse button. A rectangle forms around the area. When the area is
encompassed by the rectangle, release the mouse button and the area becomes highlighted.
3.
How to Deactivate LightFrame™
To deactivate, click on the LightFrame™ icon in the System Tray of the Taskbar. The light in the middle of the icon
turns gray and LightFrame™ is deactivated.
Note
If a highlighted window is closed before LightFrame™ is deactivated, LightFrame™ is automatically deactivated.
file:///C|/rita wu/gs3LF/ENGLISH/107S/product/product.htm (3 of 7) [10/12/2000 1:45:12 AM]