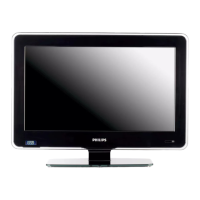
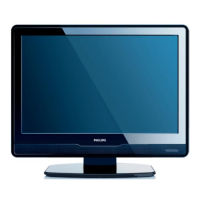
Do you have a question about the Philips 26HFL5870D/10 and is the answer not in the manual?
Information regarding product warranty, safety precautions, and user responsibilities.
Explains normal pixel variations on LCD screens as a structural property.
Details Philips' offer for open source software code upon request.
Philips' commitment to EMF standards and product safety.
Instructions for replacing the mains fuse in the TV plug, specific to UK models.
Legal information regarding trademarks and intellectual property.
Crucial safety instructions for using the TV, including electrical shock and handling precautions.
Guidelines for cleaning and maintaining the TV screen to prevent damage.
Instructions for the responsible disposal of the product and batteries according to regulations.
Identifies and explains the function of physical buttons on the TV's side.
Overview of the Guest Menu, its purpose, and how it's accessed.
Step-by-step guide to access the Guest Menu using the PBS setup remote control.
Step-by-step guide to access the Guest Menu using the guest remote control.
Instructions to navigate and use the setup menu with the PBS setup remote control.
Instructions to navigate and use the setup menu with the guest remote control.
Explains how to navigate through the setup menu options using remote control buttons.
Guide on how to change the on-screen display language for the TV.
Instructions on selecting the country for TV installation and regional settings.
How to configure the communication protocol for external system interaction.
Procedure to set the number of channels for TV, PayTV, Info, and Radio.
Refers to detailed sections for automatic channel installation and configuration.
Indicates where to find information on cloning, upgrading, and healthcare features.
Steps to set the TV's clock, including display options and time download.
How to set default TV behavior upon power-on, like welcome messages and channels.
Instructions for setting a custom welcome message displayed when the TV turns on.
How to specify the default channel that appears when the TV is powered on.
Setting the default volume level for when the TV is switched on.
Choosing the default picture aspect ratio displayed upon TV startup.
Configuring the TV's power state upon startup after a period of inactivity.
Option to show or hide the on-screen volume indicator.
How to configure whether channel numbers, names, or both are displayed.
Controls the visibility of the channel information banner at the top of the screen.
Setting the default language preferences for audio and subtitles.
Option to enable or disable the display of TV theme icons.
Adjusting visual parameters like brightness, color, contrast, and sharpness.
Fine-tuning audio parameters such as equalizer, balance, min/max volume, and AVL.
Setting up security features like keyboard lock, remote control lock, and parental controls.
Managing the TV's physical buttons, allowing them to be locked or unlocked.
Controlling the functionality of the remote control, enabling or disabling its features.
Managing audio/video output signals for recording purposes.
Setting various control features like audio mute, channel scrambling, and step tuning.
Configuring how the TV responds to SCART signal detection and source switching.
Managing RGB insertion capabilities for different input sources.
Adjusting power consumption settings for standby and active use.
First step in manual installation, involving selecting a program type (TV, PayTV, etc.).
Second step in manual installation, specifying the input source (e.g., Tuner).
Third step in manual installation, choosing the TV system (e.g., UK).
Fourth step in manual installation, selecting or searching for a specific channel frequency.
Advanced channel customization, including labeling, fine-tuning, and protection.
How to assign a custom name (up to nine characters) to a selected channel.
Options to mute audio, video, or both for a specific channel.
Final step in manual installation, allowing selection of channel groups or 'rings'.
Copying TV configuration data to/from a USB device for easy setup.
Obtaining software updates or TV settings from a USB device or RF channel.
Identifies and describes the various connectors located on the back of the TV.
Details the purpose and location of connectors found on the side of the TV.
Instructions for inserting and activating a CAM for digital TV channel access.
Guidance on using a Kensington lock for physical security of the TV.
Lists supported resolutions and refresh rates for computer and video inputs.
Information on supported multimedia formats and storage devices (USB, MP3, JPEG).
Details about the TV's tuner, antenna input, and supported TV systems.
Electrical specifications including mains power, standby power, and ambient temperature.
Solutions for problems related to the TV not powering on or responding.
Troubleshooting steps for accessing the PBS setup menu, especially with guest remote control.
Guidance for resolving issues related to no picture or poor picture quality.
Solutions for problems where the TV has picture but no sound.
Troubleshooting steps for when the TV cannot communicate with external devices.
Solutions for issues encountered with the guest remote control not functioning correctly.
Addresses specific display issues like the 'F' character indicating factory mode.
Information on how to get further support if problems persist, including FAQs.
| Screen Size | 26 inches |
|---|---|
| Display diagonal | 66 cm |
| Resolution | 1366 x 768 pixels |
| Display Technology | LCD |
| Screen Shape | Flat |
| Aspect Ratio | 16:9 |
| Contrast Ratio (typical) | 1000:1 |
| Response Time | 8 ms |
| Comb Filter | 3D |
| Digital Signal Format System | DVB-T/C |
| RMS Rated Power | 10 W |
| Number of Speakers | 2 |
| HDMI Ports | 2 |
| USB Ports | 1 |
| USB 2.0 Ports Quantity | 1 |
| Component Video (YPbPr/YCbCr) in | 1 |
| SCART Ports Quantity | 1 |
| Common Interface (CI) | Yes |
| Common Interface Plus (CI+) | Yes |
| Electronic Programme Guide (EPG) | Yes |
| Teletext | Yes |
| VESA Mounting | Yes |
| VESA Mounting Interfaces | 100 x 100 mm |
| Product Colour | Black |
| Power Consumption (standby) | 0.5 W |
| Refresh Rate | 60 Hz |
| Built-in Wi-Fi | No |
| Smart TV | No |
| Viewing Angle, Horizontal | 178 degrees |
| Viewing Angle, Vertical | 178 degrees |
